这篇文章主要介绍了vue利用axios来完成数据的交互,本文通过实例代码给大家讲解数据交互方法及安装方法,需要的朋友可以参考下
axios基于 Promise 的 HTTP 请求客户端,可同时在浏览器和 node.js 中使用
现在Vue官方推荐的网络通信库不再是vue-resource了,推荐使用axios。所以学习了下,总结如下。
一、功能特性
1、在浏览器中发送 XMLHttpRequests 请求
2、在 node.js 中发送 http请求
3、支持 Promise API
4、拦截请求和响应
5、转换请求和响应数据
6、自动转换 JSON 数据
7、客户端支持保护安全免受 XSRF 攻击
二、axios的安装方法(官方给了3种方法)
1、npm安装
$ npm install axios
2、bower安装
$ bower install axios
3、直接使用cdn
<script src="https://unpkg.com/axios/dist/axios.min.js"></script>
三、安装步骤
这里我使用npm的方法步骤:
①首先在npm中输入npm install axios
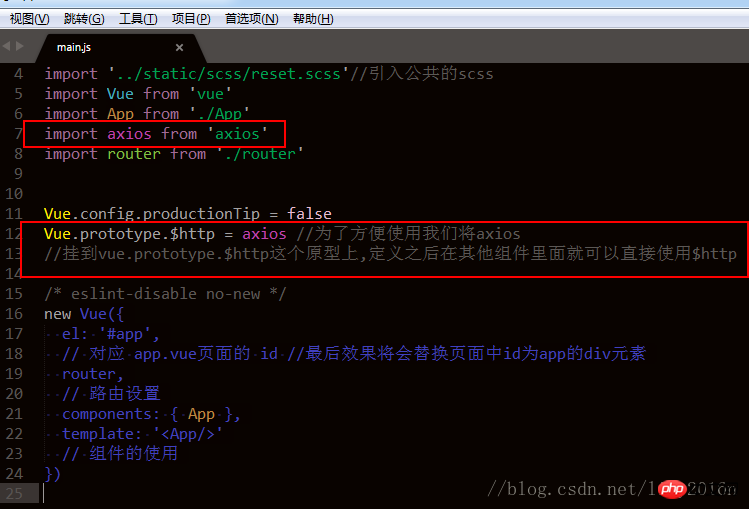
②在main.js加上配置
import axios from ‘axios'
Vue.prototype.$http = axios

四、请求实例
点击获取数据可以取到想要的数据
<template>
<p class="tabbar">
<p>首页</p>
<button v-on:click = 'goback'>获取数据</button>
<p class="new_wrap" v-for="items in item">
<p class="newcard">
<p>
<p>{{items.issuer_nickname}}.</p>
</p>
<p>
{{items.title}}
</p>
<p class="pic">
<img :src="items.cover">
</p>
</p>
<br>
</p>
</p>
</template>
<script>
export default {
name: 'tabbar',
data () {
return {
msg: 'Welcome to Your Vue.js App',
item: []
}
},
methods:{
goback:function(){
console.log('hah');
this.$http.get('url') //把url地址换成你的接口地址即可
.then(res => {
//this.request.response = res.data
this.item = res.data.data.item; //把取item的数据赋给 item: []中
console.log(res.data.data.item);
if (res.data.code == '0') {
console.log('haha');
}else{
alert('数据不存在');
}
})
.catch(err => {
alert('请求失败');
})
}
}
}
</script>
<!-- Add "scoped" attribute to limit CSS to this component only -->
<style scoped lang="scss">
*{margin: 0;padding: 0;}
@function torem($px){//$px为需要转换的字号
@return $px / 100px * 1rem; //100px为根字体大小
}
ul{
width: 100%;
position: absolute;
bottom: 0;
li{
width: torem(187.5px);
float:left;
height: torem(98px);
text-align:center;
background: #ccc;
}
}
img{
width: torem(200px);
height: torem(200px);
}
</style>效果图:

上面是我整理给大家的,希望今后会对大家有帮助。
相关文章:
Atas ialah kandungan terperinci vue利用axios来完成数据的交互. Untuk maklumat lanjut, sila ikut artikel berkaitan lain di laman web China PHP!
 Bagaimana untuk mengikat data dalam senarai lungsur
 Bagaimana untuk menyelesaikan ralat pengecam mysql yang tidak sah
 Bagaimana untuk mencari pembahagi sepunya terbesar dalam bahasa C
 Apakah yang dimaksudkan dengan kacang dalam java?
 Cara menyemak plagiarisme pada CNKI Langkah terperinci untuk menyemak plagiarisme pada CNKI
 vlookup sepadan dengan dua lajur data
 Apa itu Avalanche
 Koleksi kod imej HTML


