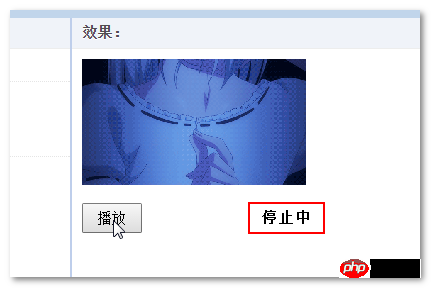
这篇文章主要介绍了使用JS和canvas实现gif动图的停止和播放代码,非常具有实用价值,需要的朋友可以参考下
HTML5 canvas可以读取图片信息,绘制当前图片。于是可以实现图片马赛克,模糊,色值过滤等很多图片特效。我们这里不用那么复杂,只要读取我们的图片,重绘下就可以。

HTML代码:
<img id="testImg" src="xxx.gif" width="224" height="126">
<p><input type="button" id="testBtn" value="停止"></p>
JS代码:
if ('getContext' in document.createElement('canvas')) {
 HTMLImageElement.prototype.play = function() {
  if (this.storeCanvas) {
   // 移除存储的canvas
   this.storeCanvas.parentElement.removeChild(this.storeCanvas);
   this.storeCanvas = null;
   // 透明度还原
   image.style.opacity = '';
  }
  if (this.storeUrl) {
   this.src = this.storeUrl;
  }
 };
 HTMLImageElement.prototype.stop = function() {
  var canvas = document.createElement('canvas');
  // 尺寸
  var width = this.width, height = this.height;
  if (width && height) {
   // 存储之前的地址
   if (!this.storeUrl) {
    this.storeUrl = this.src;
   }
   // canvas大小
   canvas.width = width;
   canvas.height = height;
   // 绘制图片帧(第一帧)
   canvas.getContext('2d').drawImage(this, 0, 0, width, height);
   // 重置当前图片
   try {
    this.src = canvas.toDataURL("image/gif");
   } catch(e) {
    // 跨域
    this.removeAttribute('src');
    // 载入canvas元素
    canvas.style.position = 'absolute';
    // 前面插入图片
    this.parentElement.insertBefore(canvas, this);
    // 隐藏原图
    this.style.opacity = '0';
    // 存储canvas
    this.storeCanvas = canvas;
   }
  }
 };
}

var image = document.getElementById("testImg"),
 button = document.getElementById("testBtn");

if (image && button) {
 button.onclick = function() {
  if (this.value == '停止') {
   image.stop();
   this.value = '播放';
  } else {
   image.play();
   this.value = '停止';
  }
 };
}上面代码并未详尽测试,以及可能的体验问题(IE闪动)没有具体处理(影响原理示意),若要实际使用,需要自己再微调完美下。
不足:
1. IE9+支持。IE7/IE8不支持canvas没搞头。
2. 只能停止gif,不能真正意义的暂停。因为canvas获得的gif图片信息为第一帧的信息,后面的貌似获取不到。要想实现暂停,而不是停止,还需要进一步研究,如果你有方法,非常欢迎分享。
Atas ialah kandungan terperinci 详解如何使用JS和canvas实现gif动图的停止和播放. Untuk maklumat lanjut, sila ikut artikel berkaitan lain di laman web China PHP!


