一、基础环境配置
<span style="box-sizing: border-box; -webkit-tap-highlight-color: rgba(0, 0, 0, 0); color: #333333;">npm install </span><span style="box-sizing: border-box; -webkit-tap-highlight-color: rgba(0, 0, 0, 0); color: #333333;">-</span><span style="box-sizing: border-box; -webkit-tap-highlight-color: rgba(0, 0, 0, 0); color: #333333;">g cnpm </span><span style="box-sizing: border-box; -webkit-tap-highlight-color: rgba(0, 0, 0, 0); color: #333333;">--</span><span style="box-sizing: border-box; -webkit-tap-highlight-color: rgba(0, 0, 0, 0); color: #333333;">registry</span><span style="box-sizing: border-box; -webkit-tap-highlight-color: rgba(0, 0, 0, 0); color: #333333;">=</span><span style="box-sizing: border-box; -webkit-tap-highlight-color: rgba(0, 0, 0, 0); color: #333333;">https</span><span style="box-sizing: border-box; -webkit-tap-highlight-color: rgba(0, 0, 0, 0); color: #333333;">://</span><span style="box-sizing: border-box; -webkit-tap-highlight-color: rgba(0, 0, 0, 0); color: #333333;">registry</span><span style="box-sizing: border-box; -webkit-tap-highlight-color: rgba(0, 0, 0, 0); color: #333333;">.</span><span style="box-sizing: border-box; -webkit-tap-highlight-color: rgba(0, 0, 0, 0); color: #333333;">npm</span><span style="box-sizing: border-box; -webkit-tap-highlight-color: rgba(0, 0, 0, 0); color: #333333;">.</span><span style="box-sizing: border-box; -webkit-tap-highlight-color: rgba(0, 0, 0, 0); color: #333333;">taobao</span><span style="box-sizing: border-box; -webkit-tap-highlight-color: rgba(0, 0, 0, 0); color: #333333;">.</span><span style="box-sizing: border-box; -webkit-tap-highlight-color: rgba(0, 0, 0, 0); color: #333333;">org</span>
二、 配置.Net Core项目
搭建.Net Core项目时,采用Api模板构建一个空的解决方案,并在此基础上启用静态文件支持,详细配置如下:
1 using System; 2 using System.Collections.Generic; 3 using System.Linq; 4 using System.Threading.Tasks; 5 using Microsoft.AspNetCore.Builder; 6 using Microsoft.AspNetCore.Hosting; 7 using Microsoft.Extensions.Configuration; 8 using Microsoft.Extensions.DependencyInjection; 9 using Microsoft.Extensions.Logging;10 11 namespace App.Integration12 {13 public class Startup14 {15 public Startup(IHostingEnvironment env)16 {17 var builder = new ConfigurationBuilder()18 .SetBasePath(env.ContentRootPath)19 .AddJsonFile("appsettings.json", optional: false, reloadOnChange: true)20 .AddJsonFile($"appsettings.{env.EnvironmentName}.json", optional: true)21 .AddEnvironmentVariables();22 Configuration = builder.Build();23 }24 25 public IConfigurationRoot Configuration { get; }26 27 // This method gets called by the runtime. Use this method to add services to the container.28 public void ConfigureServices(IServiceCollection services)29 {30 // Add framework services.31 //services.AddMvc();32 }33 34 // This method gets called by the runtime. Use this method to configure the HTTP request pipeline.35 public void Configure(IApplicationBuilder app, IHostingEnvironment env, ILoggerFactory loggerFactory)36 {37 loggerFactory.AddConsole(Configuration.GetSection("Logging"));38 loggerFactory.AddDebug();39 40 //app.UseMvc();41 app.UseDefaultFiles();42 app.UseStaticFiles();43 }44 }45 }静态文件需要安装名为Microsoft.AspNetCore.StaticFiles的nuget包,请自行从包管理中安装。
三、配置Angular Cli调试环境
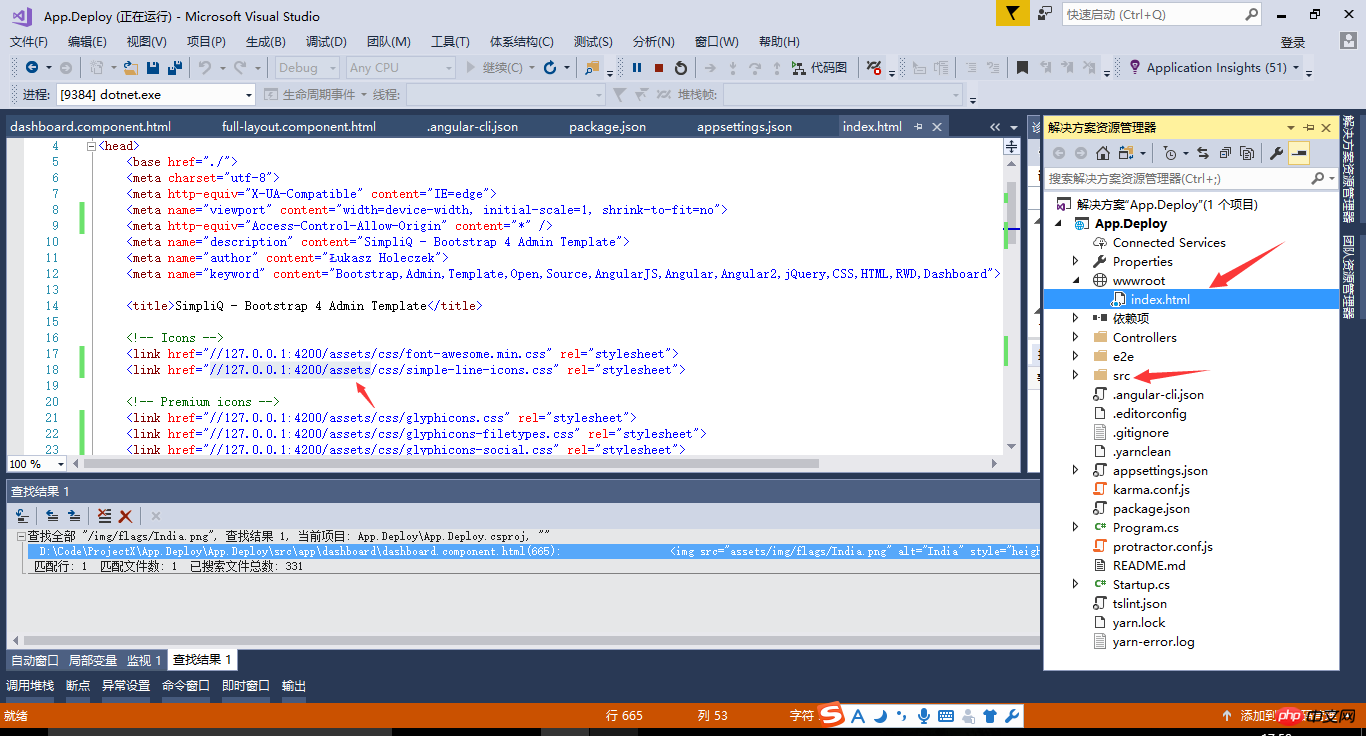
在开始项目调试之前,我们需将angular资源中的index.html移入wwwroot中,需注意,此index.html文件需是由ng build命令生成的版本,一般存储在/dist目录中
在编译angular资源前,我们需要在angular cli设置中,将DeployUrl选项设置为ng server的默认调试地址:
"deployUrl": "//127.0.0.1:4200", // 指定站点的部署地址,该值最终会赋给webpack的output.publicPath,注意,ng serve启动调试时并不会调研此参数

以下为Angular Cli的各个配置项说明。
{
  "project": {
    "name": "angular-questionare",
    "ejected": false // 标记该应用是否已经执行过eject命令把webpack配置释放出来
  },
  "apps": [
    {
      "root": "src", // 源码根目录
      "outDir": "dist", // 编译后的输出目录,默认是dist/
      "assets": [ // 记录资源文件夹,构建时复制到`outDir`指定的目录
        "assets",
        "favicon.ico"
      ],
      "index": "index.html", // 指定首页文件,默认值是"index.html"
      "main": "main.ts", // 指定应用的入门文件
      "polyfills": "polyfills.ts", // 指定polyfill文件
      "test": "test.ts", // 指定测试入门文件
      "tsconfig": "tsconfig.app.json", // 指定tsconfig文件
      "testTsconfig": "tsconfig.spec.json", // 指定TypeScript单测脚本的tsconfig文件
      "prefix": "app", // 使用`ng generate`命令时,自动为selector元数据的值添加的前缀名
      "deployUrl": "//cdn.com.cn", // 指定站点的部署地址,该值最终会赋给webpack的output.publicPath,常用于CDN部署
      "styles": [ // 引入全局样式,构建时会打包进来,常用语第三方库引入的样式
        "styles.css?1.1.10"
      ],
      "scripts": [ // 引入全局脚本,构建时会打包进来,常用语第三方库引入的脚本
      ],
      "environmentSource": "environments/environment.ts", // 基础环境配置
      "environments": { // 子环境配置文件
        "dev": "environments/environment.ts",
        "prod": "environments/environment.prod.ts"
      }
    }
  ],
  "e2e": {
    "protractor": {
      "config": "./protractor.conf.js?1.1.10"
    }
  },
  "lint": [
    {
      "project": "src/tsconfig.app.json"
    },
    {
      "project": "src/tsconfig.spec.json"
    },
    {
      "project": "e2e/tsconfig.e2e.json"
    }
  ],
  "test": {
    "karma": {
      "config": "./karma.conf.js?1.1.10"
    }
  },
  "defaults": { // 执行`ng generate`命令时的一些默认值
    "styleExt": "css", // 默认生成的样式文件后缀名
    "component": {
      "flat": false, // 生成组件时是否新建文件夹包装组件文件,默认为false(即新建文件夹)
      "spec": true, // 是否生成spec文件,默认为true
      "inlineStyle": false, // 新建时是否使用内联样式,默认为false
      "inlineTemplate": false, // 新建时是否使用内联模板,默认为false
      "viewEncapsulation": "Emulated", // 指定生成的组件的元数据viewEncapsulation的默认值
      "changeDetection": "OnPush", // 指定生成的组件的元数据changeDetection的默认值
    }
  }
}
为实现以.Net Core Api项目为主体的站点结构,我们需在使用ng server时启用Deploy选项,打开对静态资源“部署地址”的支持。注意:双站部署可能会产生JS跨域,请自行解决
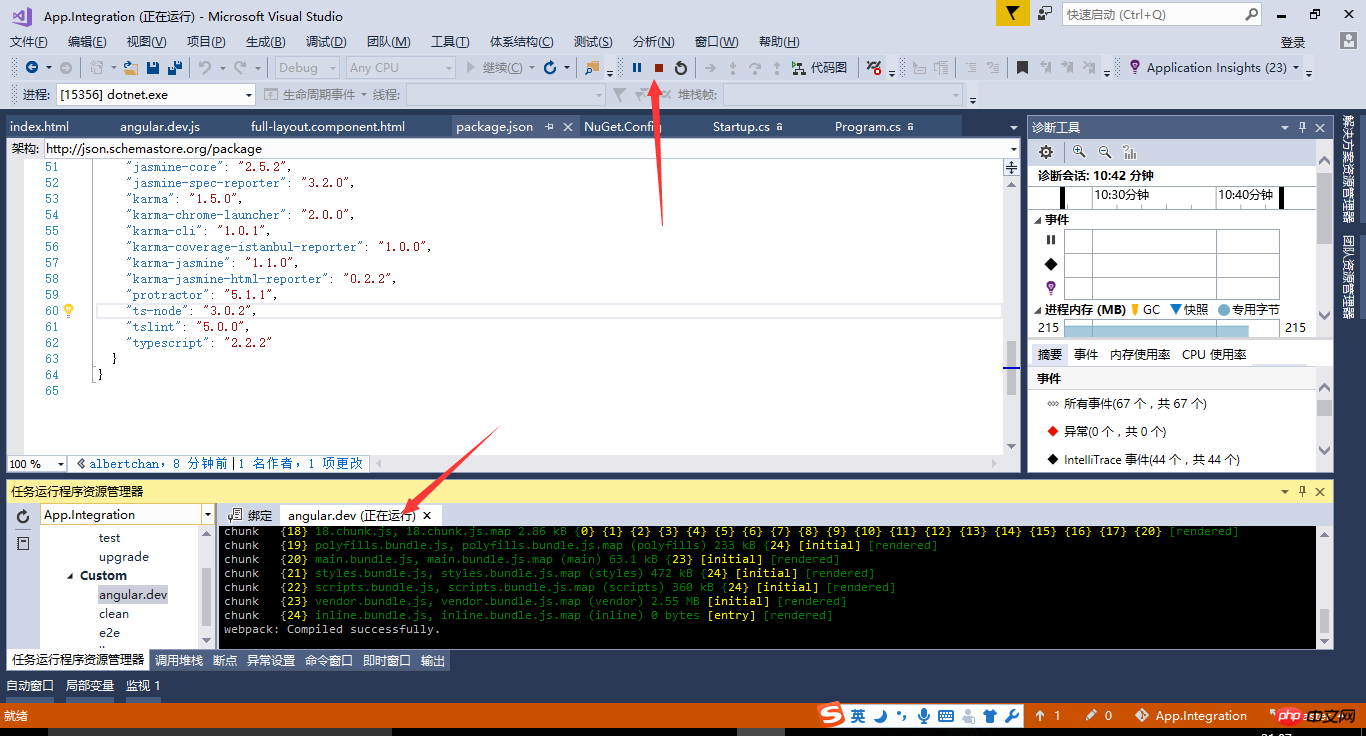
在命令行启动Angular Cli调试服务器时加上deploy参数 ng serve --deploy-url '//localhost:4200/'

最后,通过VS的F5命令,打开Api项目的运行时,我们可以看到网站的运行效果。Enjoy Coding~

Atas ialah kandungan terperinci .Net Core + Angular Cli 实现开发环境搭建. Untuk maklumat lanjut, sila ikut artikel berkaitan lain di laman web China PHP!


