安装php fileinfo扩展的方法:1、找到PHP安装源目录;2、解析使用phpize释放fileinfo模块;3、编译安装;4、重启PHP即可。

本文操作环境:Centos7.6系统、PHP7.3版,DELL G3电脑
怎么安装php fileinfo扩展?
LNMP安装PHP fileinfo扩展模块
今天在服务器(Centos7.6)通过# composer install 安装项目时报错如下:
To enable extensions, verify that they are enabled in your .ini files:
     - /etc/php.ini
   You can also run `php --ini` inside terminal to see which files are used by PHP in CLI mode.
说明我的PHP环境没有安装 php_fileinfo.dll 模块 。
安装如下:
1、找到PHP安装源目录(注意不是安装目录)
很多童鞋可能在安装完PHP后,就把原安装包删除了,或者服务器不是自己部署的自己也不知道在哪里可以找到,没关系,通过PHP -V 查询版本,然后再重新下载一份对应版本的就可以了。
我的放在了/mydata/目录下
2 解析使用phpize释放 fileinfo模块
# cd /mydata/php-7.3.8/ext/fileinfo/
# 执行phpize命令解析(我的PHP安装在了/usr/local/php)
# /usr/local/php/bin/phpize

3、编译安装
# ./configure --with-php-config=/usr/local/php/bin/php-config
如图 
# make
如下没有报错,
# make install 
OK 安装成功, 生成路径为 “/usr/local/php/lib/php/extensions/no-debug-non-zts-20180731/”
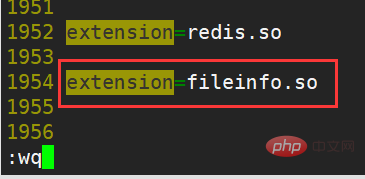
4、添加到php.ini中
# vim /etc/php.ini
把extension=fileinfo.so 添加到此文件的最后一行
重启PHP # /etc/init.d/php-fpm restart
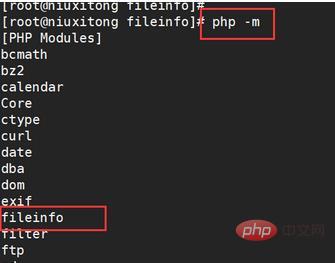
5、通过 # php -m命令可以检测 当前PHP安装了哪些模块
# 再次 composer install 就可以了。
推荐学习:《PHP视频教程》
以上是怎么安装php fileinfo扩展的详细内容。更多信息请关注PHP中文网其他相关文章!