Home > Article > Web Front-end > How to set read-only status for text text box in jquery
Two methods to set read-only: 1. Use attr() to add the readonly attribute to the text text box, and set the attribute value to "readonly", the syntax is "$("textarea").attr(" readonly","readonly");". 2. Use prop() to add the readonly attribute to the text text box, and set the attribute value to "true", using the syntax "$("textarea").prop("readonly",true);".

The operating environment of this tutorial: windows7 system, jquery3.6.0 version, Dell G3 computer.
In HTML, the read-only status of an element is controlled by the read-only attribute (readonly).
If you want to set the read-only status of the text text box (textarea), you only need to add the readonly attribute to the textarea element.
jquery has the following two ways to add attributes to elements:
Use attr()
Use prop()
Method 1. Use attr() to set the read-only status of the text text box
Just use attr() Add the readonly attribute to the textarea element and set the attribute value to "readonly".
Implementation code:

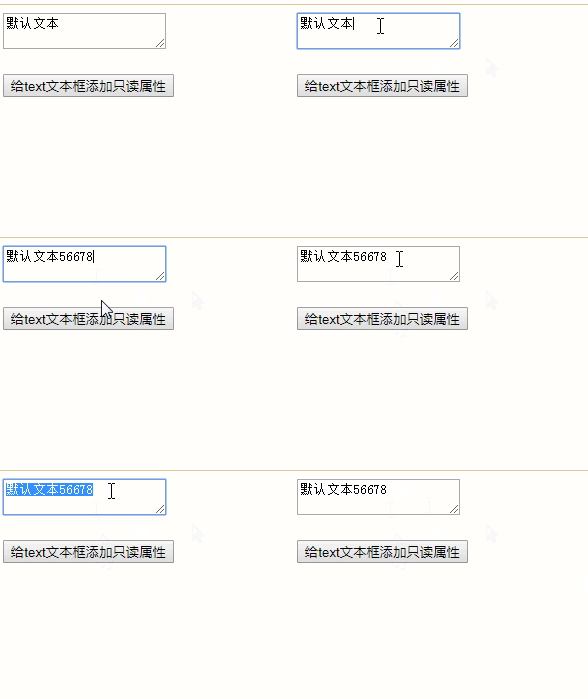
You can see that after clicking the setting button, the cursor of the text text box disappears and text input is no longer possible.
Method 2. Use prop() to set the read-only status of the text text box
Just use prop() to add the readonly attribute to the textarea element and set the attribute value Just "true".
Implementation code:
Similarly, after clicking the setting button, the cursor of the text text box disappears and text input is no longer possible.
[Recommended learning: jQuery video tutorial, web front-end development]
The above is the detailed content of How to set read-only status for text text box in jquery. For more information, please follow other related articles on the PHP Chinese website!