In the previous article " Sharing of practical Word skills: 4 ways to add circles to characters! ", we learned a few tips for adding circles to characters. Today we will talk about image alignment and introduce the automatic layout of batch images in Word (all images are right-aligned, centered, etc.).

#We often insert various beautiful pictures when editing word. Usually, for the sake of beautiful layout, we need to align multiple pictures or all pictures of the full text to make the document neat and clean.
However, when there are too many pictures in the document, the operation will be very cumbersome. If we encounter this situation, how should we implement automatic typesetting of batch pictures in Word?
Today, I will teach you how to set the image alignment in Word. You can align multiple pictures in Word in minutes and improve our work efficiency.
The method is very simple: Use the find and replace function, the steps are as follows:
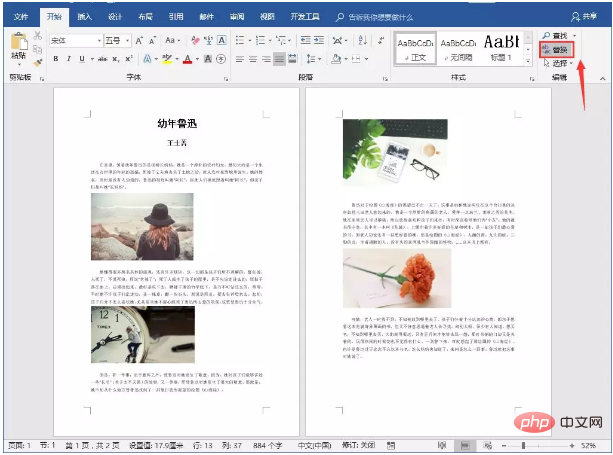
(1) Click the "Replace" button in the [Start]-[Edit] group, or Directly press the [Ctrl H] shortcut key to open the "Find and Replace" dialog box.

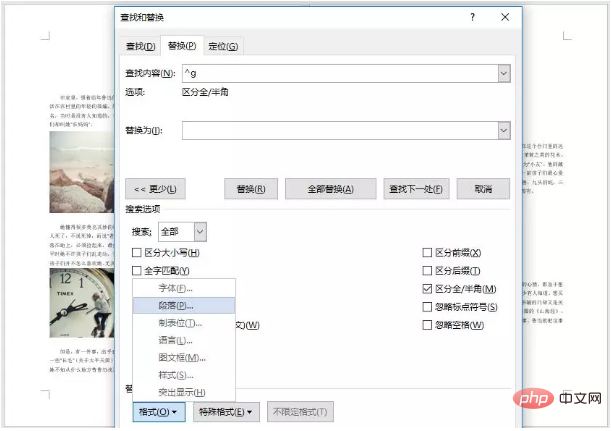
(2) Enter "^g" in the "Find content" text box, then position the mouse cursor to the "Replace content" text box, and then click [More 】-[Format] button, select the "Paragraph" command in the pop-up menu.

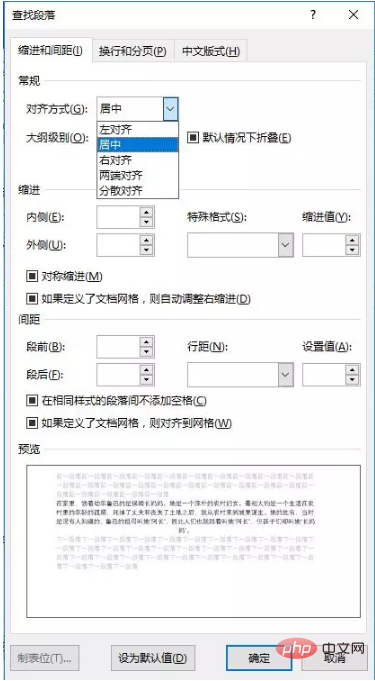
(3) Open the "Find Paragraph" dialog box, select "Centered" in the "Alignment" list of the "Indent and Paragraph" tab, and click "OK" "Button.

(4) Return to the "Find and Replace" dialog box and click the "Replace All" button.
# (5) That is, change the image alignment in batches. Close the dialog box, the effect is as shown in the figure.
Tips: If you want the image to be right-aligned, just set the "Alignment" to the corresponding alignment when searching and replacing You can achieve right alignment of all pictures in Word.
Ok, a simple but very practical typesetting tip, I hope it can help everyone~
Recommended tutorial: "Word Tutorial"
The above is the detailed content of Practical Word tips to share: Set image alignment in batches!. For more information, please follow other related articles on the PHP Chinese website!