
Home > Article > Backend Development > How to use the Python crawler Requests library

1. Install the requests library
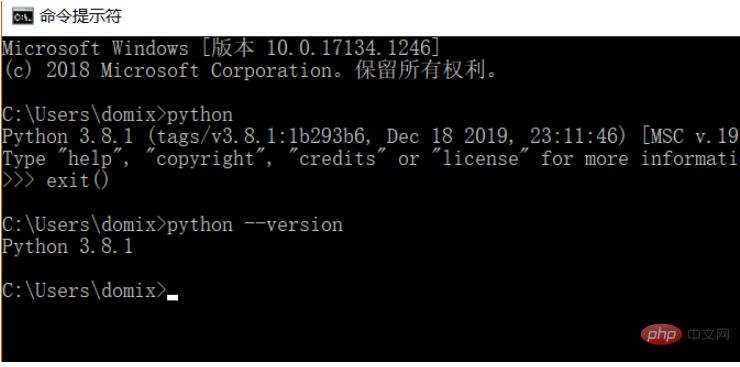
Because the learning process uses the Python language, you need to install Python in advance. I installed Python 3.8. You can check yourself through the command python --version The installed Python version, it is recommended to install Python 3.X or above.
After installing Python, you can directly install the requests library through the following command.
pip install requests
Ps: You can switch to domestic pip sources, such as Alibaba and Douban, with fast speed
In order to demonstrate the function, I used nginx to simulate a simple website.
After downloading, just run the nginx.exe program in the root directory directly (note: in windows environment).
At this time, when the local computer accesses: http://127.0.0.1, it will enter a default page of nginx.
2. Get the web page
Next we start using requests to simulate a request and get the page source code.
import requestsr = requests.get('http://127.0.0.1')print(r.text)
The results obtained after execution are as follows:
nbsp;html>Welcome to nginx! Welcome to nginx!
If you see this page, the nginx web server is successfully installed andworking. Further configuration is required.
For online documentation and support please refer tonginx.org.
Commercial support is available atnginx.com.Thank you for using nginx.
3. About requests
There are many common requests, such as the one used in the above example It is a GET request. Here is a detailed introduction to these common request methods.
4. GET request
4.1. Initiate a request
We use the same method to initiate a GET request:
import requests r = requests.get('http://httpbin.org/get') print(r.text)
The return result is as follows:
{"args": {}, "headers": {"Accept": "*/*", "Accept-Encoding": "gzip, deflate", "Host": "httpbin.org", "User-Agent": "python-requests/2.23.0", "X-Amzn-Trace-Id": "Root=1-5f846520-19f215aa46213a2b4241c18a" }, "origin": "xxxx", "url": "http://httpbin.org/get"}
By returning the result, we can see that the information included in the return result is: Headers, URL, IP, etc.
4.2. Add parameters
Usually the URL we visit will contain some parameters, for example: id is 100 and name is YOOAO. For normal access, we will write the following URL for access:
http://httpbin.org/get?id=100&name=YOOAO
Obviously it is very inconvenient, and it will be error-prone when there are many parameters. At this time, we can optimize the input content through the params parameter.
import requests data = { 'id': '100', 'name': 'YOOAO'} r = requests.get('http://httpbin.org/get', params=data) print(r.text)
This is the result returned by executing the code as follows:
{"args": {"id": "100", "name": "YOOAO" }, "headers": {"Accept": "*/*", "Accept-Encoding": "gzip, deflate", "Host": "httpbin.org", "User-Agent": "python-requests/2.23.0", "X-Amzn-Trace-Id": "Root=1-5f84658a-1cd0437b4cf34835410d7161" }, "origin": "xxx.xxxx.xxx.xxx", "url": "http://httpbin.org/get?id=100&name=YOOAO"}
By returning the result, we can see that the parameters transmitted through the dictionary are automatically constructed into a complete URL, without us Complete the construction manually.
4.3. Return result processing
The return result is in json format, so we can use the method of calling json to parse. If the returned content is not in json format, this call will report an error.
import requests
r = requests.get('http://httpbin.org/get')  print(type(r.text))   print(type(r.json()))
Return results:
4.4. Content capture
Here we use simple regular expressions to capture nginx sample page types For the content of all tags, the code is as follows:
import requestsimport re
r = requests.get('http://127.0.0.1')pattern = re.compile('(.*?)', re.S)a_content = re.findall(pattern, r.text)print(a_content)
Fetching results:
['nginx.org', 'nginx.com']
A simple page acquisition and content crawling is completed here,
4.5. Data file download
The above example returns page information. If we want to obtain images, audio and video files on the web page, we need to learn to crawl the page. binary data. We can use the open method to complete the download of binary files such as images. Example code:
import requests
r = requests.get('http://tu.ossfiles.cn:9186/group3/M00/09/FB/rBpVfl8QFLOAYhhcAAC-pTdNj7g471.jpg')with open('image.jpg', 'wb') as f:    f.write(r.content)print('下载完成')
In the open method, its first parameter is the file name, and the second parameter represents opening in binary form. You can Write binary data to a file.
After the operation is completed, the downloaded pictures will be saved in the same folder of the running file. Using the same principle, we can process video and audio files.
4.6. Add headers
In the above example, we directly initiated the request without adding headers. Some websites are caused by the request not carrying the request header. Access exception, here we can manually add headers content, simulate adding the Uer-Agent content code in the headers:
import requests
headers = {'User-Agent':'Mozilla/5.0 (Macintosh; Intel Mac OS X 10_8_3) AppleWebKit/537.36 (KHTML, like Gecko) Chrome/27.0.1453.93 Safari/537.36'}r = requests.get('http://httpbin.org/get', headers=headers)print(r.text)
Execution result:
{"args": {}, "headers": {"Accept": "*/*", "Accept-Encoding": "gzip, deflate", "Host": "httpbin.org", "User-Agent": "Mozilla/5.0 (Macintosh; Intel Mac OS X 10_8_3) AppleWebKit/537.36 (KHTML, like Gecko) Chrome/27.0.1453.93 Safari/537.36", "X-Amzn-Trace-Id": "Root=1-5ec8f342-8a9f986011eac8f07be8b450" }, "origin": "xxx3.xx.xxx.xxx", "url": "http://httpbin.org/get"}
The result can be seen, the value of User-Agent has changed. Not the previous one: python-requests/2.23.0.
5. POST request
Now that we have finished talking about the knowledge related to GET request, let’s talk about another common request method: POST request.
使用 requests 实现 POST 请求的代码如下:
import requestsdata = {      'id': '100',      'name': 'YOOAO'}
r = requests.post("http://httpbin.org/post", data=data)print(r.text)
结果如下
{"args": {}, "data": "", "files": {}, "form": {"id": "100", "name": "YOOAO" }, "headers": {"Accept": "*/*", "Accept-Encoding": "gzip, deflate", "Content-Length": "17", "Content-Type": "application/x-www-form-urlencoded", "Host": "httpbin.org", "User-Agent": "python-requests/2.23.0", "X-Amzn-Trace-Id": "Root=1-5ec8f4a0-affca27a05e320a84ca6535a" }, "json": null, "origin": "xxxx", "url": "http://httpbin.org/post"}
从 form 中我们看到了自己提交的数据,可见我们的 POST 请求访问成功。
6、响应
访问URL时,有请求就会有响应,上面的示例使用 text 和 content 获取了响应的内容。除此以外,还有很多属性和方法可以用来获取其他信息,比如状态码、响应头、Cookies 等。
import requests
r = requests.get('http://127.0.0.1/')print(type(r.status_code), r.status_code)print(type(r.headers), r.headers)print(type(r.cookies), r.cookies)print(type(r.url), r.url)print(type(r.history), r.history)
关于状态码,requests 还提供了一个内置的状态码查询对象 requests.codes,用法示例如下:
import requestsr = requests.get('http://127.0.0.1/')exit() if not r.status_code == requests.codes.ok else print('Request Successfully')==========执行结果==========Request Successfully
这里通过比较返回码和内置的成功的返回码,来保证请求得到了正常响应,输出成功请求的消息,否则程序终止。
这里我们用 requests.codes.ok 得到的是成功的状态码 200。
这样的话,我们就不用再在程序里面写状态码对应的数字了,用字符串表示状态码会显得更加直观。
下面是响应码和查询条件对照信息:
# 信息性状态码  100: ('continue',),  101: ('switching_protocols',),  102: ('processing',),  103: ('checkpoint',),  122: ('uri_too_long', 'request_uri_too_long'),
# 成功状态码  200: ('ok', 'okay', 'all_ok', 'all_okay', 'all_good', '\\o/', '✓'),  201: ('created',),  202: ('accepted',),  203: ('non_authoritative_info', 'non_authoritative_information'),  204: ('no_content',),  205: ('reset_content', 'reset'),  206: ('partial_content', 'partial'),  207: ('multi_status', 'multiple_status', 'multi_stati', 'multiple_stati'),  208: ('already_reported',),  226: ('im_used',),
# 重定向状态码  300: ('multiple_choices',),  301: ('moved_permanently', 'moved', '\\o-'),  302: ('found',),  303: ('see_other', 'other'),  304: ('not_modified',),  305: ('use_proxy',),  306: ('switch_proxy',),  307: ('temporary_redirect', 'temporary_moved', 'temporary'),  308: ('permanent_redirect',        'resume_incomplete', 'resume',), # These 2 to be removed in 3.0
# 客户端错误状态码  400: ('bad_request', 'bad'),  401: ('unauthorized',),  402: ('payment_required', 'payment'),  403: ('forbidden',),  404: ('not_found', '-o-'),  405: ('method_not_allowed', 'not_allowed'),  406: ('not_acceptable',),  407: ('proxy_authentication_required', 'proxy_auth', 'proxy_authentication'),  408: ('request_timeout', 'timeout'),  409: ('conflict',),  410: ('gone',),  411: ('length_required',),  412: ('precondition_failed', 'precondition'),  413: ('request_entity_too_large',),  414: ('request_uri_too_large',),  415: ('unsupported_media_type', 'unsupported_media', 'media_type'),  416: ('requested_range_not_satisfiable', 'requested_range', 'range_not_satisfiable'),  417: ('expectation_failed',),  418: ('im_a_teapot', 'teapot', 'i_am_a_teapot'),  421: ('misdirected_request',),  422: ('unprocessable_entity', 'unprocessable'),  423: ('locked',),  424: ('failed_dependency', 'dependency'),  425: ('unordered_collection', 'unordered'),  426: ('upgrade_required', 'upgrade'),  428: ('precondition_required', 'precondition'),  429: ('too_many_requests', 'too_many'),  431: ('header_fields_too_large', 'fields_too_large'),  444: ('no_response', 'none'),  449: ('retry_with', 'retry'),  450: ('blocked_by_windows_parental_controls', 'parental_controls'),  451: ('unavailable_for_legal_reasons', 'legal_reasons'),  499: ('client_closed_request',),
# 服务端错误状态码  500: ('internal_server_error', 'server_error', '/o\\', '✗'),  501: ('not_implemented',),  502: ('bad_gateway',),  503: ('service_unavailable', 'unavailable'),  504: ('gateway_timeout',),  505: ('http_version_not_supported', 'http_version'),  506: ('variant_also_negotiates',),  507: ('insufficient_storage',),  509: ('bandwidth_limit_exceeded', 'bandwidth'),  510: ('not_extended',),  511: ('network_authentication_required', 'network_auth', 'network_authentication')
7、SSL 证书验证
现在很多网站都会验证证书,我们可以设置参数来忽略证书的验证。
import requests
response = requests.get('https://XXXXXXXX', verify=False)print(response.status_code)
或者制定本地证书作为客户端证书:
import requests
response = requests.get('https://xxxxxx', cert=('/path/server.crt', '/path/server.key'))print(response.status_code)
注意:本地私有证书的 key 必须是解密状态,加密状态的 key 是不支持的。
8、设置超时
很多时候我们需要设置超时时间来控制访问的效率,遇到访问慢的链接直接跳过。
示例代码:
import requests# 设置超时时间为 10 秒r = requests.get('https://httpbin.org/get', timeout=10)print(r.status_code)
将连接时间和读取时间分开计算:
r = requests.get('https://httpbin.org/get', timeout=(3, 10))
不添加参数,默认不设置超时时间,等同于:
r = requests.get('https://httpbin.org/get', timeout=None)
9、身份认证
遇到一些网站需要输入用户名和密码,我们可以通过 auth 参数进行设置。
import requests from requests.auth import HTTPBasicAuth # 用户名为 admin ,密码为 admin r = requests.get('https://xxxxxx/', auth=HTTPBasicAuth('admin', 'admin')) print(r.status_code)
简化写法:
import requests
r = requests.get('https://xxxxxx', auth=('admin', 'admin'))print(r.status_code)
10、设置代理
如果频繁的访问某个网站时,后期会被一些反爬程序识别,要求输入验证信息,或者其他信息,甚至IP被封无法再次访问,这时候,我们可以通过设置代理来避免这样的问题。
import requests
proxies = {  "http": "http://10.10.1.10:3128",  "https": "http://10.10.1.10:1080",}
requests.get("http://example.org", proxies=proxies)
若你的代理需要使用HTTP Basic Auth,可以使用
http://user:password@host/ 语法:
proxies = { "http": "http://user:pass@10.10.1.10:3128/",}
要为某个特定的连接方式或者主机设置代理,使用 scheme://hostname 作为 key, 它会针对指定的主机和连接方式进行匹配。
proxies = {'http://10.20.1.128': 'http://10.10.1.10:5323'}The above is the detailed content of How to use the Python crawler Requests library. For more information, please follow other related articles on the PHP Chinese website!