
Home > Article > Backend Development > How easy is it to make a game using Python?

Hello everyone, today I will use two articles to introduce how to use Python to make games.
This game is made using PyGame, and the texture materials are found from itch.io[1]. I have never used PyGame before. This time I am learning and using it now. The tutorial I refer to is PyGame: A Primer on Game Programming in Python[2].
It is very simple to make games with PyGame. Our first article today will let you implement a pig that can move on the map.
First of all, no matter what game you are playing, just copy and paste the following code into your editor. All games require these lines of code:
import pygame
def main():
pygame.init()
pygame.display.set_caption('未闻Code:青南做的游戏')# 游戏标题
win = pygame.display.set_mode((800, 600))# 窗口尺寸,宽800高600
running = True
while running:
for event in pygame.event.get():
if event.type == pygame.QUIT:# 点击左上角或者右上角的x关闭窗口时,停止程序
running = False
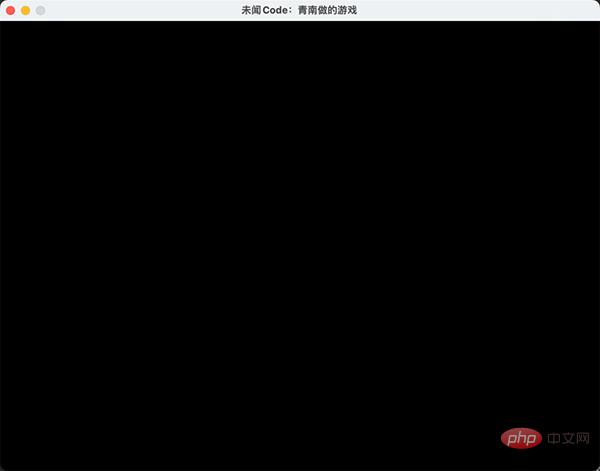
main()The running effect is as shown below:
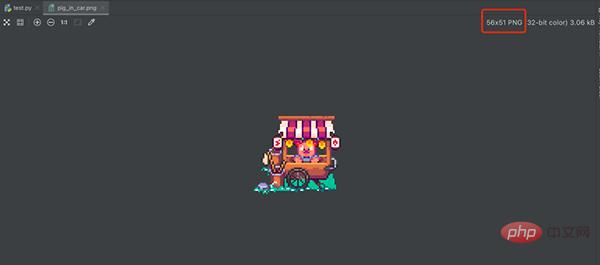
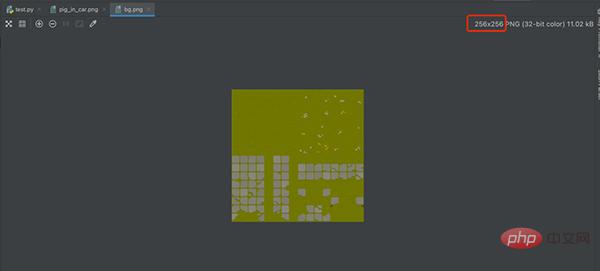
Now, let’s just Find two pictures, one for the background and one for the main character. Don’t worry too much about the size, it’s almost enough because we can dynamically adjust it using code. The two pictures below are materials I found randomly. Please note that the red box in the picture is the size of these two pictures.
We use the following code to load the image:
img_surf = pygame.image.load('图片地址').convert_alpha()The .convert_alpha() is to retain the transparency of the png image background. If the image you load is not a png image, you can change convert_alpha() to convert().
If you want to modify the image size, use the following code:
img_surf = pygame.transform.scale(img_surf, (宽, 高))
To display the image in the window, use the following two lines of code:
win.blit(素材对象, (素材左上角的横坐标, 素材左上角的纵坐标))
pygame.display.flip()
The complete code is as follows:
import pygame
def main():
pygame.init()
pygame.display.set_caption('未闻Code:青南做的游戏')# 游戏标题
win = pygame.display.set_mode((800, 600))# 窗口尺寸
bg_small = pygame.image.load('bg.png').convert_alpha()
bg_big = pygame.transform.scale(bg_small, (800, 600))
pig = pygame.image.load('pig_in_car.png').convert_alpha()
running = True
while running:
for event in pygame.event.get():
if event.type == pygame.QUIT:# 点击左上角或者右上角的x关闭窗口时,停止程序
running = False
win.blit(bg_big, (0, 0))# 背景图最先加载,坐标是(left, top)
win.blit(pig, (200, 300))
pygame.display.flip()
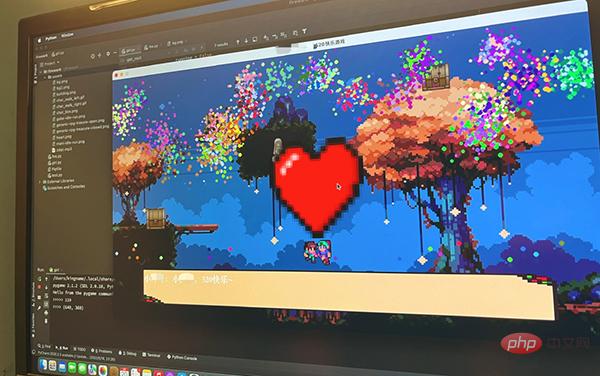
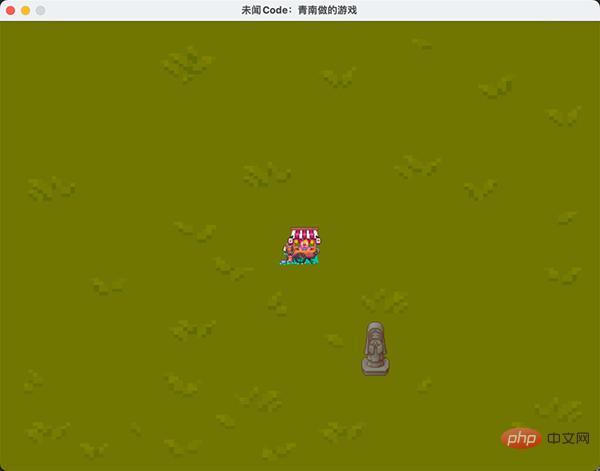
main()The running effect is shown in the figure below:
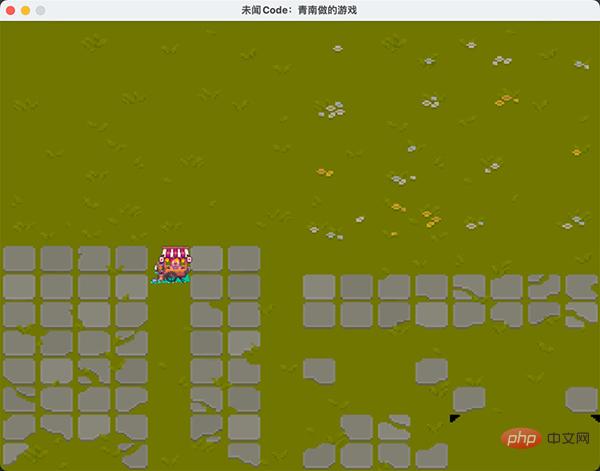
It should be noted that win.blit and pygame.display.flip() must be placed in the while loop in. The first parameter of win.blit is the material object we just loaded. The second parameter is a tuple marking the coordinates of the upper left corner of the image on the canvas. The upper left corner of the entire canvas corresponds to coordinates (0, 0). Since the size of the background image is also (800, 600), if the upper left corner of the background image is placed at (0, 0), it can just cover the entire canvas.
We are making a pixel style game, you can go to itch.io to find materials:
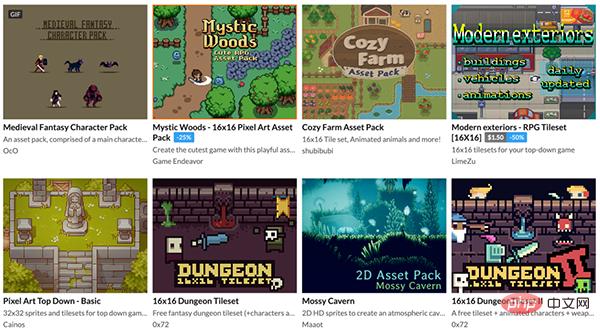
This website has improved a lot of game materials, and Most of the material is free for personal, non-commercial use. After you find the material you like, you can download it directly. You don’t even need to log in during the whole process (it is much more conscientious than domestic junk material websites).
After you download the materials, you may find a very strange thing. Why are all the materials drawn on one picture?
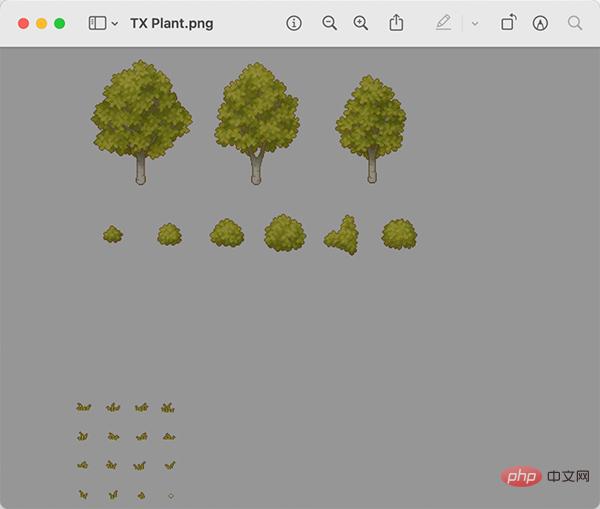
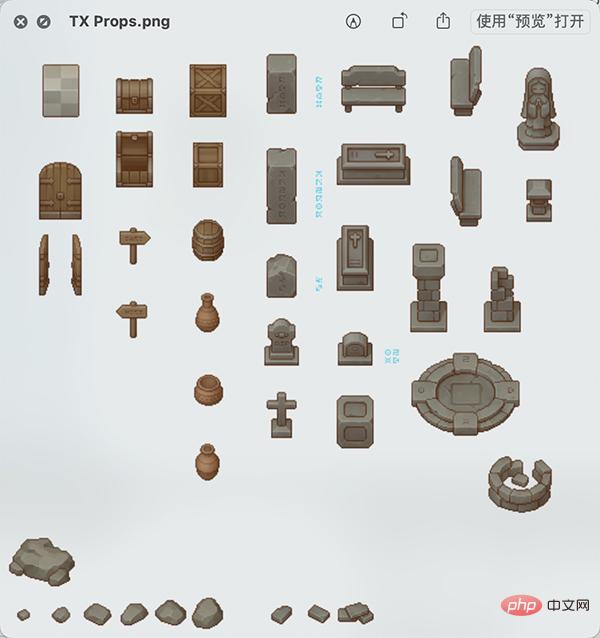
In fact, this is the industry practice. The person who makes the material will arrange each type of material on a picture. You When you want to use it, you need to cut it yourself. For example, all plants are placed on one picture, all statues are placed on one picture, and foundation textures are also placed on one picture.
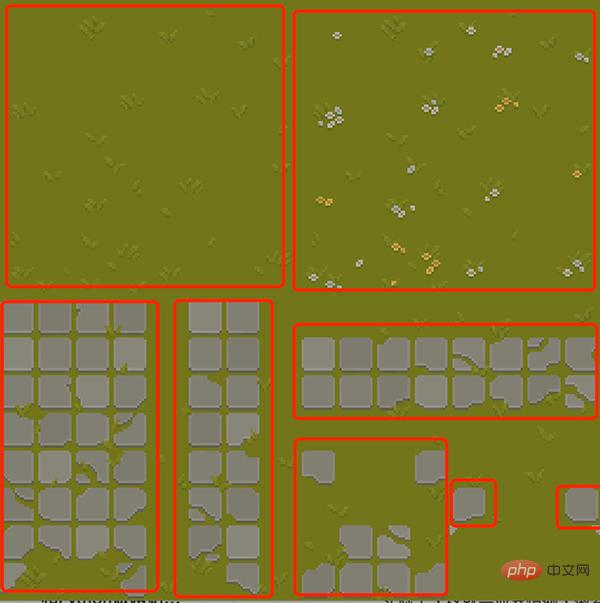
The background image we used for the demonstration above looks like a green image at first glance, but it actually contains multiple foundation elements. Please pay attention to the part I framed in red:
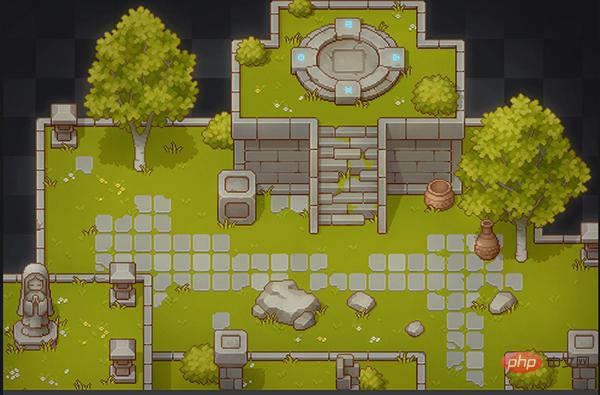
In the official game, we have to take apart every basic element and reassemble it for use. When reorganizing, some elements need to be copied and reused, and some elements need to be rotated and scaled. Finally, it is combined into a nice-looking map like the following:
Generally speaking, the sizes of pixel-style materials are mostly 16x16, 32x32, 64x64, and 128x128. Material authors will normally provide cutting instructions. If it's not provided, you can also look at it visually and take a guess.
例如我要从雕像素材里面剪切出红框框住的女神像:
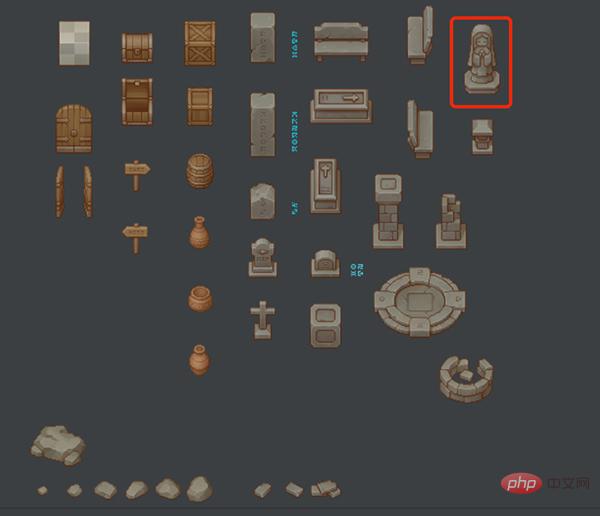
那么,我可以这样写代码:
img_surf = pygame.image.load('雕像素材.png').convert_alpha()
goddess= img_surf.subsurface(( 女神像左上角的横坐标 , 女神像左上角的纵坐标, 女神像的宽, 女神像的高))
运行效果如下图所示:
可能有同学问:为什么女神的坐标是这样的呢?我只能说,这个坐标是我试了很多次,试出来的。
除了背景图,我们添加的每一个元素都是一个对象,例如上面的小猪和女神像。原则上来讲,上面的代码就足够让你把游戏做得漂亮了,想加什么东西,就不停加载图片素材,然后放到合适的位置就可以了。
但我们可以使用面向对象的设计方法,让代码更容易维护,也更简单。PyGame 里面,有一个类叫做Sprite,我们可以为每一个对象实现一个类,继承Sprite,然后把对象的素材设置成.surf属性,把对象的位置设置为.rect属性。例如上面的代码,我们修改一下:
import pygame
class Bg(pygame.sprite.Sprite):
def __init__(self):
super(Bg, self).__init__()
bg_small = pygame.image.load('bg.png').convert_alpha()
grass_land = bg_small.subsurface((0, 0, 128, 128))
self.surf = pygame.transform.scale(grass_land, (800, 600))
self.rect = self.surf.get_rect(left=0, top=0)# 左上角定位
class Pig(pygame.sprite.Sprite):
def __init__(self):
super(Pig, self).__init__()
self.surf = pygame.image.load('pig_in_car.png').convert_alpha()
self.rect = self.surf.get_rect(center=(400, 300))# 中心定位
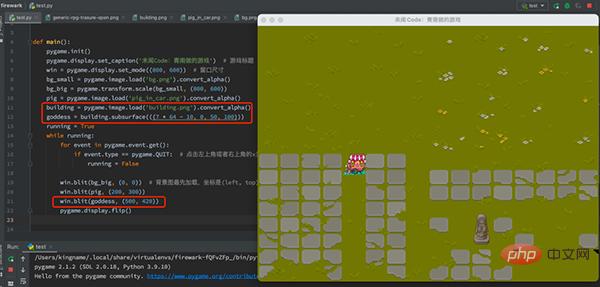
class Goddess(pygame.sprite.Sprite):
def __init__(self):
super(Goddess, self).__init__()
building = pygame.image.load('building.png').convert_alpha()
self.surf = building.subsurface(((7 * 64 - 10, 0, 50, 100)))
self.rect = self.surf.get_rect(center=(500, 430))# 女神像的中心放到画布(500, 430)的位置
def main():
pygame.init()
pygame.display.set_caption('未闻Code:青南做的游戏')# 游戏标题
win = pygame.display.set_mode((800, 600))# 窗口尺寸
bg = Bg()
goddess = Goddess()
pig = Pig()
all_sprites = [bg, goddess, pig]# 注意添加顺序,后添加的对象图层在先添加的对象的图层上面
running = True
while running:
for event in pygame.event.get():
if event.type == pygame.QUIT:# 点击左上角或者右上角的x关闭窗口时,停止程序
running = False
for sprite in all_sprites:
win.blit(sprite.surf, sprite.rect)
pygame.display.flip()
if __name__ == '__main__':
main()运行效果如下图所示:
注意代码中的all_sprites = [bg, goddess, pig],这里我使用的是列表。后面会有更高级的数据结构SpriteGroup来储存他们。今天使用列表就足够了。
素材对象.get_rect()会返回一个坐标定位对象,这个对象有多个属性,例如.left, .top, .center, .width, .height。在不传参数的情况下,默认.left=0, .top=0,PyGame会自动根据这个对象的尺寸计算.width,.height和.center。我们可以通过传入参数的形式主动设定。当你设定左上角的时候,它自动就能算出中心点的坐标;当你传入中心坐标的时候,它自动就能算出左上角的坐标。
理论上来讲,在每个类里面,素材对象可以用任何名字,不一定要用.surf。坐标定位对象也不一定要用.rect,只要你在win.blit的时候对应起来就可以了。但是如果你统一使用.surf和.rect会给你带来很多好处。这一点我们到物体碰撞那个地方再讲。因此我建议你就使用这两个名字。
既然是游戏,那肯定要按键盘让主角动起来。否则跟一幅画有什么区别呢?大家注意main()函数里面的while running这个循环,如果你在循环里面加上一行代码:print(111),你会发现当你运行这个游戏的时候,111会一直不停的打印出来。
PyGame 本质上,就是通过win.blit不停地画图,由于这个while循环每秒要运行很多次,如果每次运行的时候,我们让win.blit的第二个参数,也就是素材对象的坐标有细微的差异,那么在人眼看起来,这个素材对象就在运动了。
我们的目标是按住键盘的上下左右方向键,小猪向 4 个不同的方向移动。在 PyGame 里面,获得键盘按住不放的键,使用如下代码实现:
keys = pygame.key.get_pressed()
它返回的是一个长得像列表的对象(但不是列表),当我们要判断某个键是否被按下的时候,只需要判断if keys[想要判断的键],如果返回True,说明被按住了。基于这个原理,我们来写两段代码。首先修改Pig类,新增一个.update方法:
class Pig(pygame.sprite.Sprite):
 def __init__(self):
 super(Pig, self).__init__()
 self.surf = pygame.image.load('pig_in_car.png').convert_alpha()
 self.rect = self.surf.get_rect(center=(400, 300))# 中心定位
 def update(self, keys):
 if keys[pygame.K_LEFT]:
 self.rect.move_ip((-5, 0))# 横坐标向左
 elif keys[pygame.K_RIGHT]:
 self.rect.move_ip((5, 0))# 横坐标向右
 elif keys[pygame.K_UP]:
 self.rect.move_ip((0, -5))#纵坐标向上
 elif keys[pygame.K_DOWN]:
 self.rect.move_ip((0, 5))# 纵坐标向下
 # 防止小猪跑到屏幕外面
 if self.rect.left < 0:
 self.rect.left = 0
 if self.rect.right > 800:
 self.rect.right = 800
 if self.rect.top < 0:
 self.rect.top = 0
 if self.rect.bottom > 600:
 self.rect.bottom = 600
.update方法接收一个参数keys,就是我们按键返回的长得像列表的对象。然后判断是哪个方向键被按下了。根据被按下的键,.rect坐标定位对象修改相应方向的值。rect.move_ip这里的ip是inplace的简写,也就是修改.rect这个属性自身。它的参数是一个元组,对应横坐标和纵坐标。横纵坐标小于 0 表示向左或者向上,大于 0 表示向右或者向下。
原来的main()函数只需要在win.blit之前增加两行代码:
keys = pygame.key.get_pressed()
pig.update(keys)
完整代码如下:
import pygame
class Bg(pygame.sprite.Sprite):
 def __init__(self):
 super(Bg, self).__init__()
 bg_small = pygame.image.load('bg.png').convert_alpha()
 grass_land = bg_small.subsurface((0, 0, 128, 128))
 self.surf = pygame.transform.scale(grass_land, (800, 600))
 self.rect = self.surf.get_rect(left=0, top=0)# 左上角定位
class Pig(pygame.sprite.Sprite):
 def __init__(self):
 super(Pig, self).__init__()
 self.surf = pygame.image.load('pig_in_car.png').convert_alpha()
 self.rect = self.surf.get_rect(center=(400, 300))# 中心定位
 def update(self, keys):
 if keys[pygame.K_LEFT]:
 self.rect.move_ip((-5, 0))
 elif keys[pygame.K_RIGHT]:
 self.rect.move_ip((5, 0))
 elif keys[pygame.K_UP]:
 self.rect.move_ip((0, -5))
 elif keys[pygame.K_DOWN]:
 self.rect.move_ip((0, 5))
 # 防止小猪跑到屏幕外面
 if self.rect.left < 0:
 self.rect.left = 0
 if self.rect.right > 800:
 self.rect.right = 800
 if self.rect.top < 0:
 self.rect.top = 0
 if self.rect.bottom > 600:
 self.rect.bottom = 600
class Goddess(pygame.sprite.Sprite):
 def __init__(self):
 super(Goddess, self).__init__()
 building = pygame.image.load('building.png').convert_alpha()
 self.surf = building.subsurface(((7 * 64 - 10, 0, 50, 100)))
 self.rect = self.surf.get_rect(center=(500, 430))# 女神像的中心放到画布(500, 430)的位置
def main():
 pygame.init()
 pygame.display.set_caption('未闻Code:青南做的游戏')# 游戏标题
 win = pygame.display.set_mode((800, 600))# 窗口尺寸
 bg = Bg()
 goddess = Goddess()
 pig = Pig()
 all_sprites = [bg, goddess, pig]# 注意添加顺序,后添加的对象图层在先添加的对象的图层上面
 running = True
 while running:
 for event in pygame.event.get():
 if event.type == pygame.QUIT:# 点击左上角或者右上角的x关闭窗口时,停止程序
 running = False
 keys = pygame.key.get_pressed()
 pig.update(keys)
 for sprite in all_sprites:
 win.blit(sprite.surf, sprite.rect)
 pygame.display.flip()
if __name__ == '__main__':
 main()
最后的运行效果如下面这个视频所示:
PyGame 做游戏真的非常简单,只要会加载素材,就能做出一个还能看得过去的游戏。今天我们学会了怎么添加素材,怎么捕获键盘事件。
PyGame 可以读取 Gif 图片,但是你会发现加载进来以后,Gif 不会动。下一篇文章,我们来讲讲如何让你控制的角色动起来,例如控制一个小娃娃,移动的时候,它的脚也跟着动。以及对象的碰撞检测。
The above is the detailed content of How easy is it to make a game using Python?. For more information, please follow other related articles on the PHP Chinese website!