
Home > Article > Backend Development > The process of LNMP environment construction using source code (details)

The content of this article is about the process of LNMP recording the environment construction in the form of source code (details). It has certain reference value. Friends in need can refer to it. I hope it will be helpful to you.
LNMP refers to the environment for building websites using PHP MYSQL NGIX under Linux.
Nginx is a high-performance HTTP and reverse proxy server, as well as an IMAP/POP3/SMTP proxy server. Nginx can not only be used as a web server, but also as a load balancer.
MySQL is an open source and free data software. MySQL is a small relational database management system. It is small in size, fast in speed and low in total cost of ownership. Especially because of its characteristics of open source, many small and medium-sized websites In order to reduce the total cost of website ownership, MySQL was chosen as the website database.
PHP is the abbreviation of the English hypertext preprocessing language Hypertext Preprocessor. PHP is an HTML embedded language. It is a scripting language that is executed on the server side and embedded in HTML documents. Its source code is written in C language, so the style is similar to C language and is widely used in construction. Small website.
The following is a record of the establishment process of the LNMP environment. The Linux environment of the subject is a CentOs virtual image.
[Nginx Installation]
The latest stable version of Nginx is 1.14.0. The website address is http://nginx.org/en/download.html. You can download it directly on Windows. rz is uploaded to Linux, or it can be downloaded directly using wget. The download method listed below is the latter.
cd /usr/src          #一般将源码放在此目录下
wget http://nginx.org/download/nginx-1.14.0.tar.gz  #安装

Note: The installation of nginx depends on the zlib-devel pcre-devel openssl-devel packages, so we need to install these packages before installing nginx. To avoid errors during the installation process.
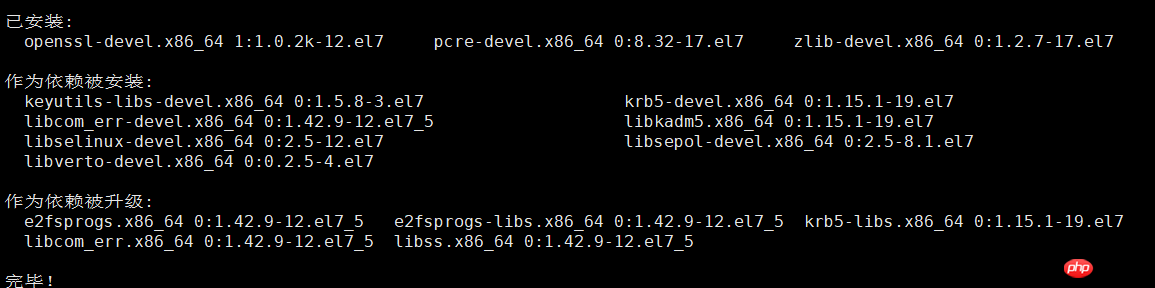
yum -y install zlib-devel pcre-devel openssl-devel

...
Unzip(tar command)Precompile(Execute configure under the source package),Compile(make),Compile and install(make install).
tar -zxvf nginx-1.14.0.tar.gz #这里解释下加压参数,z代表gzip(也就是后面的.gz文件)x代表加压,v表示显示详细信息,-f使用档案文件或设备(必选参数)

cd nginx-1.14.0
 ./configure --prefix=/data/webserver/nginx\   # 指定安装目录为/usr/local/nginx
--with-openssl=/usr/include/openssl\  # 启用ssl
--with-pcre\                          # 启用正规表达式
--with-http_stub_status_module        # 安装可以查看nginx状态的程序
…. .. 

configure file in the current directory. After the pre-compilation is completed, we Can be compiled and installed:
make #编译


make install #安装


ls /data/webserver/nginx

/data/webserver/nginx/sbin/nginx   #启动nginx

/data/webserver/nginx/sbin/nginx -s stop #停止nginx

/data/webserver/nginx/sbin/nginx -s relaod #重启nginx

netstat -antlp ¦ grep 80 #nginx占用TCP的80端口由图也可知nginx已启动

yum -y install wget cmake gcc gcc-c++ ncurses ncurses-devel libaio-devel openssl openssl-devel
..........
Then we download the source code: 
wget https://dev.mysql.com/get/Downloads/MySQL-8.0/mysql-boost-8.0.11.tar.gz


 groupadd mysql
 useradd -r -g mysql -s /bin/false mysql
Create installation directory and data directory:
mkdir -p /usr/local/mysql
mkdir -p /data/mysql

tar -zxf mysql-boost-8.0.11.tar.gz -C /usr/local

编译&安装:
cd /usr/local/mysql-8.0.11
cmake . -DCMAKE_INSTALL_PREFIX=/usr/local/mysql
-DMYSQL_DATADIR=/usr/local/mysql/data
-DSYSCONFDIR=/etc
-DMYSQL_TCP_PORT=3306
-DWITH_BOOST=/usr/local/mysql-8.0.11/boost
make  && make install

安装成功后我们可启动mysql:
cd /usr/local/mysql
bin/mysqld_safe --user=mysql
启动成功,连接mysql
bin/mysql -uroot -p
此时要求输入连接密码,比较旧的版本的mysql安装时默认密码为空,但该5.7之后的版本有默认的密码,由于我们不知道,因此关闭mysql服务后(可直接查询进程根据进程号kill掉或/etc/init.d/mysql stop ),改用跳过密码的方式重新开启mysql服务。
bin/mysqld_safe --user=mysql & skip-grant-tables
重新连接
bin/mysql -uroot
连接成功后修改密码
mysql> UPDATE user SET Password=PASSWORD('newpassword') where USER='root';
mysql> FLUSH PRIVILEGES;
此时重启mysql服务,便可以账号密码方式连接mysql。
【PHP安装】
先安装php依赖包,否则在编译安装php7的过程当中会出现各种报错,安装完成后即可进入下一个环节。
安装扩展包并更新系统内核:
yum install epel-release -y
yum update
安装php依赖组件(包含Nginx依赖),前面nginx以及mysql安装过的可以忽略,也可以直接复制运行,会跳过已安装的依赖:
yum -y install wget vim pcre pcre-devel openssl openssl-devel libicu-devel gcc gcc-c++ autoconf libjpeg libjpeg-devel
libpng libpng-devel freetype freetype-devel libxml2 libxml2-devel zlib zlib-devel glibc glibc-devel glib2 glib2-devel
ncurses ncurses-devel curl curl-devel krb5-devel libidn libidn-devel openldap openldap-devel nss_ldap jemalloc-devel
cmake boost-devel bison automake libevent libevent-devel gd gd-devel libtool* libmcrypt libmcrypt-devel mcrypt mhash
libxslt libxslt-devel readline readline-devel gmp gmp-devel libcurl libcurl-devel openjpeg-devel

........

创建用户和组,并下载php安装包解压:
cd /tmp
groupadd www
useradd -g www www
wget http://cn2.php.net/distributions/php-7.2.0.tar.gz
tar xvf php-7.2.1.tar.gz
cd php-7.2.0

设置变量并开始源码编译:
cp -frp /usr/lib64/libldap* /usr/lib/
./configure --prefix=/data/webserver/php \
--with-config-file-path=/data/webserver/php/etc \
--enable-fpm \
--with-fpm-user=www \
--with-fpm-group=www \
--enable-mysqlnd \
--with-mysqli=mysqlnd \
--with-pdo-mysql=mysqlnd \
--enable-mysqlnd-compression-support \
--with-iconv-dir \
--with-freetype-dir \
--with-jpeg-dir \
--with-png-dir \
--with-zlib \
--with-libxml-dir \
--enable-xml \
--disable-rpath \
--enable-bcmath \
--enable-shmop \
--enable-sysvsem \
--enable-inline-optimization \
--with-curl \
--enable-mbregex \
--enable-mbstring \
--enable-intl \
--with-mcrypt \
--with-libmbfl \
--enable-ftp \
--with-gd \
--enable-gd-jis-conv \
--enable-gd-native-ttf \
--with-openssl \
--with-mhash \
--enable-pcntl \
--enable-sockets \
--with-xmlrpc \
--enable-zip \
--enable-soap \
--with-gettext \
--disable-fileinfo \
--enable-opcache \
--with-pear \
--enable-maintainer-zts \
--with-ldap=shared \
--without-gdbm \

开始安装
make -j 4 && make install

完成安装后配置php.ini文件:
cp php.ini-development /data/webserver/php/etc/php.ini
cp /data/webserver/php/etc/php-fpm.conf.default /data/webserver/php/etc/php-fpm.conf
cp /data/webserver/php/etc/php-fpm.d/www.conf.default /data/webserver/php/etc/php-fpm.d/www.conf
修改 php.ini 相关参数:
vim /data/webserver/php/etc/php.ini

expose_php = Off
short_open_tag = ON
max_execution_time = 300
max_input_time = 300
memory_limit = 128M
post_max_size = 32M
date.timezone = Asia/Shanghai
mbstring.func_overload=2
重启PHP,至此LNMP环境已搭建完成。
相关文章推荐:
The above is the detailed content of The process of LNMP environment construction using source code (details). For more information, please follow other related articles on the PHP Chinese website!