Home > Article > Backend Development > Example sharing of PHP implementation of avatar changing function for multiple users
This article mainly introduces the relevant information on PHP's function of changing avatars for multiple users. The step-by-step introduction in this article is very detailed and has reference value. Friends in need can refer to the
website. In fact, To put it bluntly, it is a combination of certain specific functions, and changing the user's avatar is among these functions. Let’s do a test today to implement the avatar upload function for different users.
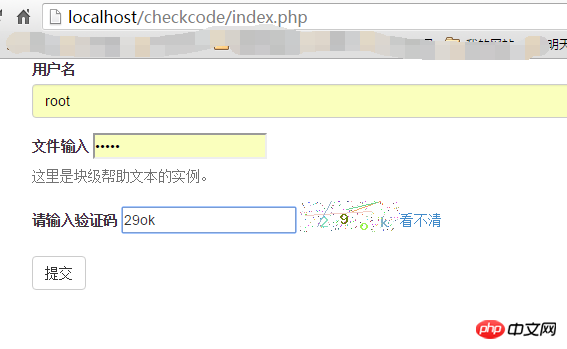
Let me show you the finished product renderings first:
Thinking
For When different users upload avatars, we need to create a folder for each logged-in user. The name of the folder is based on the username of the current user.
After the user uploads successfully, jump to the page after the user successfully logs in, and refresh the user's avatar.
Login page
Form production
<form role="form" action="./forindex.php">
<p class="form-group">
<label for="name">用户名</label>
<input type="text" class="form-control" id="username" name="username"
placeholder="请输入名称">
</p>
<p class="form-group">
<label for="inputfile">文件输入</label>
<input type="password" id="inputfile" name="password">
<p class="help-block">这里是块级帮助文本的实例。</p>
</p>
<p class="form-group">
<label>请输入验证码</label>
<input type="text" id="checkcode" name="checkcode" />
<img  id="imagecheckcode" src="./store.php?r=<?php echo rand();? alt="Example sharing of PHP implementation of avatar changing function for multiple users" >" /><a href="javascript:void(0);" onclick="change()" >看不清</a>
</p>
<script>
function change(){
document.getElementById("imagecheckcode").src = "./store.php?r="+ Math.random();
}
</script>
<button type="submit" class="btn btn-default">提交</button>
</form>
Verification code production
<?php
session_start();// 必须在php的最开始部分声明,来开启session
// 使用gd的imagecreatetruecolor();创建一张背景图
$image = imagecreatetruecolor(100,40);
// 生成填充色
$bgcolor = imagecolorallocate($image,255,255,255);
// 将填充色填充到背景图上
imagefill($image,0,0,$bgcolor);
//////// 生成随机4位字母以及数字混合的验证码
$checkcode='';
for($i=0;$i<4;$i++){
$fontsize = rand(6,8);
$fontcolor = imagecolorallocate($image,rand(0,255),rand(0,255),rand(0,255));
// 为了避免用户难于辨认,去掉了某些有歧义的字母和数字
$rawstr = 'abcdefghjkmnopqrstuvwxyz23456789';
$fontcontent = substr($rawstr,rand(0,strlen($rawstr)),1);
// 拼接即将诞生的验证码
$checkcode.=$fontcontent;
// 避免生成的图片重叠
$x += 20;
$y = rand(10,20);
imagestring($image,$fontsize,$x,$y,$fontcontent,$fontcolor);
}
// 保存到session变量中
$_SESSION['checkcode']=$checkcode;
// 生成一些干扰的点,这里是200个
for($i=0;$i<200;$i++){
$pointcolor = imagecolorallocate($image,rand(50,255),rand(50,255),rand(50,255));
imagesetpixel($image,rand(0,100),rand(0,30),$pointcolor);
}
// 生成一些干扰线 这里是4个
for($i=0;$i<4;$i++){
// 设置为浅色的线,防止喧宾夺主
$linecolor = imagecolorallocate($image,rand(50,255),rand(50,255),rand(50,255));
imageline($image,rand(0,99),rand(0,29),rand(0,99),rand(0,29),$linecolor);
}
header('content-type:image/png');
imagepng($image);
// 释放资源,销毁执行对象
imagedestroy($image);
JavaScript refresh verification code
<a href="javascript:void(0);" onclick="change()" >看不清</a>
<script>
function change(){
document.getElementById("imagecheckcode").src = "./store.php?r="+ Math.random();
}
</script>
Verification page
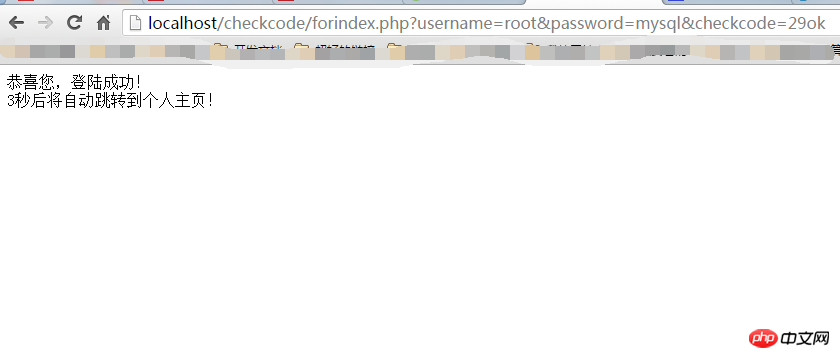
Since the core of this experiment is to change the user’s avatar, we will not care about the user name for the time being, and the Root will prevail.
Verification logic
<?php
session_start();
header("Content-Type:text/html;charset=utf-8");
$username = $_REQUEST['username'];
$password = $_REQUEST['password'];
if(strtolower($_REQUEST['checkcode']==$_SESSION['checkcode'])){
if(!is_dir($username)){
mkdir($username);
}
echo "恭喜您,登陆成功!"."<br />3秒后将自动跳转到个人主页!";
$_SESSION['username'] = $username;
header("refresh:3;url=./personalpage.php");
}else{
echo "对不起,登陆失败了!";
header("refresh:3;url=./index.php");
//echo "<script>window.location.href='./index.php'</script>";
}
##Page jump
In PHP, there are many ways to jump to the page first. This article uses the method of adding header information. Here are a few small examples of page jumps.header function
< ?php
//重定向浏览器
header("Location: http://blog.csdn.net/marksinoberg");
//确保重定向后,后续代码不会被执行
exit;
?>
##Note: There cannot be a space between Location and:<meta http-equiv = "refresh" content = "1;url=http://blog.csdn.net/marksinoberg" >Note: content can be controlled to complete the jump within a few seconds change.
JavaScript
< ?php $ url = "http://bbs.lampbrother.net" ; echo " < script language = 'javascript' type = 'text/javascript' > "; echo " window.location.href = '$url' "; echo " < /script > "; ?>Note: Using JavaScript, the code can be placed anywhere you like , as long as it meets the grammatical requirements.
Upload page
Personal homepage<!DOCTYPE html>
<html>
<head>
<meta http-equiv="Content-Type" content="text/html; charset=utf-8" />
<title><?php session_start(); echo $_SESSION['username']."的个人主页"; ?></title>
<style>
img {
width:128px;
height:auto;
}
</style>
</head>
<body>
<p>
<img id="userphoto" src="./root/lover.png" / alt="Example sharing of PHP implementation of avatar changing function for multiple users" ><br />
<form action="./uploadphoto.php" method="post" enctype="multipart/form-data">
<input type="file" name="photo" />
<input type="submit" onclick="uploadphoto()" value="上传新头像"/>
</form>
<script>
function uploadphoto(){
document.getElementById("userphoto").src = "./root/<?php echo $_SESSION['username'];?>.png"
}
window.onload = function(){
uploadphoto();
}
</script>
</p>
</body>
</html>
Upload coreThe core of upload is still a form. We upload the image to be uploaded to the server, and then PHP uses move_uploaded_file to implement file migration. , to achieve uploading.
<?php
session_start();
header("Content-Type:text/html;charset=utf-8");
// 附件的存储位置、附件的名字
$path = "./root/";
$username = $_SESSION['username'];
// 拼接成该文件在服务器上的名称
$server_name = $path.$username.".png";
if($_FILES['photo']['error']>0) {
die("出错了!".$_FILES['photo']['error']);
}
if(move_uploaded_file($_FILES['photo']['tmp_name'],$server_name)){
//echo "<BR>"."Upload Success!";
echo "恭喜您,上传成功!"."<br />3秒后将自动跳转到个人主页!";
header("refresh:3;url=./personalpage.php");
}else{
//echo "<BR>"."Upload Failed!".$_FILES['photo']['error'];
echo "对不起,上传头像失败了!";
header("refresh:2;url=./index.php");
}
?>
Final Result
Login Page
 ##Verification result
 Personal homepage
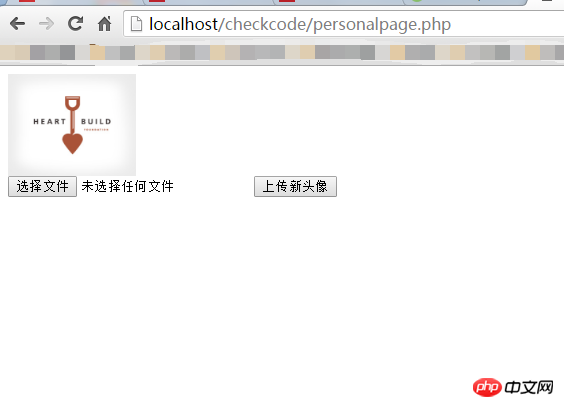 Latest Avatar
#Summary: The above is the entire content of this article, I hope it will be helpful to everyone's study. 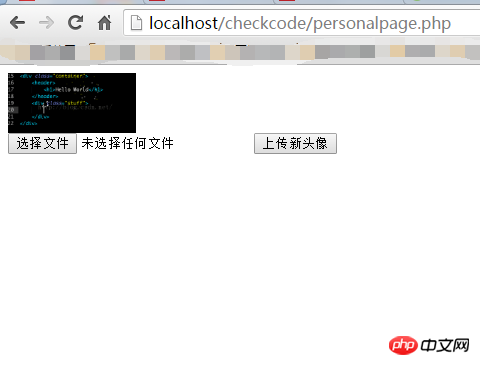
Detailed explanation of PDO exception handling methods
Detailed explanation of socket usage
The above is the detailed content of Example sharing of PHP implementation of avatar changing function for multiple users. For more information, please follow other related articles on the PHP Chinese website!