
Home > Article > Backend Development > How to meet the authorization requirements in API scenarios?

In Laravel, it is very simple to implement login and authorization based on traditional forms, but how to meet the authorization requirements in API scenarios? In API scenarios, user authorization is usually implemented through tokens instead of maintaining session state between requests. Passport can now be used to easily implement the API authorization process in Laravel projects. With Passport, you can add a complete OAuth2 server implementation to your application in a few minutes.
Use the Composer dependency package manager to install Passport:
composer require laravel/passport
Next, register the Passport service provider to the configuration In the providers array of the file config/app.php:
Laravel\Passport\PassportServiceProvider::class
Passport uses service providers to register the internal database migration script directory, so after the previous step is completed, you need to update your database structure . Passport's migration script will automatically create the client data table and token data table required by the application:
php artisan migrate
Next, you need to run the passport:install command to create and generate a secure access token The encryption key used when playing cards. At the same time, this command will also create a "Private Access" client and a "Password Authorization" client:
php artisan passport:install
After executing the above command, modify App\User.php, used to check the authenticated user's token and use the scope:
Next, you need to call the Passport::routes function in the boot method of the AuthServiceProvider. This function will register some necessary routes that will be used in the issuance and revocation process of access tokens, clients, and private access tokens:
Modify App\Providers\AuthServiceProvider.php:
 'App\Policies\ModelPolicy',];/**
     * Register any authentication / authorization services.
     *
     * @return void     */public function boot()
    {$this->registerPolicies();

        Passport::routes(); // 注册passport路由

        //令牌的有效期Passport::tokensExpireIn(Carbon::now()->addDays(15));

        Passport::refreshTokensExpireIn(Carbon::now()->addDays(30));
    }
}
Finally, you need to change the authorization protection item (driver) in the api part of the configuration file config/auth.php to passport. This adjustment will cause your application to use Passport's TokenGuard to handle when receiving an authorization request from the API:
'guards' => ['web' => ['driver' => 'session',
        'provider' => 'users',],

    'api' => ['driver' => 'passport', // 改为passport'provider' => 'users',],],
The routing of the api is api.php. Open routes\api.php and add a test route.
Route::group(['namespace' => 'api'], function () {
    Route::post('/login', 'UserController@login');
});

Route::group(['middleware' => 'auth:api', 'namespace' => 'api'], function() {
    Route::get('details', 'UserController@details');
});
One is used to log in and obtain the token, and the other is used to complete the login verification with the obtained token and obtain the current user information.
details routing uses the auth:api middleware to verify the token.
Create the api folder in the App\Http\ directory and add UserController.php
content = array();
    }public function login()
    {if(Auth::attempt(['email' => request('email'), 'password' => request('password')]))
        {$user = Auth::user();$this->content['token'] =  $user->createToken('Pizza App')->accessToken;$status = 200;
        } else {$this->content['error'] = "未授权";             $status = 401;
        }         return response()->json($this->content, $status);
    }public function details()
    {return response()->json(['user' => Auth::user()]);
    }
}
Test in postman:

As shown in the figure above, the login method must match the route, use post mode, and pass the user's email and password to api/login in a form
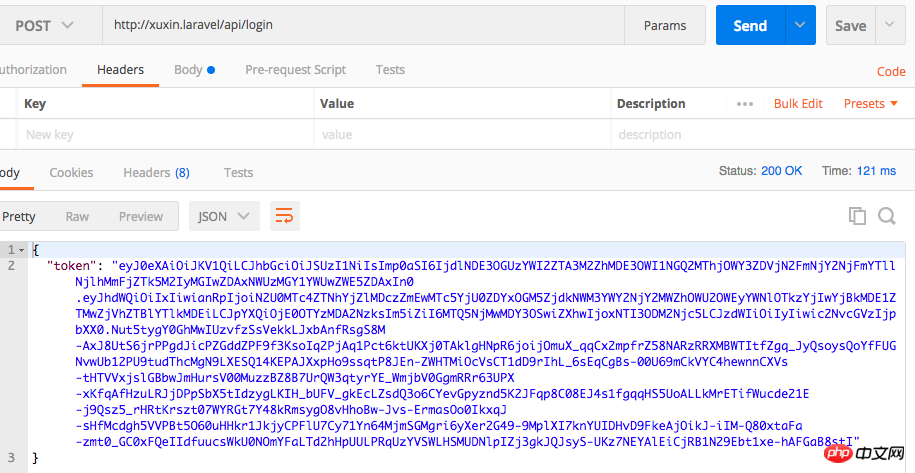
If the transmission is correct, you will get the token in the picture above

Add the token obtained in the previous step to the Header and add ' in front of the token Bearer'. Then you can get the current user's information. That is, user authentication is completed.
The above is not guaranteed to be completely correct. Welcome to view my GitHub code.
The above is the detailed content of How to meet the authorization requirements in API scenarios?. For more information, please follow other related articles on the PHP Chinese website!