
Home > Article > Backend Development > Detailed graphic tutorial on how to install Nextcloud using Nginx and PHP7-FPM in CentOS7

This article mainly introduces in detail how to install Nextcloud using Nginx and PHP7-FPM in CentOS7. Nextcloud will be run through Nginx and PHP7-FPM, and MariaDB will be used as the database system.
Nextcloud is a free (open source) Dropbox-like software, evolved from the ownCloud branch. It is written in PHP and Javascript and supports multiple database systems such as MySQL/MariaDB, PostgreSQL, Oracle Database and SQLite. It can keep files in your desktop system and cloud servers synchronized. Nextcloud provides client support for Windows, Linux, Mac, Android and Apple phones. Nextcloud is not just a Dropbox clone, it also offers many additional features such as calendar, contacts, scheduled tasks, and streaming media Ampache.
In this article, I will show you how to install and configure the latest version of Nextcloud 10 in CentOS 7 server. I will run Nextcloud through Nginx and PHP7-FPM, and use MariaDB as the database system.
Prerequisites
64-bit CentOS 7
Root permissions for the server
Step 1 - Install Nginx and PHP7-FPM in CentOS 7
Before starting to install Nginx and php7-fpm, we also learn You must first add the warehouse source of the EPEL package. Use the following command:
yum -y install epel-release
Now start installing Nginx from the EPEL repository:
yum -y install nginx
Then we also need to add another repository for php7-fpm. There are many remote repositories on the Internet that provide PHP 7 series packages. I use webtatic here.
Add PHP7-FPM webtatic repository:
rpm -Uvh https://mirror.webtatic.com/yum/el7/webtatic-release.rpm
Then install PHP7-FPM and some packages required by Nextcloud.
The code is as follows:
yum -y install php70w-fpm php70w-cli php70w-gd php70w-mcrypt php70w-mysql php70w-pear
php70w-xml php70w-mbstring php70w-pdo php70w-json php70w-pecl-apcu php70w-pecl-apcu-devel
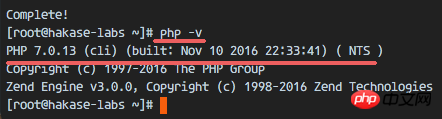
Finally, check the PHP version number from the server terminal to verify whether PHP is installed correctly.
php -v
Step 2 - Configure PHP7-FPM
In this step, we will configure php-fpm Runs with Nginx. Php7-fpm will run as user nginx and listen on port 9000.
Use vim to edit the default php7-fpm Configuration file.
vim /etc/php-fpm.d/www.conf
In lines 8 and 10, user and group are assigned the values nginx.
user = nginx
group = nginx
On line 22, make sure php-fpm is running on the specified port.
listen = 127.0.0.1:9000
Cancel the comments on lines 366-370 and enable the system environment variables of php-fpm.
env[HOSTNAME] = $HOSTNAME
env[PATH] = /usr/local/bin:/usr/bin:/bin
env[TMP] = /tmp
env[TMPDIR] = /tmp
env[TEMP] = /tmp
Save the file and Exit vim Editor.
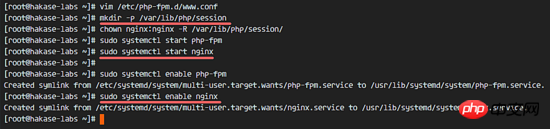
The next step is to create a new folder session in the /var/lib/ directory and change its owner For the nginx user.
mkdir -p /var/lib/php/session
chown nginx:nginx -R /var/lib/php/session/
Then start php-fpm and Nginx, and set them as services that start at boot.
sudo systemctl start php-fpm
sudo systemctl start nginx
sudo systemctl enable php-fpm
sudo systemctl enable nginx
PHP7-FPM configuration completed
Step 3 - Install and configure MariaDB
I use MariaDB as the database of Nextcloud. You can directly use the yum command to install the mariadb-server package from the CentOS default remote repository.
yum -y install mariadb mariadb-server
Start MariaDB and add it to the services started with the system.
systemctl start mariadb
systemctl enable mariadb
Now start configuring the MariaDB root user password.
mysql_secure_installation
Type Y , and then set the MariaDB root password.
Set root password? [Y/n] Y
New password:
Re-enter new password:
Remove anonymous users? [Y/n] Y
Disallow root login remotely? [Y/n] Y
Remove test database and access to it? [Y/n] Y
Reload privilege tables now? [Y/n] Y
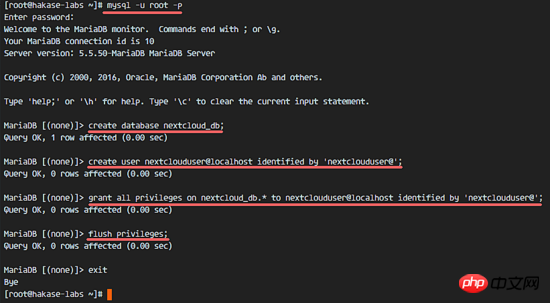
Now that the password is set, log in to the mysql shell and create a new database and user for Nextcloud. Here I create a database named nextcloud_db and a user named nextclouduser . The user password is nextclouduser@. Of course, choose a more secure password for your system. mysql -u root -p
Enter the root password of MariaDB to log in to the mysql shell.
Enter the following mysql
query statement to create a new database and user. create database nextcloud_db;
create user nextclouduser@localhost identified by 'nextclouduser@';
grant all privileges on nextcloud_db.* to nextclouduser@localhost identified by 'nextclouduser@';
flush privileges;
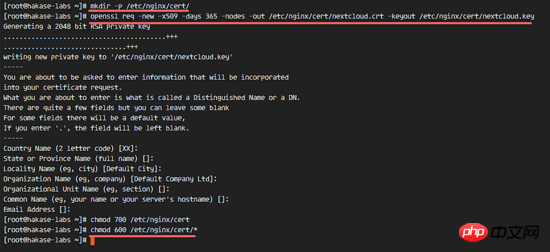
Database and 步骤 4 - 为 Nextcloud 生成一个自签名 SSL 证书 在教程中,我会让客户端以 https 连接来运行 Nextcloud。你可以使用诸如 let's encrypt 等免费 SSL 证书,或者是自己创建自签名 (self signed) SSL 证书。这里我使用 OpenSSL 来创建自己的自签名 SSL 证书。 为 SSL 文件创建新目录: 如下,使用 openssl 生成一个新的 SSL 证书。 代码如下: 最后使用 chmod 命令将所有证书文件的权限设置为 600。 步骤 5 - 下载和安装 Nextcloud 我直接使用 先进入 解压 Nextcloud,并将其移动到 下一步,转到 Nginx 的 web 根目录为 Nextcloud 创建一个 变更 步骤 6 - 在 Nginx 中为 Nextcloud 配置虚拟主机 在步骤 5 我们已经下载好了 Nextcloud 源码,并配置好了让它运行于 Nginx 服务器中,但我们还需要为它配置一个虚拟主机。在 Nginx 的 将以下内容粘贴到虚拟主机配置文件中: 保存文件并退出 vim。 下载测试以下该 Nginx 配置文件是否有错误,没有的话就可以重启服务了。 步骤 7 - 为 Nextcloud 配置 SELinux 和 FirewallD 规则 本教程中,我们将以强制模式运行 SELinux,因此需要一个 SELinux 管理工具来为 Nextcloud 配置 SELinux。 使用以下命令安装 SELinux 管理工具。 然后以 root 用户来运行以下命令,以便让 Nextcloud 运行于 SELinux 环境之下。如果你是用的其他名称的目录,记得将 接下来,我们要启用 firewalld 服务,同时为 Nextcloud 开启 http 和 https 端口。 启动 firewalld 并设置随系统启动。 现在使用 firewall-cmd 命令来开启 http 和 https 端口,然后重新加载防火墙。 至此,服务器配置完成。 步骤 8 - Nextcloud 安装 打开你的 Web 浏览器,输入你为 Nextcloud 设置的域名,我这里设置为 cloud.nextcloud.co,然后会重定向到安全性更好的 https 连接。 设置你的管理员用户名和密码,然后输入数据验证信息,点击 '完成安装 (Finish Setup)'。 Nextcloud 安装 Nextcloud 管理面板大致如下:nextclouduser Database user creation completedmkdir -p /etc/nginx/cert/
openssl req -new -x509 -days 365 -nodes -out /etc/nginx/cert/nextcloud.crt -keyout /etc/nginx/cert/nextcloud.key
chmod 700 /etc/nginx/cert
chmod 600 /etc/nginx/cert/*
wget 命令下载 Nextcloud 到服务器上,因此需要先行安装 wget。此外,还需要安装 unzip 来进行解压。使用 yum 命令来安装这两个程序。yum -y install wget unzip
/tmp 目录,然后使用 wget 从官网下载最新的 Nextcloud 10。cd /tmp
wget https://download.nextcloud.com/server/releases/nextcloud-10.0.2.zip
/usr/share/nginx/html/ 目录。unzip nextcloud-10.0.2.zip
mv nextcloud/ /usr/share/nginx/html/
data 文件夹。cd /usr/share/nginx/html/
mkdir -p nextcloud/data/
nextcloud 目录的拥有者为 nginx 用户和组。chown nginx:nginx -R nextcloud/
conf.d 目录下创建一个新的虚拟主机配置文件 nextcloud.conf。cd /etc/nginx/conf.d/
vim nextcloud.conf
upstream php-handler {
server 127.0.0.1:9000;
#server unix:/var/run/php5-fpm.sock;
}
server {
listen 80;
server_name cloud.nextcloud.co;
# enforce https
return 301 https://$server_name$request_uri;
}
server {
listen 443 ssl;
server_name cloud.nextcloud.co;
ssl_certificate /etc/nginx/cert/nextcloud.crt;
ssl_certificate_key /etc/nginx/cert/nextcloud.key;
# Add headers to serve security related headers
# Before enabling Strict-Transport-Security headers please read into this
# topic first.
add_header Strict-Transport-Security "max-age=15768000;
includeSubDomains; preload;";
add_header X-Content-Type-Options nosniff;
add_header X-Frame-Options "SAMEORIGIN";
add_header X-XSS-Protection "1; mode=block";
add_header X-Robots-Tag none;
add_header X-Download-Options noopen;
add_header X-Permitted-Cross-Domain-Policies none;
# Path to the root of your installation
root /usr/share/nginx/html/nextcloud/;
location = /robots.txt {
allow all;
log_not_found off;
access_log off;
}
# The following 2 rules are only needed for the user_webfinger app.
# Uncomment it if you're planning to use this app.
#rewrite ^/.well-known/host-meta /public.php?service=host-meta last;
#rewrite ^/.well-known/host-meta.json /public.php?service=host-meta-json
# last;
location = /.well-known/carddav {
return 301 $scheme://$host/remote.php/dav;
}
location = /.well-known/caldav {
return 301 $scheme://$host/remote.php/dav;
}
# set max upload size
client_max_body_size 512M;
fastcgi_buffers 64 4K;
# Disable gzip to avoid the removal of the ETag header
gzip off;
# Uncomment if your server is build with the ngx_pagespeed module
# This module is currently not supported.
#pagespeed off;
error_page 403 /core/templates/403.php;
error_page 404 /core/templates/404.php;
location / {
rewrite ^ /index.php$uri;
}
location ~ ^/(?:build|tests|config|lib|3rdparty|templates|data)/ {
deny all;
}
location ~ ^/(?:\.|autotest|occ|issue|indie|db_|console) {
deny all;
}
location ~ ^/(?:index|remote|public|cron|core/ajax/update|status|ocs/v[12]|updater/.+|ocs-provider/.+|core/templates/40[34])\.php(?:$|/) {
include fastcgi_params;
fastcgi_split_path_info ^(.+\.php)(/.*)$;
fastcgi_param script_FILENAME $document_root$fastcgi_script_name;
fastcgi_param PATH_INFO $fastcgi_path_info;
fastcgi_param HTTPS on;
#Avoid sending the security headers twice
fastcgi_param modHeadersAvailable true;
fastcgi_param front_controller_active true;
fastcgi_pass php-handler;
fastcgi_intercept_errors on;
fastcgi_request_buffering off;
}
location ~ ^/(?:updater|ocs-provider)(?:$|/) {
try_files $uri/ =404;
index index.php;
}
# Adding the cache control header for js and css files
# Make sure it is BELOW the PHP block
location ~* \.(?:css|js)$ {
try_files $uri /index.php$uri$is_args$args;
add_header Cache-Control "public, max-age=7200";
# Add headers to serve security related headers (It is intended to
# have those duplicated to the ones above)
# Before enabling Strict-Transport-Security headers please read into
# this topic first.
add_header Strict-Transport-Security "max-age=15768000;
includeSubDomains; preload;";
add_header X-Content-Type-Options nosniff;
add_header X-Frame-Options "SAMEORIGIN";
add_header X-XSS-Protection "1; mode=block";
add_header X-Robots-Tag none;
add_header X-Download-Options noopen;
add_header X-Permitted-Cross-Domain-Policies none;
# Optional: Don't log access to assets
access_log off;
}
location ~* \.(?:svg|gif|png|html|ttf|woff|ico|jpg|jpeg)$ {
try_files $uri /index.php$uri$is_args$args;
# Optional: Don't log access to other assets
access_log off;
}
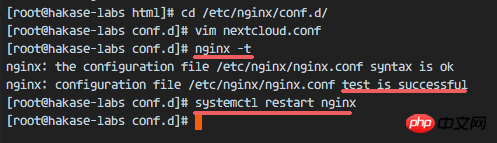
}nginx -t
systemctl restart nginx
yum -y install policycoreutils-python
nextcloud 替换掉。semanage fcontext -a -t httpd_sys_rw_content_t '/usr/share/nginx/html/nextcloud/data(/.*)?'
semanage fcontext -a -t httpd_sys_rw_content_t '/usr/share/nginx/html/nextcloud/config(/.*)?'
semanage fcontext -a -t httpd_sys_rw_content_t '/usr/share/nginx/html/nextcloud/apps(/.*)?'
semanage fcontext -a -t httpd_sys_rw_content_t '/usr/share/nginx/html/nextcloud/assets(/.*)?'
semanage fcontext -a -t httpd_sys_rw_content_t '/usr/share/nginx/html/nextcloud/.htaccess'
semanage fcontext -a -t httpd_sys_rw_content_t '/usr/share/nginx/html/nextcloud/.user.ini'
restorecon -Rv '/usr/share/nginx/html/nextcloud/'
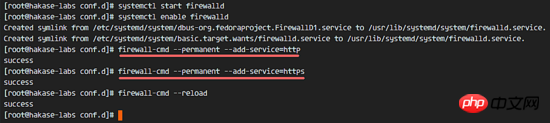
systemctl start firewalld
systemctl enable firewalld
firewall-cmd --permanent --add-service=http
firewall-cmd --permanent --add-service=https
firewall-cmd --reload
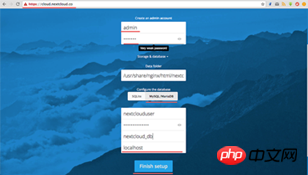
Nextcloud 用户设置: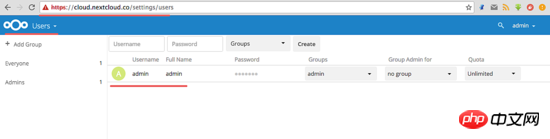
管理设置: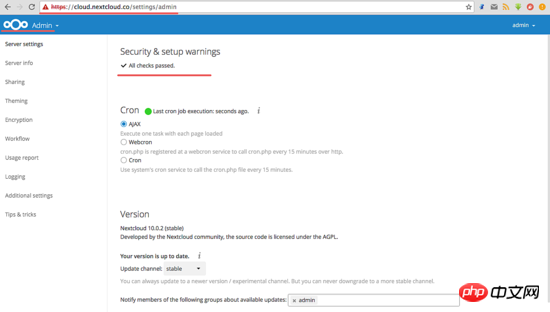
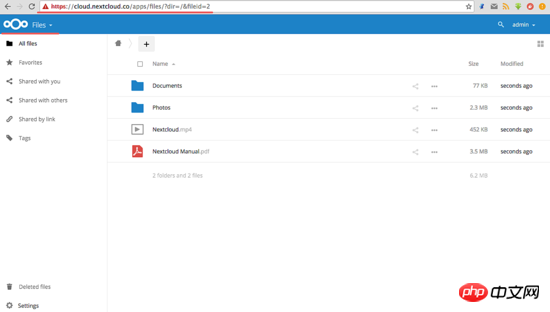
至此,我们在 CentOS 7 服务器上通过使用 Nginx、PHP7-FPM、MariaDB 完成了 Nextcloud 的安装。希望对大家的学习有所帮助,也希望大家多多支持脚本之家。
The above is the detailed content of Detailed graphic tutorial on how to install Nextcloud using Nginx and PHP7-FPM in CentOS7. For more information, please follow other related articles on the PHP Chinese website!