Home > Article > Web Front-end > One article explains in detail the installation and management of multi-version node

This article will talk about the management of multi-version node, and introduce the detailed operations of installation and switching of multi-version node. I hope it will be helpful to everyone!

During the project development process, different projects use nodejsDifferent versions sometimes cause errors because the node version is too high or too low. How to install multiple versions of node in the same system? There are two ways. Read on and choose the one that suits you. [Related tutorial recommendations: nodejs video tutorial, Programming teaching]
NVM, the full name of Node Version Manager, is a tool for managing NodeJS versions.
NVM only supports Linux and OS X by default, and does not support Windows. There are 2 alternatives for Windows operating systems:
nvm-windows
nodist
Here we only introduce the method of using nvm-windows to install and switch multiple versions of NodeJS.
nvm use , still invalid ("*" is not selected in front of the node version), you need to reinstall it on the 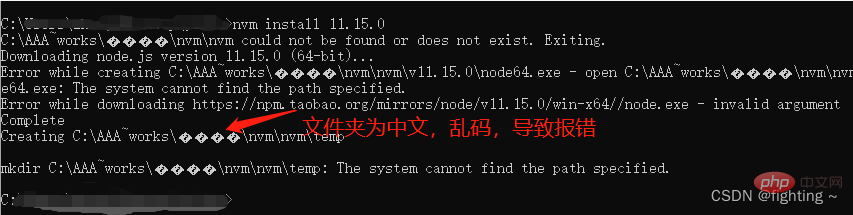
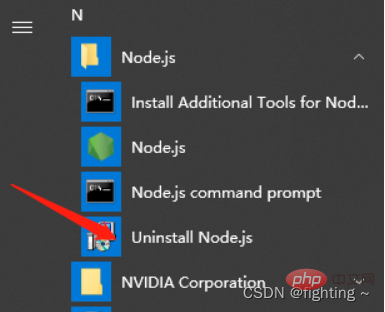
1. Click Start Menu, find the folder of nodejs, click the arrow to uninstall (note: you need to end the project using nodejs before doing this)
2. Check whether there is still a file in the system Nodejs exists
(1) View in the start menu
(2) Enter node -v in the cmd window to view
nvm download
Installation package download address: https:// github.com/coreybutler/nvm-windows/releases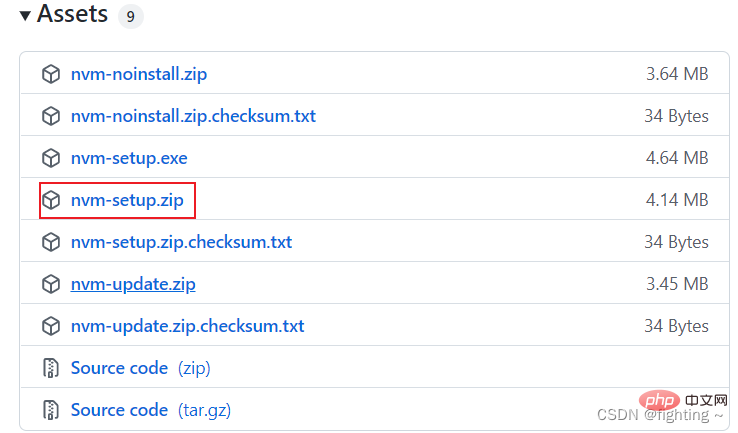
Note: Installation environmentwin10 system,64 bit
nvm installation(Note: It is best not to install on the C drive)
(1) Create two new folders under the specified file, one with To store the nvm installation file, and another to store the node file 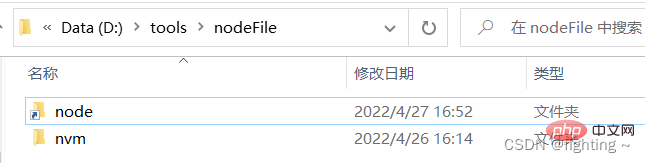
(2) Place the downloaded installation package into the nvm folder, unzip it, and install it.
Note: During installation, select the newly created folder as the designated installation directory 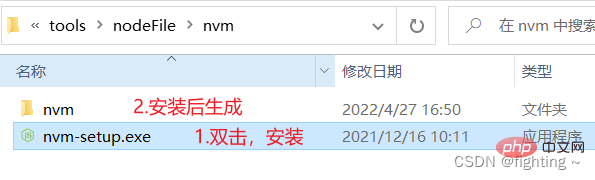
(3) Select the nvm installation path and click Next 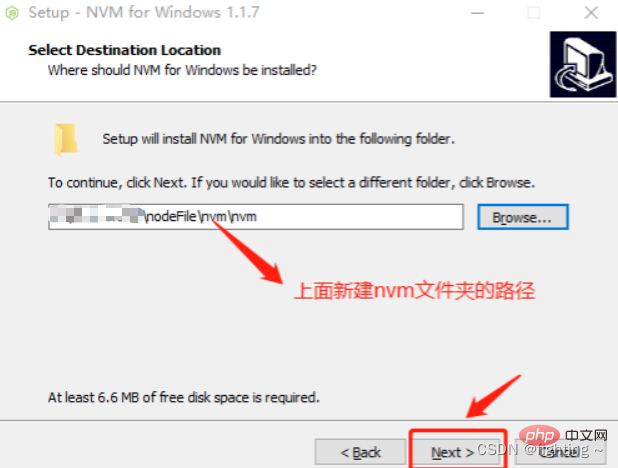
(4) Select nodejs path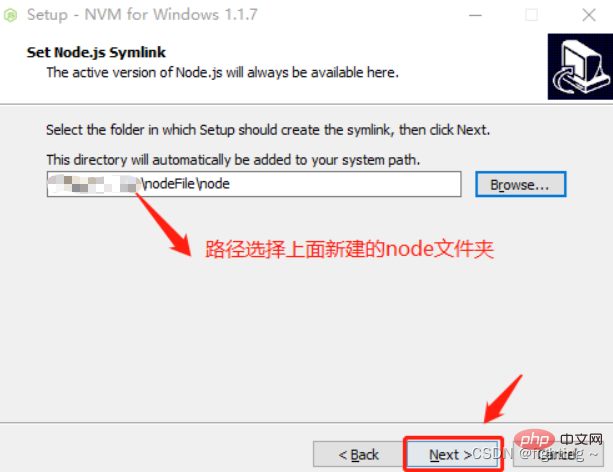
(5) Click Install——>Click Finish to complete the installation.
(6) Confirm whether the installation is successful
Open CMD and enter the command nvm command. If the installation is successful, the following will be displayed 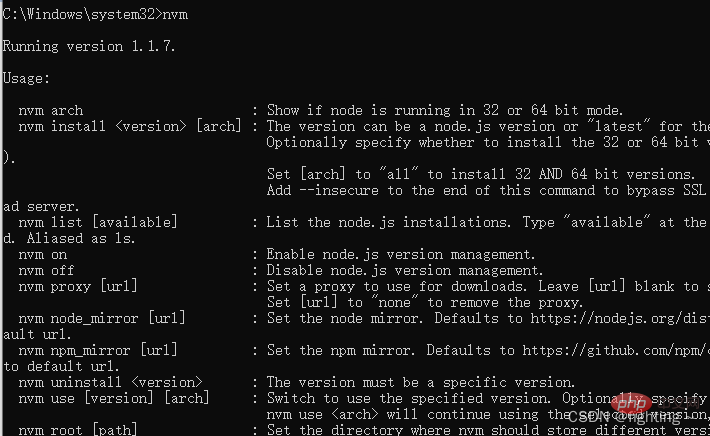
(7) nvm has been successfully installed.
If you have installed Taobao image and need to complete the configuration of downloading the image, you can skip it if you don’t have any.
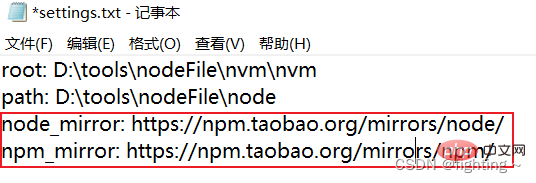
Open the settings.txt file in the nvm folder and add the following code at the end (do not change, download node may report an error) 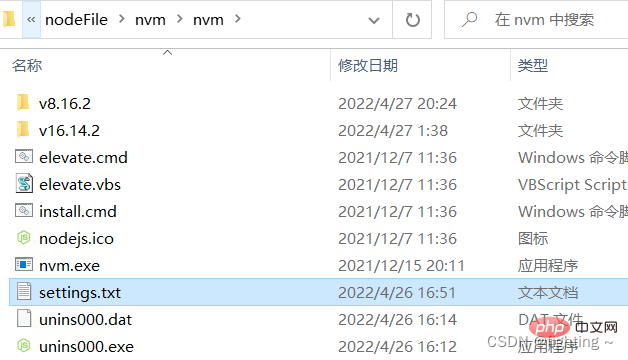
arch: 64proxy:
node_mirror: https://npm.taobao.org/mirrors/node/
npm_mirror: https://npm.taobao.org/mirrors/npm/
Note:
arch: Windows operating system number
proxy: proxy, Taobao NodeJS image and NPM image
Note:
root: NVM installation path
path: NodeJS shortcut path
1、NVM 安装成功后,win + r 输入cmd 新开cmd窗口,可以通过 nvm -v 命令查看所有可用的命令。
C:\>nvm -v Running version 1.1.7. Usage: nvm arch : Show if node is running in 32 or 64 bit mode. nvm install[arch] : The version can be a node.js version or "latest" for the latest stable version. Optionally specify whether to install the 32 or 64 bit version (defaults to system arch). Set [arch] to "all" to install 32 AND 64 bit versions. Add --insecure to the end of this command to bypass SSL validation of the remote download server. nvm list [available] : List the node.js installations. Type "available" at the end to see what can be installed. Aliased as ls. nvm on : Enable node.js version management. nvm off : Disable node.js version management. nvm proxy [url] : Set a proxy to use for downloads. Leave [url] blank to see the current proxy. Set [url] to "none" to remove the proxy. nvm node_mirror [url] : Set the node mirror. Defaults to https://nodejs.org/dist/. Leave [url] blank to use default url. nvm npm_mirror [url] : Set the npm mirror. Defaults to https://github.com/npm/cli/archive/. Leave [url] blank to default url. nvm uninstall : The version must be a specific version. nvm use [version] [arch] : Switch to use the specified version. Optionally specify 32/64bit architecture. nvm use will continue using the selected version, but switch to 32/64 bit mode. nvm root [path] : Set the directory where nvm should store different versions of node.js. If is not set, the current root will be displayed. nvm version : Displays the current running version of nvm for Windows. Aliased as v.
2、使用 nvm install 命令安装指定版本的NodeJS
C:\>nvm install v8.16.2
Downloading node.js version 8.16.2 (64-bit)...
Complete
Downloading npm version 6.4.1... Complete
Installing npm v6.4.1...

Installation complete. If you want to use this version, type

nvm use 8.16.2
3、安装成功后在 NVM 安装目录下出现一个 v8.16.2 文件夹,使用 nvm list 命令查看已安装 NodeJS 列表。
C:\>nvm list

     8.16.2
4、再次使用 nvm install 命令安装另一版本的 NodeJS
C:\>nvm install v12.8.0
Downloading node.js version 12.8.0 (64-bit)...
Complete
Creating C:\Dev\nvm\temp

Downloading npm version 6.10.2... Complete
Installing npm v6.10.2...

Installation complete. If you want to use this version, type

nvm use 12.8.0
5、使用nvm use 切换需要使用的 NodeJS 版本,切换成功后可以使用 node -v 和 npm -v 命令查看是否切换成功。
C:\>nvm use v8.16.2
Now using node v8.16.2 (64-bit)

C:\>node -v
v8.16.2

C:\>npm -v
6.4.1
这里需注意使用nvm use 时可能出现乱码的情况
C:\>nvm use v8.16.2
exit status 1: ��û���㹻��Ȩ��ִ�д˲�����
不要慌张,不要生气,这时候用重新打开一个以管理员身份运行cmd窗口就不会出现乱码的情况,使用nvm use 切换需要使用的 NodeJS 版本,使用nvm ls 查看所有安装的node版本,版本号前面带有*号的表示当前使用的NodeJS版本。
C:\Windows\system32>nvm use v8.16.2
Now using node v8.16.2 (64-bit)

C:\Windows\system32>nvm ls
    12.8.0
  * 8.16.2 (Currently using 64-bit executable)
6、这里是一些常用命令汇总:
nvm off // 禁用node.js版本管理(不卸载任何东西) nvm on // 启用node.js版本管理 nvm install// 安装node.js的命名 version是版本号 例如:nvm install 8.12.0 nvm uninstall // 卸载node.js是的命令,卸载指定版本的nodejs,当安装失败时卸载使用 nvm ls // 显示所有安装的node.js版本 nvm list available // 显示可以安装的所有node.js的版本 nvm use // 切换到使用指定的nodejs版本 nvm v // 显示nvm版本 nvm install stable // 安装最新稳定版
1、同样,如果之前有安装过node,为了避免不必要的麻烦,将其先卸载掉
注意:安装多个版本的node的时候一定要从低版本开始安装,如果你先安装高版本的话会出现许多问题,如果你已经安装啦,先卸载掉然后进行下面的步骤
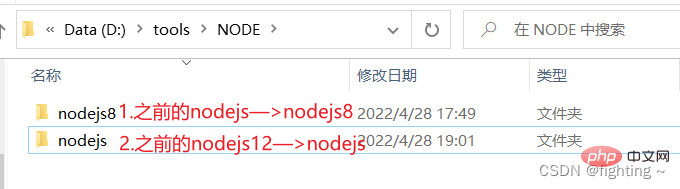
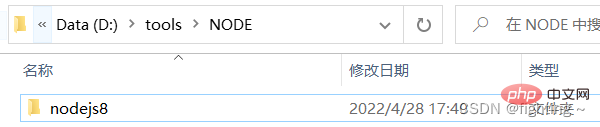
2、在安装node之前,我先选择一个node安装目录,我要安装到D盘下,所以我在D盘中新建了一个NODE的目录,并且在里面创建了一个nodejs8的文件夹,因为我一会要在这个文件夹中安装8.16.2版本的node
3、开始安装
node版本可以去node中文网或者点击这里下载https://nodejs.org/
打开下载好的node8.16.2的安装包,一直点击下一步,直到出现安装路径,将安装路径切换为我们上面新建的nodejs8文件夹路径:D:\tools\NODE\nodejs8,然后一路下一步,直到安装成功
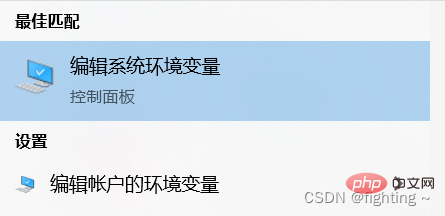
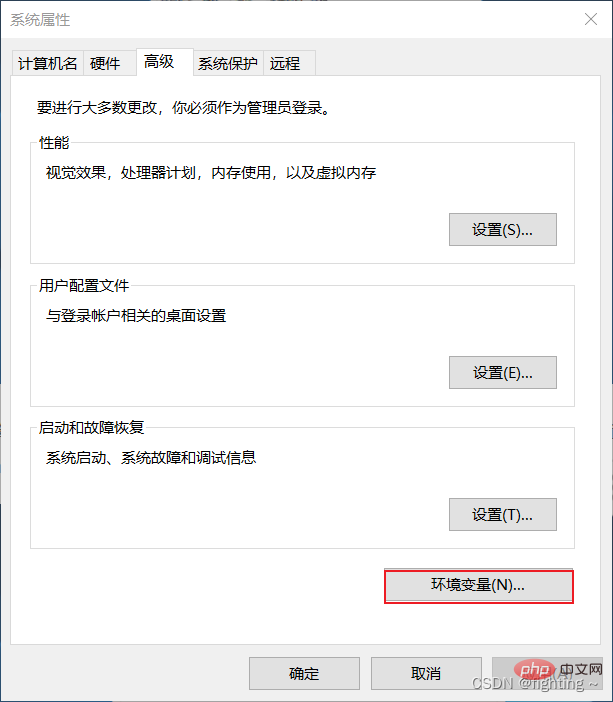
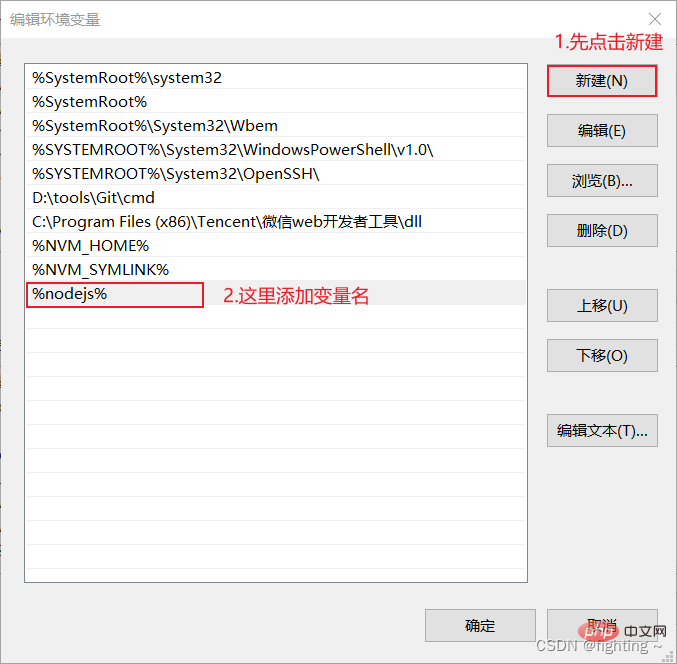
在开始搜索框搜环境变量,注意这里选择编辑系统环境变量—>高级—>环境变量
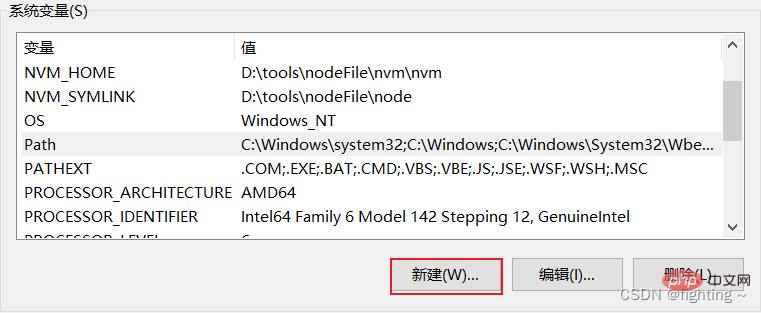
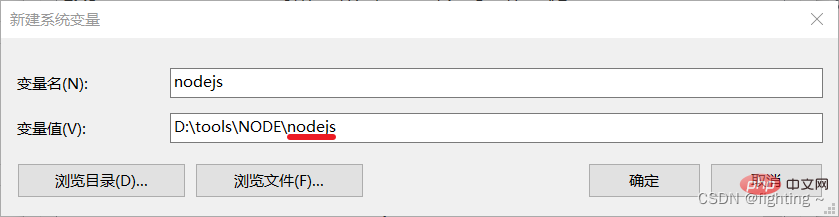
在系统变量中点击新建,变量名:nodejs,变量值:D:\tools\NODE\nodejs(即上面存放node的文件夹,这里先去掉nodejs8后面的8)
点击确定后再系统变量中找到path 变量,选中后点击编辑,然后点击新建,将上面新建系统变量的变量名以%变量名%的形式加入,点击确定
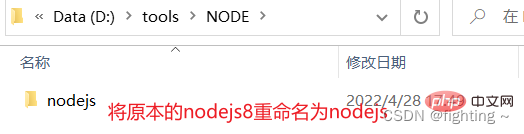
这时候还不行,最关键的一点是:我们需要将一开始建的文件夹nodejs8重命名为nodejs
值得注意的是:这里将nodejs8重命名的一方面是为了与上面配置的环境变量中的变量名匹配(即使用此版本node),另一方面是为了更好的安装下一个版本(因为在安装完一个node版本之后如果文件名不修改的话,后面再安装其他版本的node时无论你安装到什么地方,都会把之前的那个覆盖掉)
1、检查
重名名之后,然后win+R—>cmd,在命令窗口输入node -v查看node 版本,出现版本号说明第一个node版本安装成功
C:\>node -v
v8.16.2
2、安装下一个版本
由于上面已经将安装的node8.16.2版本的文件名重命名(防止覆盖),这时我们只需在同级目录下新建一个文件夹nodejs12,安装node12.8.0版本的node(方法同上面安装node8.16.2)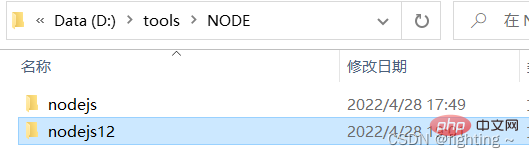
重点来了,在安装了多个版本的node的之后,在我们需要切换版本的时候,只需要将对应版本的文件夹重命名为nodejs即可
例如:我们先装了node8.16.2版本的(放在nodejs文件夹下)和node12.8.0版本的(放在nodejs12文件夹下),现在使用的node是8.16.2,那么要想切换至node12.8.0版本的node,只需更改文件名,将nodejs重命名为nodejs8,再将nodejs12重命名为nodejs即可,换句话说就是用哪个版本的node就将哪个版本的node文件夹重命名为nodejs
此时在打开命令行窗口,输入node -v检查node版本
C:\>node -v
v12.8.0
小伙伴儿们你们习惯使用哪个种方式呢?两种方式你们都学废了吗!评论区一起讨论一下吧!
更多node相关知识,请访问:nodejs 教程!
The above is the detailed content of One article explains in detail the installation and management of multi-version node. For more information, please follow other related articles on the PHP Chinese website!