
Home > Article > Web Front-end > How to quickly use node.js for web development

This article mainly introduces the detailed explanation of quickly using node.js for web development. The content is quite good. I will share it with you now and give it as a reference.
First of all, regarding the learning of node.js, here is a better tutorial recommended, the nodejs web development guide. After the book explains the node.js language features in an easy-to-understand manner, it also leads from a project perspective. Readers learn web development using node.js. I believe this is a better learning model and process. Since this book was published in 2012, one of the web teaching projects in the book is to develop a Weibo. From 2012 to now, node.js and its ecological environment have changed a lot, so if you study this book according to the book, it is obviously too old. So far, the web development framework of node.js has been upgraded to Express4.12.1. For MongoDB operations, the mongoose object model is used instead of the native node.js API officially provided by mongoDB, so this article will be based on nodejsV0 .1033 MongoDBV3.0.2 Jade1.9.2 mogooseV4.0.1 to reconstruct the Weibo project in the book. This combination is also one of the latest common combinations using node.js for web development. If you need to get started, use node.js for web development. Development, friends who are learning the nodejs web development guide and want to quickly understand the node.js web development model, I believe this article will be helpful.
1.express framework installation
1) Enter the following command in node command line mode
npm install -g express
This command installs the express framework in the global environment. After installing this step, you cannot directly use the express command to generate an express project. You need to install an express project generator. This is not required in the express2.X version. Yes, after version express4. It should be noted that the original nodejs web development guide does not include the step of installing express-generator.
2) Install express-generator
npm install -g express-generator
3) Generate a project
cd ..
mkdir microblog
cd microblog
express micorblog
Here, create a microblog folder in a certain directory on the hard disk, enter the folder, and then use the express microblog command to create a microblog express project.
The generated structure is as follows:
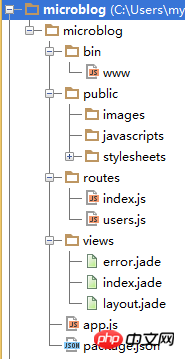
where app.js is the project entry file, package.json is the npm package management file, and www. in the bin folder. js puts some global configuration items and command line configurations, etc. The public folder is used to store project static file directories such as js, css and images, and the routes folder is used to store code-related files for routing monitoring. The views folder is used to store template files. It should be noted here that express4. It is undeniable that ejs is simpler, but the principles are the same. We use jade as the template engine for development.
4) Start the project and view
cd microblog
npm install
npm start
Go to the microblog folder and install the relevant modules required for the project (according to the pacakge.json file) , then start the project, then open the browser to view the project input address localhost:3000, the results are as follows, everything is normal,
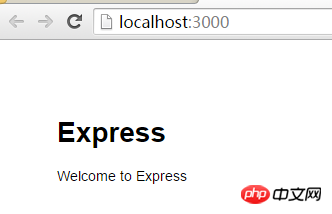
So far, we already have a browser A prototype of a web project running in the server. The following is the development. The main function of the Weibo project in the original book is that users can register and log in, control permissions and allow users to publish Weibo and display them on the user's personal homepage and the project homepage respectively. The full version of the code for these functions will be provided. Due to space reasons, Here, the user registration and login module is used to illustrate how to conduct a complete process of web development.
2. Page layout
According to the web development process, we first build a project homepage. The project homepage is composed of the layout file layout.jade and the content file index.jade Composition, regarding the learning of jade, here are two addresses. For those who have used similar template engines such as smarty, razor, etc., you can get started by looking at the documentation. The basic principles are similar.
Open the views file and rewrite the layout.jade file code as follows:
doctype html
html
 head
  title= title
  link(rel='stylesheet', href='/stylesheets/style.css')
 body
   nav.header
     ul.list
       li.logo
         a(href='/') Microblog
       li
         a(href='/') 首页
       li
         a(href='/login') 登录
       li
         a(href='/reg') 注册
    p.container
      block content
      hr
      footer.footer
        p
          a(href='http://myzhibie.coding.io') myzhibie
          | @2015
You need to pay attention to the indentation between the line breaks of the parent element and the child element. Furthermore, Jade uses indentation to distinguish code levels.
Homepage content file index.jade
extends layout
block content
  main.main
    section.intro
      if message
        h3.indexmes #{message}
      //如果用户登录或者注册成功并且没有在登录状态下点击注册或者登录
      if success&&user
        h1.welcome #{success},欢迎 #{user} 来到 Microblog
      else if !success&&user
        h1.welcome 欢迎 #{user} 来到 Microblog
      else
        h1.welcome 欢迎来到 Microblog
      h3.tech Microblog是一个基于Node.js,使用express4.12.1,jade1.9.2以及MongoDB搭建起来的微博系统,是对Node.js开发指南一书中教学项目的重构。
      p.btnlist
        if user
          a.login(href='/logout') 退出
          a.userlink(href='/users/#{user}') 发表文章
        else
          a.login(href='/login') 登录
          a.register(href='/reg') 立即注册
    section.show
      each val in posts
        article.col
          h3.author #{val.user}说
          p
            | #{val.post}
Homepage content is inherited from the template file layout.jade. It is constructed using bootstrap used in the original book The css layout and style of the page. Here I hand-written a bootstrap-style layout style without applying bootstrap. The style.css file is as follows:
body {
 padding: 50px;
 font: 14px "Lucida Grande", Helvetica, Arial, sans-serif;
}
html,body,ul,p,hr,h3{
  margin:0;
  padding: 0;
}
a {
 color: #00B7FF;
}
.header{
  background:#337aB7;
  width: 100%;
  height: 60px;
  color: #fff;
  font-size: 22px;
  overflow: hidden;
}
.list{
  line-height: 60px;
}
.navigation{
  overflow: hidden;
}
.list li{
  list-style: none;
  float: left;
  display: inline-block;
  margin-left: 20px;
  margin-right: 20px;
}
.list li a{
  text-decoration: none;
  color: #fff;
}

.list li a:hover{

}
.list li:not(:first-child) a:hover{
  font-size: 26px;
  color: #F5F5F5;
}
.logo{
  font-size: 26px;
  font-weight: 700;
}
.container{
  min-height: 500px;
  text-align: center;
  width: 100%;
}
.footer{
  width: 100%;
  height: 50px;
  font-size: 22px;
  background:#F5F5F5 ;
  line-height: 50px;
}
.footer a{
  color:#337aB7;
  text-decoration: none;
}
.main{
  color: #000000;
  width: 96%;
  margin: 30px auto;
}
.intro{
  width: 100%;
  margin:0 auto;
  border-radius: 5px;
  height: 300px;
  background:#F5F5F5 ;

}
.userintro{
  width: 100%;
  margin:0 auto;
  border-radius: 5px;
  height: 200px;
  background:#F5F5F5 ;
}
.welcome{
  padding-top: 50px;
  padding-left:50px;
  font-size: 50px;
  text-align: left;
  padding-bottom: 0;
  margin: 0;
}
.tech{
  text-align: left;
  padding-left:50px;
  margin: 0;
}
.show{
  overflow: hidden;
  width: 100%;
}
.show li{
  text-align: left;
  font-size: 18px;
}
.col{
  display: inline-block;
  float: left;
  width: 32%;
  height: 100px;
  overflow: hidden;
  padding-right: 20px;
  text-align: left;
  text-overflow: ellipsis;
}
.author{
  margin-top: 10px;
  margin-bottom: 3px;
}
.btnlist{
  padding-left: 50px;
  text-align: left;
}
.login{
  display: inline-block;
  padding-left: 15px;
  padding-right: 15px;
  height: 38px;
  line-height: 40px;
  background: -webkit-gradient(linear, left top, left bottom, from(#0068A6), to(#337aB7));
  color: #fff;
  text-align: center;
  border-radius: 5px;
  font-size: 20px;
  font-weight: 600;
  border: 1px solid #ccc;
  text-decoration: none;
  margin-right: 10px;
}
.register{
  display: inline-block;
  padding-left: 15px;
  padding-right: 15px;
  height: 38px;
  line-height: 40px;
  background: -webkit-gradient(linear, left top, left bottom, from(#fff), to(#F5F5F5));
  color: #000;
  text-align: center;
  border-radius: 5px;
  font-size: 20px;
  font-weight: 600;
  border: 1px solid #ccc;
  text-decoration: none;
}
.field{
  margin-top: 20px;
  margin-left: 50px;
  text-align: left;
  margin-bottom: 20px;
  border:none;
  border-bottom: 1px solid #ccc;
}
.label{
  font-size: 18px;
  font-weight: 600;
  line-height: 100%;
  display: inline-block;
  width: 10%;
  vertical-align: middle;
  text-align: right;
  padding-right: 10px;
}
.regheader{
  text-align: left;
  font-size: 24px;
  font-weight: 600;
}
.regform{
  text-align: left;
  padding-left: 100px;
  margin-bottom: 20px;
}
.regform input[type='text'],input[type='password']{
  width: 200px;
  height: 20px;
}
.regform input[type='submit']{
  width: 120px;
  height: 30px;
  color: #fff;
  background:-webkit-gradient(linear, left top, left bottom, from(#0068A6), to(#337aB7));
  border-radius: 5px;
  font-size: 20px;
}

.item{
  margin:20px;
  width: 100%;
}
.mess{
  font-size: 18px;
  color: #E73C3C;
  background: #F2DEDE;
  border-radius: 5px;
  width: 300px;
  text-align: center;
  margin-left: 100px;
}
.indexmes{
  height: 30px;
  line-height: 30px;
  background: #F2DEDE;
  color: #E73C3C;
}
.article{
  width: 60%;
  height: 30px;
  border-radius: 3px;
  border: 1px solid #A3C732;
  margin-top: 5px;
  font-size: 20px;
}
.submit{
  height: 40px;
  vertical-align: middle;
  padding: 0;
  margin-top: -5px;
  margin-left: 5px;
  width: 80px;
  background: #A3c732;
  font-size: 20px;
  border: none;
  border-radius: 5px;
  color: #fff;
}
.submitform{
  margin-top: 25px;
  margin-left: -10px;
}
.userlink{
  display: inline-block;
  text-decoration: none;
  line-height: 38px;
  height: 38px;
  vertical-align: middle;
  padding: 0;
  margin-top: -8px;
  margin-left: 5px;
  width: 90px;
  text-align: center;
  background: #A3c732;
  font-size: 20px;
  font-weight: 600;
  border-radius: 5px;
  color: #fff;
  border: 1px solid #ccc;
}
.usertitle{
  text-align: left;
  padding-top: 5px;
  padding-bottom: 0;
  padding-left: 5px;
  margin-bottom: 8px;
}
.usersuccess{
  height: 30px;
  background: #DFF0D8;
  line-height: 30px;
  color: #3C7668;
}
This The css file contains all the css in the project, so it is relatively large. So far, you can view the homepage effect as follows:
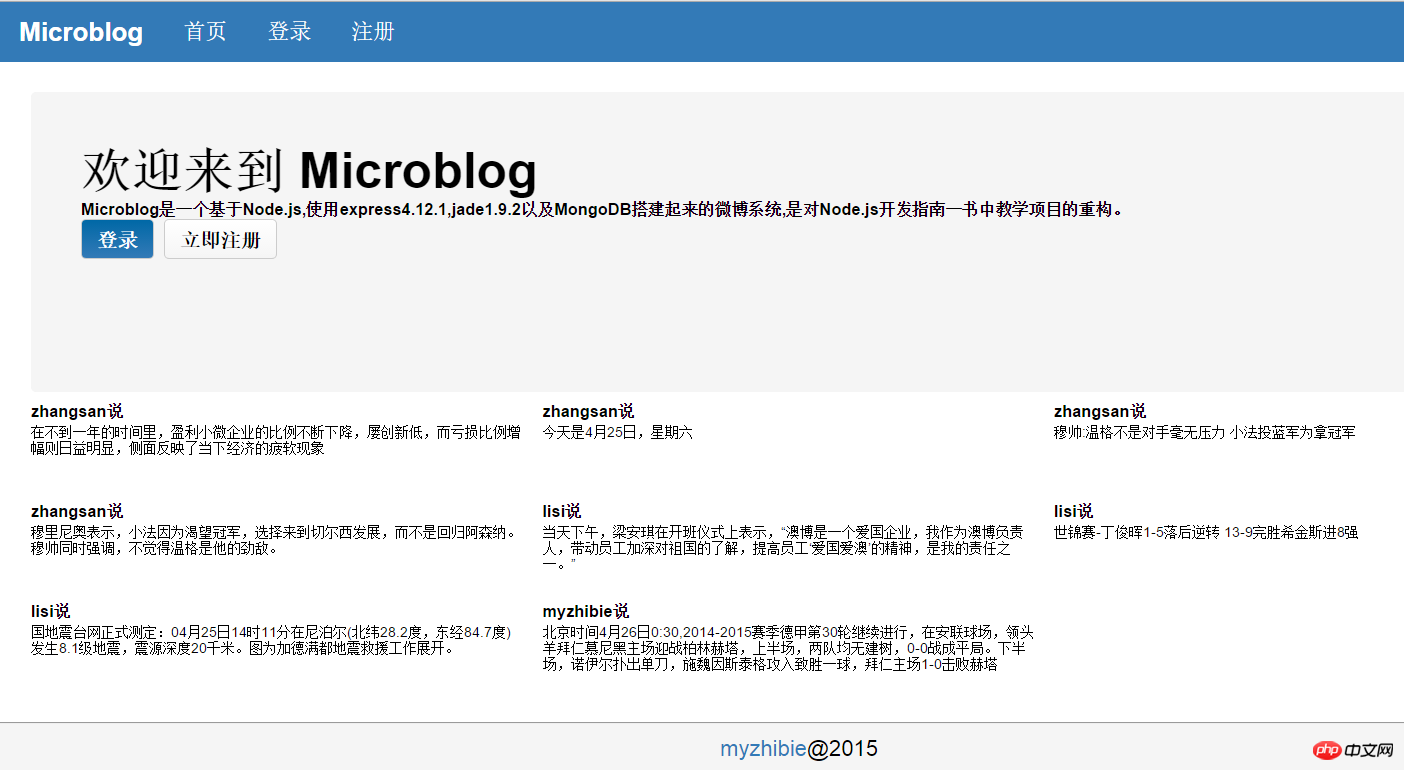
首页中的数据都是之前自己测试过程中加入的,这里主要为了查看首页效果,可以忽略这些数据。
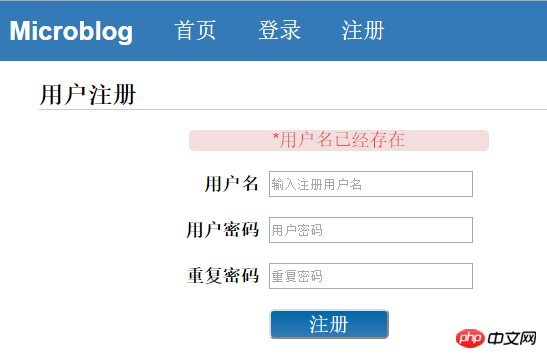
由于这里要演示用户注册登录模块,用户注册模块的模板文件reg.jade如下:
extends layout
block content
  h3.field.regheader #{title}
  form.regform(method='post')
    p.mess #{message}
    p.item
      label.label(for='username') 用户名
      input(type='text',placeholder='输入注册用户名',id='username',name='username')
    p.item
      label.label(for='password') 用户密码
      input(type='password',placeholder='用户密码',id='password',name='password')
    p.item
      label.label(for='passwordconf') 重复密码
      input(type='password',placeholder='重复密码',id='passwordconf',name='passwordconf')
    p.item
      label.label
      input(type='submit' id='sub',name='sub' value='注册')
用户登陆模板login.jade如下:
extends layout
block content
  h3.field.regheader #{title}
  form.regform(method='post')
    p.mess #{message}
    p.item
      label.label(for='username') 用户名
      input(type='text',placeholder='输入登陆用户名',id='username',name='username')
    p.item
      label.label(for='password') 用户密码
      input(type='password',placeholder='用户密码',id='password',name='password')
    p.item
      label.label
      input(type='submit' id='sub',name='sub' value='登陆')
最终用户注册效果如下:
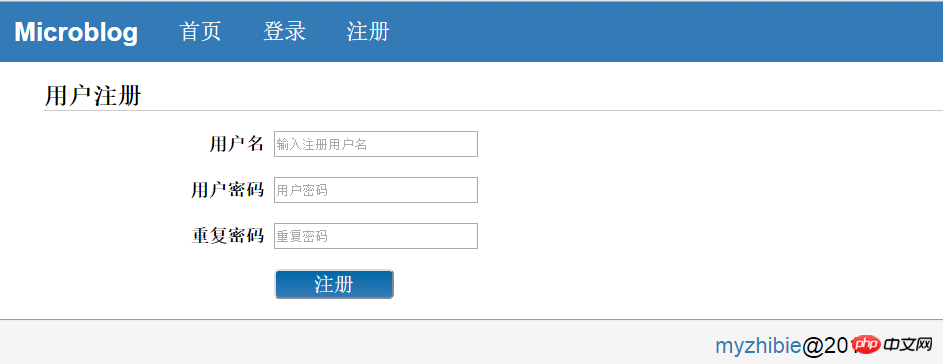
用户登录模块和这个效果相仿,就不查看了,少了一个重复密码的input而已。
下面我们需要编写用户注册的逻辑,在编写用户注册逻辑的前,用户数据需要持久化,所以首先要安装MongoDB数据库在自己的机器上.
MongoDB这种nosql类型的数据库,非常适合用户存储JSON对象类型的数据,有了mongoDB,就可以免去数据库表设计部分的工作,对比以前使用的mysql,sqlserver以及oracle还是非常方便的。关于mongoDB数据库的熟悉和学习,推荐其官网,官网详细介绍了该数据库的一切。英文不好可以去中文社区。同时为了使用nodejs来操作mongoDB数据库,我们使用mongoose这个对象模型,它是将mongoDB中的一个集合映射为nodejs中的一个model,然后在该model上提供操作这个集合的一些方法,使用它就可以避免我们自己利用nodejs提供的原生操作mongoDB数据库的语法去手写数据库CURD的方法,大大见晒了工作量,提高了开发效率。关于mongoose的学习,推荐去其官网,里面详述了它的安装,使用以及API调用情况。
解决了mongoDB安装和操作问题,我们来对数据库操作的model类,首先在项目路径下建立一个db.js文件,用来连接数据库并对数据库进行全局配置,如下
db.js
var settings=require("./settings");
var mongoose=require('mongoose');
mongoose.connect("mongodb://"+settings.ip+"/"+settings.db);
var db=mongoose.connection;
module.exports={
  "dbCon":db,
  "mongoose":mongoose
};
这里首先加载了配置文件settings.js文件,为了数据库便于灵活修改,我们将某些信息存储在配置文件中。然后加在了之前安装的mongoose模块,然后调用该模块的connect方法来连接我们配置的数据库,然后将连接以对象的形式返回供外部调用。
settings.js
module.exports={
  "ip":"localhost",
  "db":"microblog",
  "host":27071
};
MongoDB的默认端口是27071,一般可以使用默认端口即可,数据库连接大时候可以不指定端口,数据库名为microblog.
然后以db.js返回的数据库连接对象为基础,我们在项目根目录下创建一个models文件夹,用来存放数据模型。创建一个user.js映射我们数据库中的user集合(可以理解为user表),代码如下:
var mongoose=require('../db').mongoose;
var schema=new mongoose.Schema({
  name:'string',
  password:'string'
});
var User=mongoose.model('User',schema);
module.exports=User;
这里首先获得db.js中定义的连接对象,并以该对象为基础构造一个Schema(架构),mogoose操作数据库是以架构为基础的,类似于我们其他ORM模型中属性和方法的定义。这里我们定义了一个架构,拥有两个属性,name和password,都是string类型,对应用户的用户名和密码。然后利用该架构去创建一个model,该model上定义了对数据集合的增删改查等方法,不用我们自己再去定义和编写其他代码。在原书中这一节是利用node.js操作MongoDB数据库的原生API去定义了一个user对象,然后在user对象上自定义了一些CRUD的方法。可以看出,直接使用Mongoose可以大大减少开发量并且拥有更好的效率和性能。
到目前为止,我们已经有了界面(view),数据模型(model),就差逻辑代码(controller)没有编写了。在编写逻辑代码之前需要先说下express框架的特点以及它的整体运行方式。由于本人使用过一些类似的如Asp.net mvc,Yii以及thinkphp等MVC框架,使用express之后最大的感觉是这个框架够轻量级,尤其是express4.X之后,它仅仅保留了静态文件路径映射模块作为该框架本身的内置模块,其他的功能都以中间件的形式采用require(modulename)进行引入,只有引入后才能够使用该模块提供的功能。
express的工作原理是客户端发送一个request,express接到该请求,可以将它进行处理之后传递给其他中间件进行处理,最终处理完成之后,采用respond.end或者response.render进行页面渲染或响应,进行页面渲染的时候,采用参数传递页面需要的数据给对应模板引擎,模板引擎收到数据然后按照自己的语法进行替换生成对应的html,最终返回给浏览器进行渲染。
在express中,最关键的部分就是路有机制,我们所有基于请求做出的响应都是对该路由进行监听捕获的结果。举个例子,如果我们请求一个路径为http://localhost:3000/user,那么必须在routes文件夹下面的路径监听(暂且叫做监听吧)的js文件中编写对该请求的响应代码,诸如app.post('/user',function(...){...})之类的代码,如果不存在这样的代码,就会报一个404错误,因为请求没有得到响应,express实例不知道怎么去响应这个请求。以上就是express大致的原理和工作流程,对于它的学习,推荐去express官网直接去看文档,讲的很详细。
现在回到用户注册模块,我们注册用户常见的做法是注册成功之后就默认用户已经登录,直接跳转到欢迎登陆界面。在这里我们需要将用户数据在注册成功之后保存在session中,express框架对于session的支持是通过中间件express-session来的,使用方式依然是在npm 下安装,然后在项目主文件中使用require加载,最后调用其提供的API,为了使用session,必须先安装cookie的支持,这里利用cookie-parser这个中间件来为express框架提供cookie支持,它的具体使用方式可以去上面提供的地址自行查看。对于session,我们常见框架的做法是在服务器端将其存放到文件当中,由于这里我们有了MongoDB数据库,更理想的状态是将它存在数据库中,这样可以更灵活去控制。使用connect-mongo中间件可以将session存储到mongoDB中,具体使用方式可按地址查看。
上述概念明确之后,我们在项目根目录下的app.js(项目入口文件)中加载我们需要的中间件模块和自定义的模块如下:
app.js模块加载代码:
var express = require('express');
var path = require('path');
var favicon = require('serve-favicon');
var logger = require('morgan');
var cookieParser = require('cookie-parser');
var bodyParser = require('body-parser');
var routes = require('./routes/index');
var users = require('./routes/users');
var session = require("express-session");
var MongoStore=require('connect-mongo')(session);
var db = require('./db');
var app = express();

// view engine setup
app.set('views', path.join(__dirname, 'views'));
app.set('view engine', 'jade');

// uncomment after placing your favicon in /public
//app.use(favicon(__dirname + '/public/favicon.ico'));
app.use(logger('dev'));
app.use(bodyParser.json());
app.use(bodyParser.urlencoded({ extended: false }));
app.use(cookieParser());
app.use(express.static(path.join(__dirname, 'public')));
app.use(session({
  secret:"myzhibie",
  store:new MongoStore({
  mongooseConnection:db.dbCon
  })
}));


 app.use('/', routes);
 app.use('/users', users);
上述代码就是加载各个中间件模块并采用app.use来load这个模块,其中上述代码的最后一指定了将session存储在MongoDB数据库中,secret属性是对session的签名,通常是一个字符串,这是必选项,如果不写,
是无法完成将session存储进入数据库的,关于该功能的更详细介绍请查看文档,最后两句app.use('/',routes)和app.use('/users',users)代表对于这两个路由的访问处理代码我们封装在了routes和users模块中,er这两个模块都在routes文件夹下面。
完成了模块引入加载和一些基本的设置,现在来编写用户注册的逻辑代码,上面说到对于路径/的访问处理在routes模块中,这个模块指的就是routes文件夹下面的index.js,部分代码如下:
var express = require('express');
var crypto = require('crypto');
var router = express.Router();
var db=require('../db');
var User=require('../models/user');
var Post=require('../models/post');
/* GET home page. */
router.get('/', function(req, res, next) {
  Post.find({},function(err,posts){
    if(err){
      req.session.message=err.message;
      return res.redirect('/');
    }
    res.render('index',{
      posts:posts
    });
  });

});
//发表微博
router.post('/post',function(req, res, next){
  var currentUser=req.session.user;
  var post=new Post({
    user:currentUser.name,
    post:req.body.article,
    updated:getTime(new Date())
  });
  post.save(function(err){
    if(err){
      req.session.message=err.message;
      return res.redirect('/reg');
    }
    req.session.success="发表成功";
    res.redirect('/users/'+currentUser.name);
  });


});

function getTime(date){
  return date.getFullYear()+
  "-"+date.getMonth()+1+"-"+
  date.getDate()+" "+
  date.getHours()+":"+
  date.getMinutes();
}
router.get('/reg', isLogin);
//用户进入注册页面
router.get('/reg',function(req,res){
  res.render('reg',{title:"用户注册"});
});
router.post('/reg', isLogin);
//用户点击注册按钮
router.post('/reg',function(req,res){
  if(req.body['password']!= req.body['passwordconf']){
    req.session.error="两次密码不一致";
    return res.redirect('/reg');
  }
  var md5=crypto.createHash('md5');
  var password=md5.update(req.body.password).digest('base64');
  var newUser=new User({
    name:req.body['username'],
    password:password
  });
  User.findOne({name:newUser.name},function(err,user){
    if(user){
      err="用户名已经存在";
    }
    if(err){
      req.session.error=err;
      return res.redirect('/reg');
    }
    newUser.save(function(err){
      if(err){
        req.session.error=err.message;
        return res.redirect('/reg');
      }
      req.session.user=newUser;
      req.session.success="注册成功";
      res.redirect('/');
    });
  });
});
router.get('/login',isLogin);
router.get('/login',function(req,res){
  res.render('login',{title:"用户登陆"});
});
router.post('/login',isLogin);
router.post('/login',function(req,res){
  var md5=crypto.createHash('md5');
  var password=md5.update(req.body.password).digest('base64');
  User.findOne({name:req.body.username},function(err,user){
    if(!user){
      req.session.error="用户不存在";
      return res.redirect('/login');
    }
    if(user.password!=password){
      req.session.error="密码错误";
      return res.redirect('/login');
    }
      req.session.user=user;
      req.session.success="登录成功";
      res.redirect('/');
  });
});
router.get('/logout',function(req,res){
  req.session.user=null;
  res.redirect('/');
});
function isLogin(req,res,next){
  if(req.session.user){
    req.session.message="用户已登录";
    return res.redirect('/');
  }
  next();
}
module.exports = router;
上述代码1-6行都是对外部模块的引入,8-19行是对首页路由/的处理代码。117行将该模块定义为router供外部调用。我们主要看54-83行,这些代码就是用户注册的代码,54行监听来自用户对于/reg路由的post请求,首先判断两次密码是否一致,如果不一致在session中存储一个错误信息然后跳转到到当前页面显示错误信息,该错误信息供模板引擎显示给用户。如果两次密码一致首先对密码进行md5加密,使用的是nodejs提供的核心模块crypto,并生成一个对象模型User,该对象模型是mongoose中提供的一个model的实例,mongoose在它上面定义了一些操作数据库的方法。然后调用这个实例的findOne方法检测该用户是否已经存在,如果存在就保存错误信息到session并跳转到当前页显示错误。如果不存在这样一个用户就使用save方法进行用户信息保存,注册成功后将用户信息保存在session中,并保存一个success的提示信息,然后跳转到首页。这里需要注意一个坑,以前做php或者.net的时候,我们通常都是先查询数据库等数据库返回结果提示用户是否存在之后再进行用户的save然后在跳转,这是一种同步方式,跳转操作需要等待findOne操作返回结果之后才能进行。而nodejs中采用异步IO,最后的跳转操作需要放在findOne操作的回调函数中进行,跳转操作不必等待findone操作结束后执行,两者是异步的。如果将最后的redirect操作放在findOne操作外部而不是回调函数中,你会在控制台上得到一个Can't set headers after they are sent的错误,这是因为在fineOne以及save操作之前已经进行行了跳转,response响应已经结束,不能够重复响应请求。
到目前为止,用户注册模块基本上已经差不多完成了,最后需要说一下如何在页面上显示提示信息或者错误信息,之前我们将提示信息或者错误信息都保存在了session中,jade要显示错误信息,它是不能够直接访问session的,在express2.X即原书中是利用req.flash API+动态视图助手来实现的,就是发生错误的时候先将其利用req.flash方法存储下来,然后利用动态视图助手结合模板去渲染给用户。express4.X废弃了这种方式,我们可以利用req.flash 的原理来自己模拟一个这种机制,同时利用res.locals变量被保存起来,模板在渲染的时候是能够访问到服务端这个变量的。关于res.locals的更多介绍请查看文档。
为了模拟这种req.flash机制,我们在项目入口文件app.js(项目根目录下)添加一段代码如下:
app.use(function(req,res,next){
//  res.locals.user=req.session.user;
  var err=req.session.error;
  var success=req.session.success;
  var user=req.session.user;
  var mess=req.session.message;
  delete req.session.success;
  delete req.session.error;
  delete req.session.message;
  if(err){
    res.locals.message="*"+err;
  }
  if(mess){
    res.locals.message="*"+mess;
  }
  if(success){
    res.locals.success=success;
  }
  if(user){
    res.locals.user=user.name;
  }
  next();
});
这段代码的意思是用户请求和响应的时候,捕获session中存储的错误信息和用户提示,将其存储在response.locals变量中,这样模板就能够获取。对于错误信息和提示,由于只使用一次,存储后立即使用delete删除,对于用户信息,需要持久保存下来,则不删除。
这样,就能够显示用户提示或者错误信息。
下面演示一下完整的用户注册流程以及错误信息提示。
当用户名存在或密码不一致时,
当注册成功后跳转到首页并显示用户注册成功

同时对于注册成功和登陆成功拥有不同提示,如果该用户已经是登录状态则显示退出和发表文章按钮,如果没有登录,则显示的是登陆和立即注册按钮。
以上就是利用nodejs及express,mongoose,mongoDB,jade进行web开发的主要流程,由于该项目是对nodejs web开发指南一书中微博项目的重构,所以完整版的项目代码还有用户权限控制(已登录用户不能够注册或登陆并提示),用户进入个人页面发布微博并列表显示,同时首页显示最近发布的微博信息等功能。完整版代码点这里,由于篇幅以及时间问题,上述要点不可能一一展开讨论,本文就作为一个提纲,是对nodejs web开发的一个综述。
以上就是本文的全部内容,希望对大家的学习有所帮助,更多相关内容请关注PHP中文网!
相关推荐:
关于NodeJS、NPM安装配置步骤(windows版本) 以及环境变量的介绍
The above is the detailed content of How to quickly use node.js for web development. For more information, please follow other related articles on the PHP Chinese website!