
Home > Article > Web Front-end > Detailed explanation of using mint-ui in vue
This time I will bring you a detailed explanation of the use of mint-ui in vue. What are the precautions for using mint-ui in vue. The following is a practical case, let's take a look.
First put the mint-ui Chinese documentation
I have been using mint-ui recently and found that the explanations of some plug-ins are not very detailed, and the codes used in some examples cannot be found. The sharing on github contains all markdown files, and the content is the online document
. I happen to be using it. The information I can find online is not very detailed, so I write it myself. Keep updating...emmmmm, it should be okay, I'm so lazy. Hope it helps others.
Introduce the features of mint-ui
Feature introduction
1. How to use cell
Let’s throw a picture first↓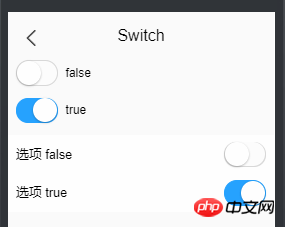
switch# When ##, I want to make text and switch on both sides of the list. The effect couldn't come out, and I found that there were many people like me who were desperately trying to find the switch documentation and find switch-related information. Then actually, you should use cell.
Use the cell layout and combine it with switch. produces the following results.

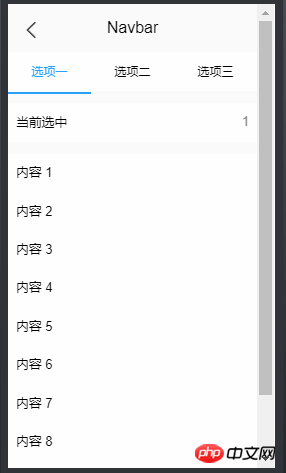
Navbar is like this↓
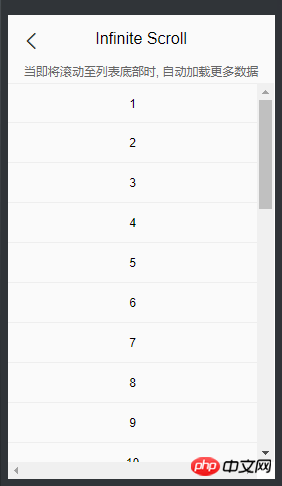
 Infinite scroll is like this↓
 Combining the two is to nest the Infinite scroll inside
, and then the effect will be Out. It’s simply purple.
  选项一
  选项二
The basic page will appear.
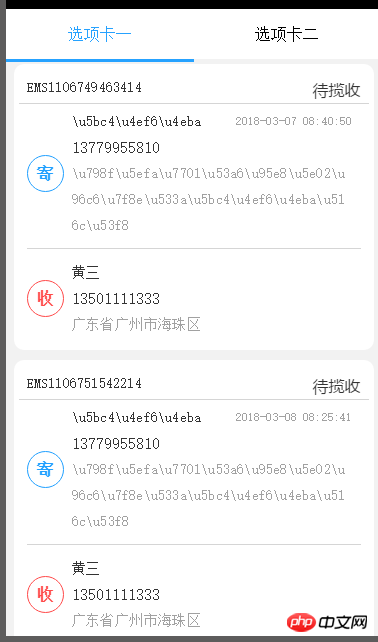 One small problem is that this is a page and the scroll bars are shared. In other words, after you pull out several pages of data in tab one, and then go to tab two, the position of the scroll bar will not change, and the content of your tab two will be pulled out for many pages of data. If a tab has less data, it will affect the data loading of other tabs.
After searching for this problem for a long time, I finally found a simple solution. In Infinite-Scroll, add a
v-if=selected == id, combine Infinite-scroll with the id and selected of the tab, and only when the selected selected corresponds to the id, the corresponding Infinite-Scroll. The code of Infinite-Scroll is as follows:
Modify the v-if conditions as needed.
The method bound to v-infinite-scroll will be executed for the first time after vue is mounted and before
before. No additional calls are required.
3. Picker, three-level linkage of addressThere is a very simple three-level linkage here, but I couldn’t find it when I wanted to use it before. It’s so troublesome to write one myself. Picture first
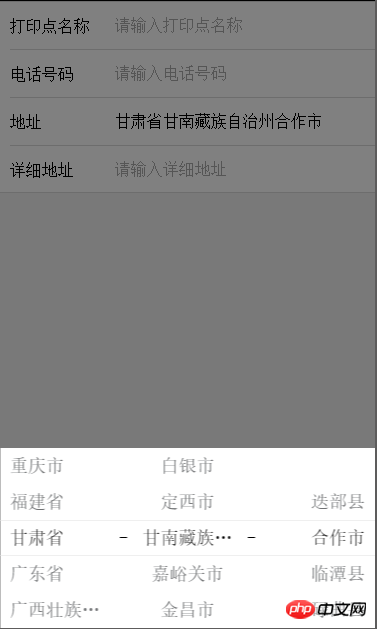
首先获取地址
getRegion(){
var root=this;
http.get("/region").then(function (data) {
root.regionArr=data.data.data;
for(var i=0;i
for(var i=0;i
for(var i=0;i
然后设置三级地址
onValuesChange(picker, values) {
var root=this;
var str_1=[];
var str_2=[];
for(var i in root.regionArr){
// 获取省,并重置市级名称
if(root.regionArr[i].value == values[0]){
for(var j in root.regionArr[i].children){
str_1.push(root.regionArr[i].children[j].value);
// 获取市级,并重置区级的名称
if(root.regionArr[i].children[j].value == values[1]){
// 当市级下不存在区名市,置空。
if(root.regionArr[i].children[j].children != null){
for(var k in root.regionArr[i].children[j].children){
str_2.push(root.regionArr[i].children[j].children[k].value);
}
}else{
str_2.push(" ");
}
}
}
picker.setSlotValues(1, str_1);
picker.setSlotValues(2, str_2);
}
}
// 赋值,初始时置为上一页返回的值
root.$set(root.printerMessage,'province',values[0] == null ? root.printerMessage.province : values[0]);
root.$set(root.printerMessage,'city',values[1] == null ? root.printerMessage.city : values[1]);
root.$set(root.printerMessage,'area',values[2] == null ? root.printerMessage.area : values[2]);
}
相信看了本文案例你已经掌握了方法,更多精彩请关注php中文网其它相关文章!
推荐阅读:
The above is the detailed content of Detailed explanation of using mint-ui in vue. For more information, please follow other related articles on the PHP Chinese website!