
Home > Article > Web Front-end > How to achieve carousel effect in js

The content of this article is to share with you how to achieve the carousel effect in js. It has a certain reference value. Friends in need can refer to it.
There are many examples on the Internet , the seamless scrolling I do here is to make the picture appear left and right scrolling by changing the left value of the element.
Let’s first take a look at the structural style of p css: 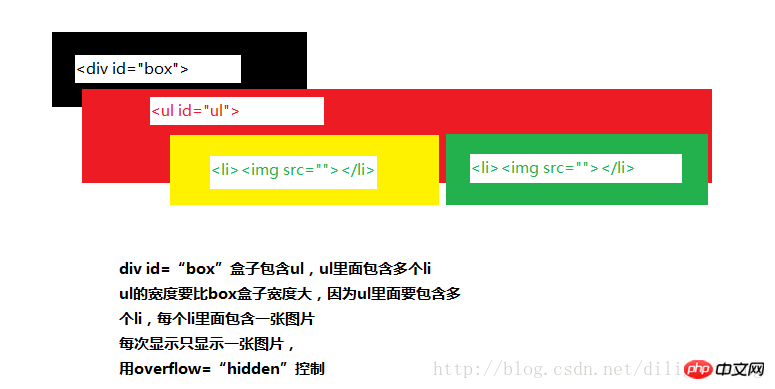
p css code


The display effect is as shown in the figure: 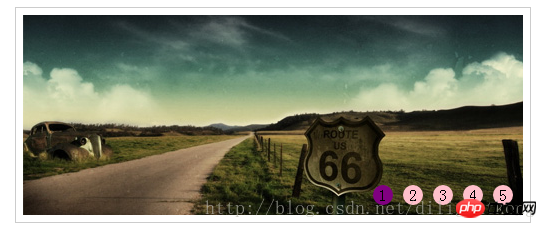
Next we want to js code,
Before we do this, we must understand that the small dots 1 2 3 are not hard-coded. It is determined based on the number of pictures in ul li, so we must first put p in ol li Remove the code
To achieve seamless scrolling, you need one more picture, that is, clone the first picture and put it at the end. At this time, the css layout is retained, and only p is left:
At this time, we use js code to generate small dots
var scroll = document.getElementById("scroll"); // 获得大盒子
var ul = document.getElementById("ul"); // 获得ul
var ulLis = ul.children;// 获得ul的盒子 以此来生成ol中li的个数
var liWidth = ul.children[0].offsetWidth;// 获得每个li的宽度
// 操作元素
// 因为要做无缝滚动,所以要克隆第一张,放到最后一张后面
// 1. 克隆元素
ul.appendChild(ul.children[0].cloneNode(true)); // 2.创建ol 和li
vaar ol = document.createElement("ol");//创建ol元素
scroll.appendChild(ol);// 把ol放到scroll盒子里面去
for (var i=0;iAt this time, after the ol li element, which is the small dot, is created, we continue to use js for animation
The animation part includes:
1. When the mouse passes through several small dots, which picture will be displayed, and the color of the small dots also changes
2. Automatic carousel of pictures , (this requires a timer)
3. When the mouse passes over the picture, the picture stops playing automatically (this requires clearing the timer)
4. When the mouse leaves the picture, the picture continues to rotate automatically (restart the timer)
Here we encapsulate an animate() animation function
// 动画函数 第一个参数,代表谁动 第二个参数 动多少
// 让图片做匀速运动,匀速动画的原理是 当前的位置 + 速度 即 offsetLeft + speed
function animate(obj,target){
// 首先清除掉定时器
clearInterval(obj.timer); // 用来判断 是+ 还是 - 即说明向左走还是向右走
var speed = obj.offsetLeft < target ? 15 : -15;
obj.timer = setInterval(function(){
var result = target - obj.offsetLeft;//它们的差值不会超过speed
obj.style.left = obj.offsetLeft + speed + "px"; // 有可能有小数的存在,所以在这里要做个判断
if (Math.abs(result) <= Math.abs(speed)) {
clearInterval(obj.timer);
obj.style.left = target + "px";
}
},10);
}Timer function
var timer = null; // 轮播图的定时器
var key = 0;// 控制播放的张数
var circle = 0;// 控制小圆点
timer = setInterval(autoplay,1000);// 自动轮播
function autoplay(){
/*自动轮播时,要对播放的张数key进行一个判断,如果播放的张数超过ulLis.length-1,
就要重头开始播放. 因为我们克隆了第一张并将其放在最后面,所以我们要从第二张图片开始播放*/
key++; // 先++
if(key > ulLis.length-1){// 后判断
ul.style.left = 0; // 迅速调回
key = 1; // 因为第6张是第一张,所以播放的时候是从第2张开始播放
} // 动画部分
animate(ul,-key*liWidth); // 小圆点circle 当显示第几张图片是,对应的小圆点的颜色也发生变化
/*同理,对小圆点也要有一个判断*/
circle++; if (circle > olLis.length-1) {
circle = 0;
} // 小圆点颜色发生变化
for (var i = 0 ; i < olLis.length;i++) { // 先清除掉所用的小圆点类名
olLis[i].className = "";
} // 给当前的小圆点 添加一个类名
olLis[circle].className = "current";
}Okay, here we show the main code, the specific code, check here to download js to achieve the carousel effect
The above is the detailed content of How to achieve carousel effect in js. For more information, please follow other related articles on the PHP Chinese website!