
Home > Article > Web Front-end > How to solve the problem that the files after webpack packaging are too large

本文主要和大家介绍了webpack打包之后的文件过大的解决方法,小编觉得挺不错的,现在分享给大家,也给大家做个参考。一起跟随小编过来看看吧,希望能帮助到大家。
以前一直使用 create-react-app 这个脚手架进行 react 开发,后面因为一些自定义的配置,转而使用 webpack 搭建一套自己的脚手架。但是在使用 webpack 打包之后发现,纳尼?怎么文件这么大??? 于是研究了一下如何处理 webpack 打包之后文件太大的情况,简单记录下来。
首先配置全局变量
首先,通过指定环境,告诉 webpack 我们当前处于 production 环境中,要按照 production 的方式去打包。
//指定环境,将process.env.NODE_ENV环境与library关联
 new Webpack.DefinePlugin({
 'process.env.NODE_ENV': JSON.stringify('production'),
 }),
优化 devtool 中的 source-map .
dev-tool 提供了很多种选项,用来增强我们 debug 的能力,我们熟知的有: source-map , inline-source-map , cheap-source-map 等等。详细的用法可以参考Devtool官方文档,Devtool配置对比 , webpack sourcemap 选项多种模式的一些解释 , https://webpack.github.io/docs/configuration.html#devtool 如果你的文件在打包之后突然变成好几M,那么不用想,肯定是因为 source-map 的原因。 source-map 在开发阶段确实很好用,调试起来很方便,但是在生产环境下就没必要部署了。 建议在 prod 环境下关闭 source-map 。
剥离css文件,单独打包
安装 webpack 插件 extract-text-webpack-plugin 。 npm install extract-text-webpack-plugin --save-dev 。 使用方法:
plugins:[
 new ExtractTextPlugin('static/css/styles.[contenthash].css'),
]
这里使用了 contenthash , webpack 会根据内容去生成 hash 值。
使用 UglifyJSPlugin 压缩。
通过 UglifyJSPlugin 可以压缩我们的 *.js 文件。 安装方法: npm install uglifyjs-webpack-plugin --save-dev 。 用法: UglifyJSPlugin详细用法
const UglifyJsPlugin = require('uglifyjs-webpack-plugin')
module.exports = {
 plugins: [
   new UglifyJSPlugin({
      parallel: 4,
      uglifyOptions: {
        output: {
          comments: false,
          beautify: false,
        },
        compress: {
          warnings: false
        },
      },
      cache: true,
    }),
 ]
}
提取公共依赖
使用 CommonsChunkPlugin 插件,将多个 js 文件进行提取,建立一个独立的文件。这个文件包含一些共用模块,浏这样览器只在刚开始的时候加载一次,便缓存起来供后续使用。而不用每次访问一个新界面时,再去加载一个更大的文件。
entry:{
app:'./entry',
vendor:['react','other-lib'],
},
plugins:[
new Webpack.optimize.CommonsChunkPlugin({
name: 'vendor',
}),
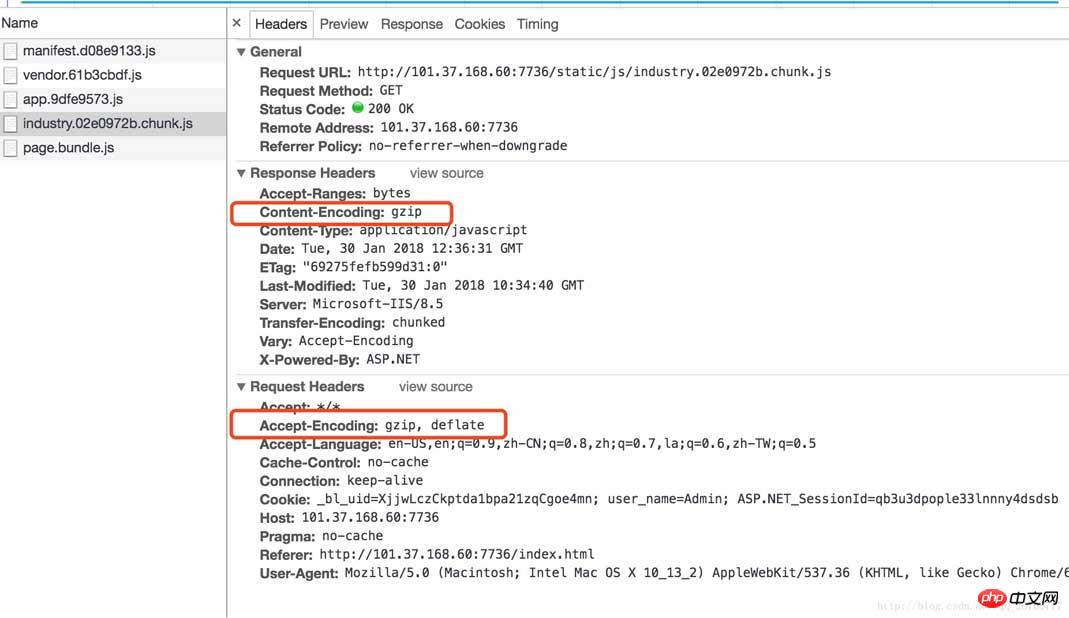
]开启gzip压缩
我们使用 compression-webpack-plugin 插件进行压缩。 安装: npm install compression-webpack-plugin --save-dev 。 compression-webpack-plugin 详细用法 使用:
const CompressionPlugin = require("compression-webpack-plugin");
plugins:[
new CompressionPlugin({
 asset: '[path].gz[query]', //目标资源名称。[file] 会被替换成原资源。[path] 会被替换成原资源路径,[query] 替换成原查询字符串
   algorithm: 'gzip',//算法
   test: new RegExp(
     '\\.(js|css)$'  //压缩 js 与 css
   ),
   threshold: 10240,//只处理比这个值大的资源。按字节计算
   minRatio: 0.8//只有压缩率比这个值小的资源才会被处理
})
]
压缩结果:

开启html压缩,自动添加上面生成的静态资源
添加插件 html-webpack-plugin
安装: npm install html-webpack-plugin --save-dev 用法:
plugins:[
 new HtmlWebpackPlugin({
   title: '',
     template: __dirname + '/../public/index.html',
     minify: {
       removeComments: true,
       collapseWhitespace: true,
       removeRedundantAttributes: true,
       useShortDoctype: true,
       removeEmptyAttributes: true,
       removeStyleLinkTypeAttributes: true,
       keepClosingSlash: true,
       minifyJS: true,
       minifyCSS: true,
       minifyURLs: true,
     },
     chunksSortMode:'dependency'
   }),
]
相关推荐:
vue-cli快速构建vue应用并实现webpack打包详解
The above is the detailed content of How to solve the problem that the files after webpack packaging are too large. For more information, please follow other related articles on the PHP Chinese website!