
Home > Article > Web Front-end > Detailed explanation of Node, Git, and Webhook automated deployment examples

本文主要和大家分享Node 、Git 、Webhook自动化部署实例详解,希望能帮助到大家。
首先确定需要完成的内容,明确需求:
1.监听指定 git 提交
2.执行指定多个脚本
而且因为我这边是需要分别对client 和server 目录分别执行部署命令。所以需要特别处理。
首先去域名管理那边增加一条A记录指向新的项目名称.因为Webhooks是需要外网域名的,因此先提前加一条。new.xxx.com
然后就是需要对服务器上Nginx做转发配置。
我的nginx是很久之前配置的
在etc/nginx/conf/vhost里增加一个文件,里面写入如下内容:
server
        {
                listen 80;
                server_name new.xxx.com;
                index index.html index.htm index.php default.html default.htm default.php;

                location / {

                        proxy_pass http://127.0.0.1:8801;
                }
                access_log off;

        }
将本地的8801转发出去。
然后重启一下Nginx nginx -s reload
然后git clone 仓库
因为项目用了mongodb数据库:
需要创建一个对应的数据库并添加权限。
1. 切换数据库到 abc
2. 指定了数据库 abc ,拥有权限: userAdmin
 db.createUser(
   {
     user: "123",
     pwd: "123",
     roles: [ { role: "userAdmin", db: "abc" } ]
   }
 )
 3. 验证下上面创建的账号 123

 db.auth('123','123')
 => 1
这个其实是最简单的,只要在你的github对应的项目仓库右侧选择settings
然后选择webhooks
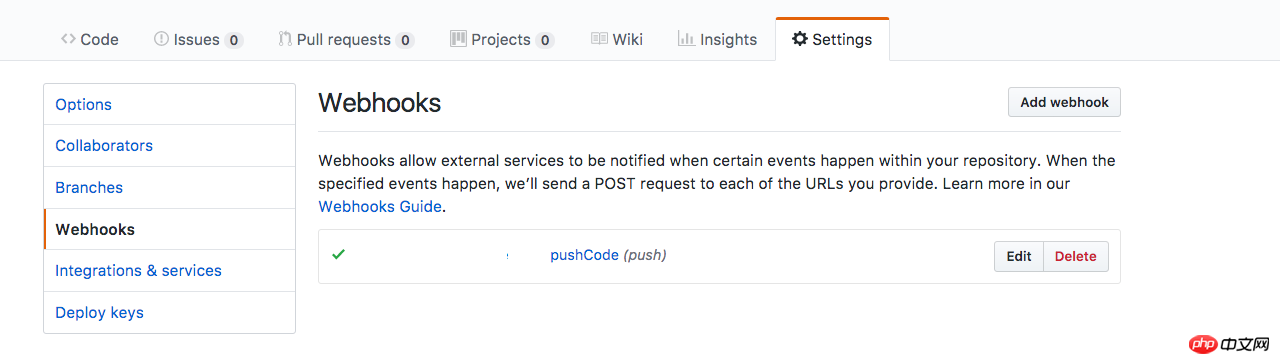
选择add webhook
然后按照如下配置即可:
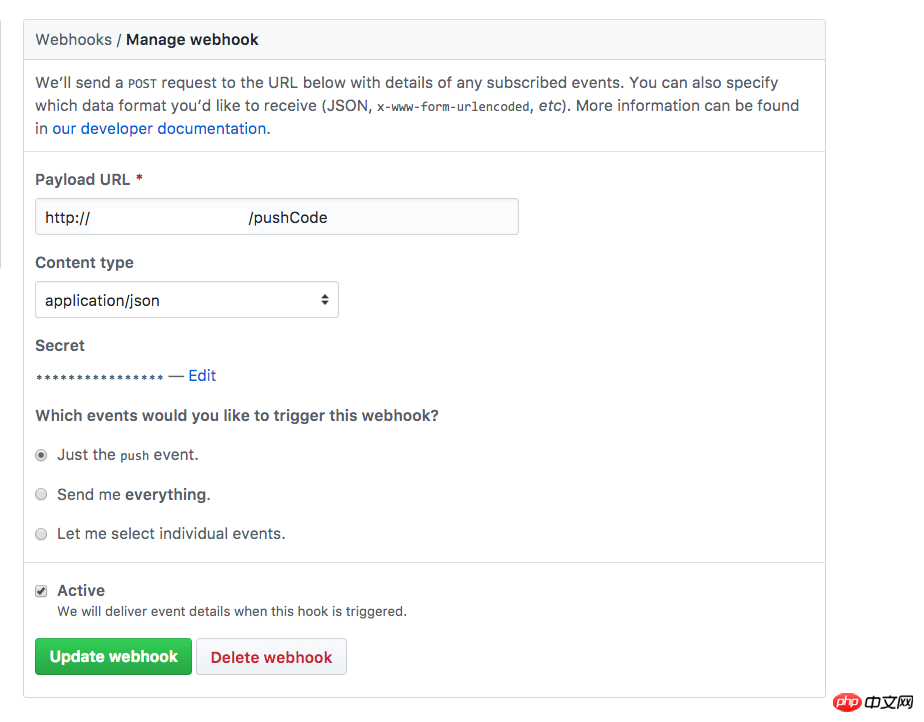
这里需要记住你自己设置的secret 以及你定义的推送动作,我这里是pushCode 。
写之前先来看下最终的目录结构:
├── README.md
├── clean.sh // 清理缓存,并且执行git命令
├── client
│   ├── autoClient.sh // client端自动监听
│   ├── build
│   ├── config
│   ├── package.json
│   ├── public
│   ├── scripts
│   ├── src
│   ├── tsconfig.json
│   ├── tsconfig.test.json
│   ├── tslint.json
│   ├── www
│   ├── yarn.lock
├── deploy
│   └── index.js // 监听webhook事件然后依次执行 clean.sh autoClient.sh autoServer.sh
├── package.json
├── server
│   ├── autoServer.sh // server端自动监听
│   ├── dist
│   ├── package.json
│   ├── src
│   ├── tsconfig.json
│   ├── tslint.json
│   └── yarn.lock
因为项目原因,脚本还需要做一些定制。
首先是client端,因为前端是用了typescript + React全家桶 所以打包起来特别慢,当在服务器build的时候,因为阿里云内存给的不够,所以会很卡。基于这个考虑,是打算本地bulid完之后,推送到git上,服务器去git pull。
而且前端还有个考虑是用什么跑前端代码。因为服务器没装类似服务,因此打算用node框架koa起一个HTTP服务来跑。
代码如下:
www目录中
app.js

const Koa = require('koa')
const morgan = require('koa-morgan')
const path = require('path');
const static = require('koa-static')
const fs = require('fs')
const app = new Koa();
// logger
app.use(morgan(':remote-addr - :remote-user [:date[clf]] ":method :url HTTP/:http-version" :status :res[content-length] :response-time ms'));
// static assets
app.use(static(path.join(__dirname,'../build')));
//异步读取文件的形式
// app.use(async (ctx,next) =>{
//     ctx.type = 'html';
//     ctx.body = await fs.createReadStream(path.resolve(__dirname, '..', './build', 'index.html'));
// })
module.exports = app;
index.js

'use strict';
const app = require('./app');
const PORT = process.env.PORT || 8801;
console.log('client start')
app.listen(PORT, () => {
  console.log(`App listening on port ${PORT}!`);
});
这样通过命令node ./www/index.js能够监听同级build目录。
当然这比较粗暴,还需要慢慢改进。
我们需要在client目录下建立autoClient.sh
#! /bin/bash
cd ./
echo 'client build'
kill -9 $(lsof -i:8801 |awk '{print $2}' | tail -n 2)
node ./www/index.js
用来自动执行监听动作。
因为多次推送监听的前端端口一致,如果不处理会报错。需要先根据端口号8801结束进程然后重新开启服务。
然后是server端,因为整个后端是用koa完成的,项目比较小,在服务端即时编译花费不了多少时间,因此直接执行yarn start( "start": "yarn run build && yarn run watch",)用来编译和监听。
在server目录里建立autoServer.sh
#! /bin/bash
cd ./
echo 'server start'
kill -9 $(lsof -i:8866 |awk '{print $2}' | tail -n 2)
yarn run start
同样我们需要在执行监听之前结束上一个端口的进程。
然后我们来看clean.sh 这个shell脚本是用来清理client目录下build文件夹。
#! /bin/bash
rm rf ./client/build
git reset --hard origin/master
git clean -f
git pull
可以看到 先清理了缓存然后再向服务器拉取代码.
最后我们来看部署的脚本deploy/index.js
var spawn = require('child_process').spawn
var http = require('http')
var spawn = require('child_process').spawn
var createHandler = require('github-webhook-handler')
var handler = createHandler({ path: '/pushCode', secret: 'xxx' }) // 根据git上webhook的配置填写
http.createServer(function (req, res) {
  handler(req, res, function (err) {
    res.statusCode = 404;
    res.end('no such location')
  })
}).listen(7777)

handler.on('error', function (err) {
  console.error('Error:', err.message)
})

// 监听 push 事件
handler.on('push', function (event) {
  console.log('Received a push event for %s to %s',
    event.payload.repository.name,
    event.payload.ref)
    init() // 每次拉取都重新监听
}
)
function rumCommand( cmd, args, cwd, callback ) {
  var child = spawn( cmd, args, {cwd: cwd} )
  var response = ''
  child.stdout.on('data', function( buffer ){ response += buffer.toString(); })
  child.stdout.on('end', function(){ callback( response ) })
}

function init() {
  rumCommand('sh', ['../clean.sh'], './' ,function( result ) { // 清理缓存
    console.log(result)
  })

  rumCommand('sh', ['../server/autoServer.sh'], '../server' ,function( result ) { // cLient端更新
    console.log(result)
  })

  rumCommand('sh', ['../client/autoClient.sh'], '../client' ,function( result ) { // server端更新
    console.log(result)
  })

}

init() // 脚本运行第一次默认指向一次
这里需要声明的是因为多目录下执行脚本需要对应的环境。因此才把脚本都分开放。
部署我们只需要对pm2 start deploy/index.js
然后就可以在本地开发完之后推送,服务器就能自动拉取代码并且部署。
相关推荐:
The above is the detailed content of Detailed explanation of Node, Git, and Webhook automated deployment examples. For more information, please follow other related articles on the PHP Chinese website!