Home > Article > Web Front-end > Detailed examples of methods for integrating other plug-ins in Angular2
Nowadays, when many friends come into contact with Angular2, they will inevitably use some other third-party plug-ins, and these plug-ins may be based on jQuery, and there is no corresponding version of angular2. Here I Let’s explain how to integrate a third-party jQuery plug-in in this case. We take Angular2's integration of zTree as an example to illustrate the integration ideas and process. This article mainly analyzes in detail how Angular2 integrates other plug-ins. Friends who are interested can learn from it.
zTree official website: http://www.treejs.cn/v3/main.php#_zTreeInfo
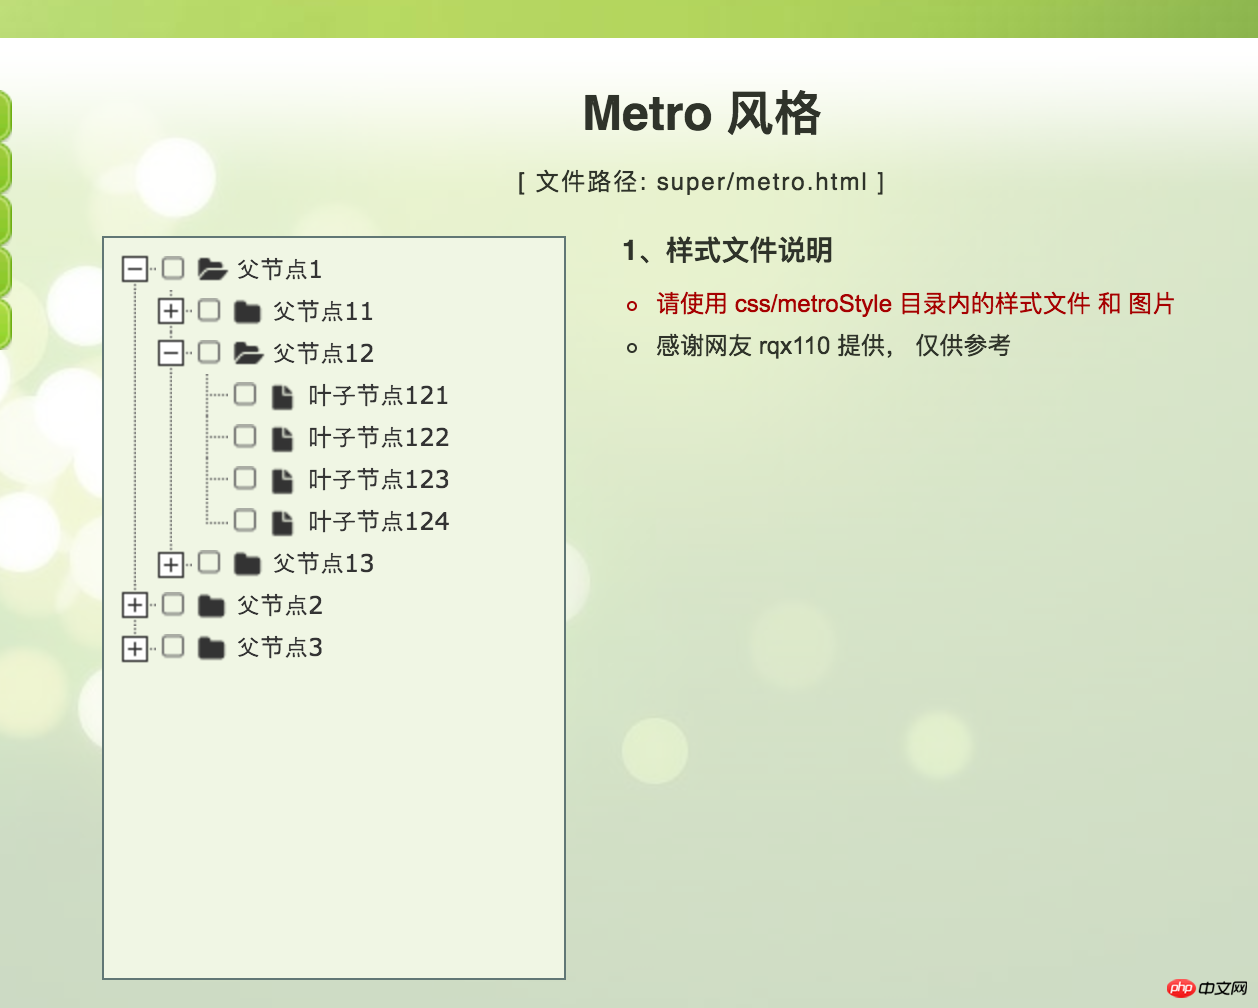
1. Generally when I want to integrate a plug-in like zTree , I will go directly to zTree’s online examples first, such as this example:
https://github.com/zTree/zTree_v3/blob/master/demo/cn/super/metro.html
The rendering is like this:

2. After seeing this effect, let’s look at the code of this example: The key code is here:
$(document).ready(function(){
      $.fn.zTree.init($("#treeDemo"), setting, zNodes);
 });
This code uses jQuery, right? If we want to integrate zTree, we must first introduce jQuery. So let’s not worry about how to integrate zTree. Let’s first solve the problem of how to introduce jQuery:
3. Introduce jQuery into the angular2 project. Of course, you can skip it if the plug-in you use does not depend on jQuery. This step, but generally third-party plug-ins rely on it, right. Introducing jQuery is relatively simple. Just introduce it in the index.html file:
After being introduced, we need to test whether jQuery is successfully introduced. We use the ng g c demo command to generate a component to test whether jQuery is successfully introduced:
 You will see that angular-cli has generated the necessary files for us, then we open the demo.component.ts file and add the following content after the import statement:
declare var $ : any;
import { Component, OnInit } from '@angular/core';declare var $ : any;
@Component({selector: 'app-demo',templateUrl: './demo.component.html',styleUrls: ['./demo.component.css']})export class DemoComponent implements OnInit {
constructor() { }
ngOnInit() {console.log($);}

}
After the above code is added, check the browser’s console output:
 you will find that the output is the jquery object $ that we usually use. At this point, we have successfully introduced jQuery into the project.
4. Introduce zTree’s js library and css library into the project. In the index.html file, we add the following code:
"After this, we can test whether zTree is introduced normally. We add the following code to the ngOnInit method in the demo.component.ts file: "console.log($ .fn.zTree);"Looking at the console, you will find the following output: In the output content, we can see that there is an init method used by zTree to initialize, so that we can actually write a zTree example
5.zTree example
We pass. Looking at the initialization code of zTree, you will find that it requires 3 parameters. The first parameter is a jQuery object, and the second parameter is the configuration object of zTree. For details, you can check the official documentation of zTree to see what parameters can be set ( http://www.treejs.cn/v3/api.php), the third parameter is used to generate the data of the zTree node
Here we directly copy the code of the demo in zTree to the demo. In the component.ts file:
import { Component, OnInit } from '@angular/core';
declare var $ : any;
@Component({
 selector: 'app-demo',
 templateUrl: './demo.component.html',
 styleUrls: ['./demo.component.css']
})
export class DemoComponent implements OnInit {
setting = {
  data: {
   simpleData: {
    enable: true
   }
  }
 };
 zNodes = [
  { id: 1, pId: 0, name: "父节点1 - 展开", open: true },
  { id: 11, pId: 1, name: "父节点11 - 折叠" },
  { id: 111, pId: 11, name: "叶子节点111" },
  { id: 112, pId: 11, name: "叶子节点112" },
  { id: 113, pId: 11, name: "叶子节点113" },
  { id: 114, pId: 11, name: "叶子节点114" },
  { id: 12, pId: 1, name: "父节点12 - 折叠" },
  { id: 121, pId: 12, name: "叶子节点121" },
  { id: 122, pId: 12, name: "叶子节点122" },
  { id: 123, pId: 12, name: "叶子节点123" },
  { id: 124, pId: 12, name: "叶子节点124" },
  { id: 13, pId: 1, name: "父节点13 - 没有子节点", isParent: true },
  { id: 2, pId: 0, name: "父节点2 - 折叠" },
  { id: 21, pId: 2, name: "父节点21 - 展开", open: true },
  { id: 211, pId: 21, name: "叶子节点211" },
  { id: 212, pId: 21, name: "叶子节点212" },
  { id: 213, pId: 21, name: "叶子节点213" },
  { id: 214, pId: 21, name: "叶子节点214" },
  { id: 22, pId: 2, name: "父节点22 - 折叠" },
  { id: 221, pId: 22, name: "叶子节点221" },
  { id: 222, pId: 22, name: "叶子节点222" },
  { id: 223, pId: 22, name: "叶子节点223" },
  { id: 224, pId: 22, name: "叶子节点224" },
  { id: 23, pId: 2, name: "父节点23 - 折叠" },
  { id: 231, pId: 23, name: "叶子节点231" },
  { id: 232, pId: 23, name: "叶子节点232" },
  { id: 233, pId: 23, name: "叶子节点233" },
  { id: 234, pId: 23, name: "叶子节点234" },
  { id: 3, pId: 0, name: "父节点3 - 没有子节点", isParent: true }
 ];
 constructor() {
 }
 ngOnInit() {
  $.fn.zTree($("#ztree"),this.setting,this.zNodes);
 }

}
Look at the above code, $.fn.zTree($("#ztree"),this.setting,this.zNodes) ;Here we use jQuery's id selector, then we need to add a ul element with the id of ztree in the template file demo.component.html
As for why ul, you can read the zTree documentation. Of course, you can also try other elements to see if it can be implemented. After reaching this point, zTree will be integrated by us.
Angular2 imitates WeChat to implement 9 image uploading and previewing example sharingangular2 routing transition animation example explanation
Get it in angular2 Node methods
The above is the detailed content of Detailed examples of methods for integrating other plug-ins in Angular2. For more information, please follow other related articles on the PHP Chinese website!