
Home > Article > Web Front-end > Angular combines with zTree to asynchronously load node data instance sharing

This article mainly shares with you the difficulties and methods of asynchronously loading node data using Angular combined with zTree. Friends who have needs in this regard can refer to it. I hope it can help everyone.
1 Prerequisite preparation
1.1 Create a new angular4 project

1.2 Go to zTree official website to download zTree
zTree official website: Click to go to
Version used by Sanshao: Click to go to

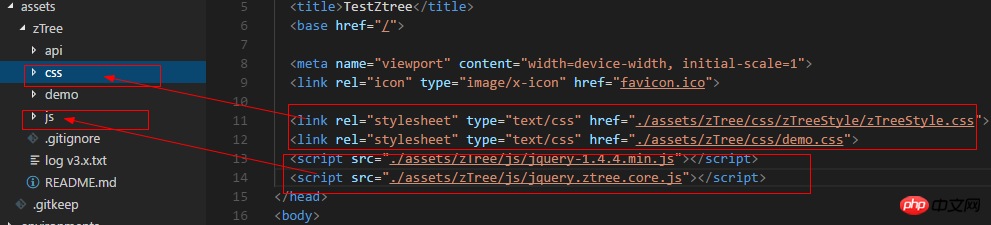
View Code2.2 Declare the jquery object in the TS fileTestZtree
declare var $ : any;2.3 Write code in TS file
##
import { Component, OnInit } from '@angular/core';
declare var $ : any;
@Component({
selector: 'app-root',
templateUrl: './app.component.html',
styleUrls: ['./app.component.scss']
})
export class AppComponent implements OnInit {
// setting = {
// view: {
// showLine: true,
// showIcon: true,
// fontCss: this.getFont
// },
// data: {
// simpleData: {
// enable: true,
// idKey: 'id',
// pIdKey: 'pId'
// }
// },
// callback: {
// onClick: this.onCzTreeOnClick
// }
// };
// zNodes = [
// {id: 1, pId: 0, name: '1 一级标题', open: true, iconOpen:"assets/zTree/css/zTreeStyle/img/diy/1_open.png", iconClose:"assets/zTree/css/zTreeStyle/img/diy/1_close.png"},
// {id: 11, pId: 1, name: '1.1 二级标题', open: true, font:{'background-color':'skyblue', 'color':'white'}},
// {id: 111, pId: 11, name: '1.1.1 三级标题 -> 博客园', url: 'http://www.cnblogs.com/NeverCtrl-C/'},
// {id: 112, pId: 11, name: '1.1.2 三级标题 -> 单击', click: "alert('你单击了')"},
// {id: 12, pId: 1, name: '1.2 二级标题'},
// {id: 2, pId: 0, name: '2 一级标题'}
// ]
// getFont(treeId, node) {
// return node.font ? node.font : {};
// }
// onCzTreeOnClick(event, treeId, treeNode, clickFlag) {
// alert(treeNode.name);
// }
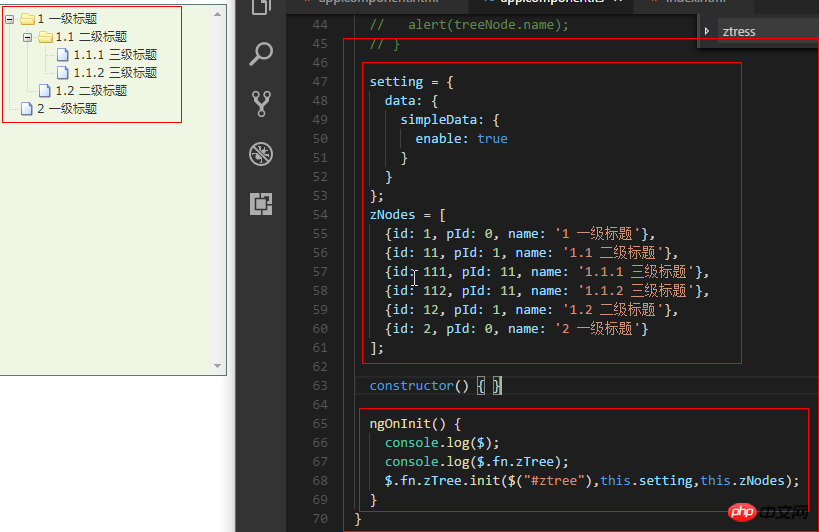
setting = {
data: {
simpleData: {
enable: true
}
}
};
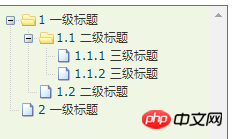
zNodes = [
{id: 1, pId: 0, name: '1 一级标题'},
{id: 11, pId: 1, name: '1.1 二级标题'},
{id: 111, pId: 11, name: '1.1.1 三级标题'},
{id: 112, pId: 11, name: '1.1.2 三级标题'},
{id: 12, pId: 1, name: '1.2 二级标题'},
{id: 2, pId: 0, name: '2 一级标题'}
];
constructor() { }
ngOnInit() {
console.log($);
console.log($.fn.zTree);
$.fn.zTree.init($("#ztree"),this.setting,this.zNodes);
}
}
2.4 In component HTML Write code in
 3 zTree basic functions
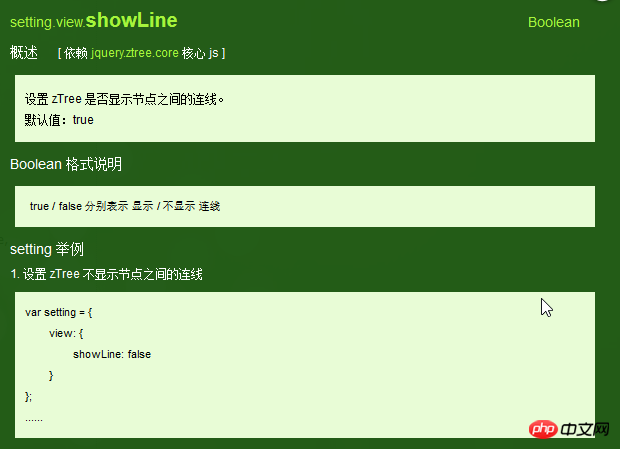
3.1 Not displayed Connecting lines
3.1.1 Official documentation
Does not display connecting lines between titles
 3.1.2 Programming steps
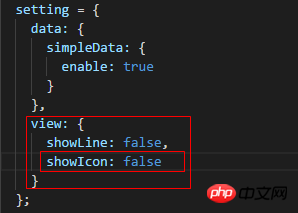
Just specify the value of showLine attribute as false in the basic configuration object
 setting = {
 data: {
 simpleData: {
 enable: true
 }
 },
 view: {
 showLine: false
 }
 };
3.2.1 Official document
Remove the icon in front of the node
#3.2.2 Programming steps
##
setting = {
 data: {
 simpleData: {
 enable: true
 }
 },
 view: {
 showLine: false,
 showIcon: false
 }
 };
View Code
3.3 Custom node icon
3.3.1 Official document
Change the icon of the node
3.3.2 Programming steps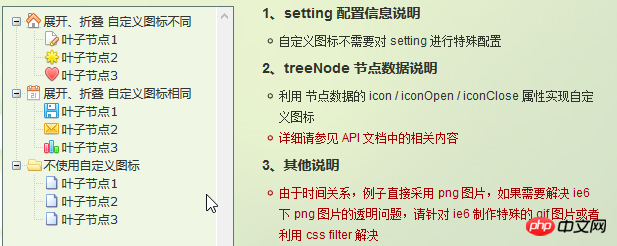 Set icon/iconOpen for treeNode node data /iconClose attribute
 3.4.1 Official document
Change the style of node font
3.4.2 Programming steps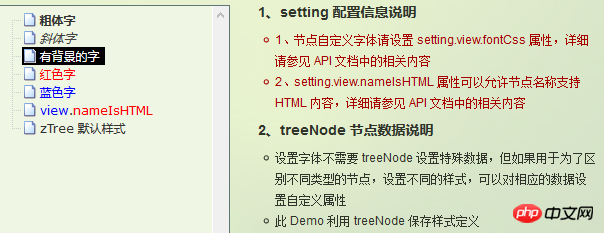 Just set the font attribute for the treeNode node data. The value of the font attribute is an object, and the content of the object is the same as the style data

##3.5 Hyperlink
3.5.1 Official document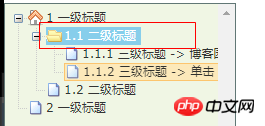
3.5.2 Programming steps
Set the url and click attributes for the treeNode node data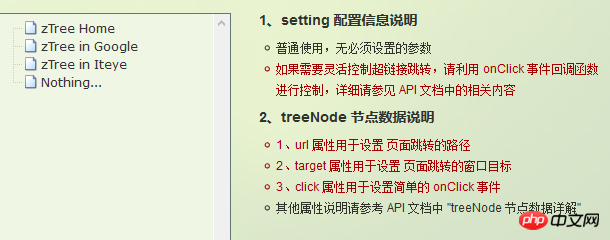
_self -> Open in the original window

 zNodes = [
 {id: 1, pId: 0, name: '1 一级标题', open: true, iconOpen:"assets/zTree/css/zTreeStyle/img/diy/1_open.png", iconClose:"assets/zTree/css/zTreeStyle/img/diy/1_close.png"},
 {id: 11, pId: 1, name: '1.1 二级标题', open: true, font:{'background-color':'skyblue', 'color':'white'}},
 {id: 111, pId: 11, name: '1.1.1 三级标题 -> 博客园1', url: 'http://www.cnblogs.com/NeverCtrl-C/', target: '_blank'},
 {id: 113, pId: 11, name: '1.1.1 三级标题 -> 博客园2', url: 'http://www.cnblogs.com/NeverCtrl-C/', target: '_self'},
 {id: 112, pId: 11, name: '1.1.2 三级标题 -> 单击', click: "alert('你单击了')"},
 {id: 12, pId: 1, name: '1.2 二级标题'},
 {id: 2, pId: 0, name: '2 一级标题'}
 ]
View Code
3.6.1 Official document
The corresponding method is triggered when the node title is clicked
Tips 01: You can use this usage in angular Implement route jump
3.6.2 编程步骤
设置基本配置对象的onClick属性
技巧01:onClick属性值是一个方法的引用,我们需要自己编写这个方法
setting = {
view: {
showLine: true,
showIcon: true,
fontCss: this.getFont
},
data: {
simpleData: {
enable: true,
idKey: 'id',
pIdKey: 'pId'
}
},
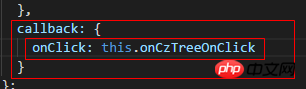
callback: {
onClick: this.onCzTreeOnClick
}
};
View Code
编写onClick触发方法

 onCzTreeOnClick(event, treeId, treeNode, clickFlag) {
 alert(treeNode.name);
 }
View Code
3.6.3 代码汇总
import { Component, OnInit } from '@angular/core';
declare var $ : any;
@Component({
selector: 'app-root',
templateUrl: './app.component.html',
styleUrls: ['./app.component.scss']
})
export class AppComponent implements OnInit {
setting = {
view: {
showLine: true,
showIcon: true,
fontCss: this.getFont
},
data: {
simpleData: {
enable: true,
idKey: 'id',
pIdKey: 'pId'
}
},
callback: {
onClick: this.onCzTreeOnClick
},
// async: {
// enable: true,
// url:"http://localhost:3000/data",
// type: "get",
// // autoParam:["id", "name=n", "level=lv"],
// // otherParam:{"otherParam":"zTreeAsyncTest"},
// dataFilter: this.filter
// }
};
zNodes = [
{id: 1, pId: 0, name: '1 一级标题', open: true, iconOpen:"assets/zTree/css/zTreeStyle/img/diy/1_open.png", iconClose:"assets/zTree/css/zTreeStyle/img/diy/1_close.png"},
{id: 11, pId: 1, name: '1.1 二级标题', open: true, font:{'background-color':'skyblue', 'color':'white'}},
{id: 111, pId: 11, name: '1.1.1 三级标题 -> 博客园1', url: 'http://www.cnblogs.com/NeverCtrl-C/', target: '_blank'},
{id: 113, pId: 11, name: '1.1.1 三级标题 -> 博客园2', url: 'http://www.cnblogs.com/NeverCtrl-C/', target: '_self'},
{id: 112, pId: 11, name: '1.1.2 三级标题 -> 单击', click: "alert('你单击了')"},
{id: 12, pId: 1, name: '1.2 二级标题'},
{id: 2, pId: 0, name: '2 一级标题'}
]
getFont(treeId, node) {
return node.font ? node.font : {};
}
// filter(treeId, parentNode,responseData) {
// console.log(responseData);
// if (responseData) {
// for(var i =0; i < responseData.length; i++) {
// responseData[i].name += "动态节点数据" + responseData[i].id;
// }
// }
// return responseData;
// }
onCzTreeOnClick(event, treeId, treeNode, clickFlag) {
alert(treeNode.name);
}
constructor() { }
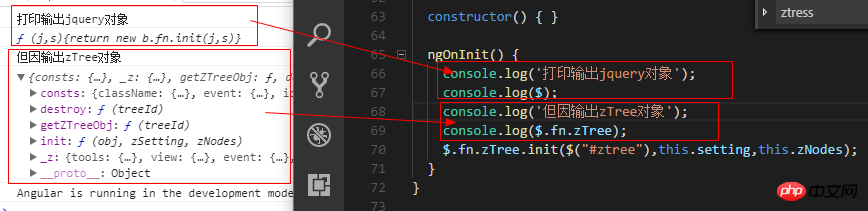
ngOnInit() {
console.log('打印输出jquery对象');
console.log($);
console.log('但因输出zTree对象');
console.log($.fn.zTree);
$.fn.zTree.init($("#ztree"),this.setting,this.zNodes);
// $.fn.zTree.init($("#ztree"),this.setting);
}
}View Code
3.7 异步加载节点数据
3.7.1 官方文档
节点的数据是从后台进行获取的
3.7.2 编程步骤
技巧01:异步加载节点数据时init方法不用传递第三个参数

> 准备一个后台用于返回JSON格式的数据
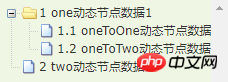
技巧01:返回的JSON数据是一个列表,格式为
[
 {
 "id": 1,
 "pId": 0,
 "name": "1 one"
 },
 {
 "id": 2,
 "pId": 0,
 "name": "2 two"
 }
 ]
技巧02:三少偷懒,是利用json-server模拟的后台数据,哈哈;json-server
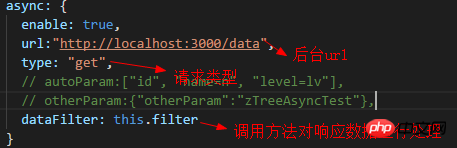
> 设置基本配置对象的async属性
 setting = {
 view: {
 showLine: true,
 showIcon: true,
 fontCss: this.getFont
 },
 data: {
 simpleData: {
 enable: true,
 idKey: 'id',
 pIdKey: 'pId'
 }
 },
 callback: {
 onClick: this.onCzTreeOnClick
 },
 async: {
 enable: true,
 url:"http://localhost:3000/data",
 type: "get",
 // autoParam:["id", "name=n", "level=lv"],
 // otherParam:{"otherParam":"zTreeAsyncTest"},
 dataFilter: this.filter
 }
 };
View Code
> 编写响应数据处理方法
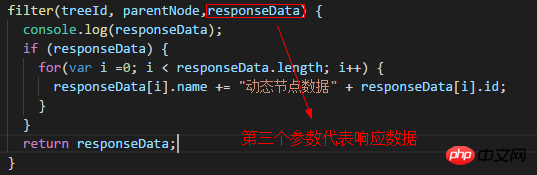
 filter(treeId, parentNode,responseData) {
 console.log(responseData);
 if (responseData) {
 for(var i =0; i < responseData.length; i++) {
 responseData[i].name += "动态节点数据" + responseData[i].id;
 }
 }
 return responseData;
 }
View Code
3.7.3 代码总汇
{
 "data":
 [
 {
 "id": 1,
 "pId": 0,
 "name": "1 one"
 },
 {
 "id": 11,
 "pId": 1,
 "name": "1.1 oneToOne"
 },
 {
 "id": 12,
 "pId": 1,
 "name": "1.2 oneToTwo"
 },
 {
 "id": 2,
 "pId": 0,
 "name": "2 two"
 }
 ]
}
模拟后台响应数据
HTML
import { Component, OnInit } from '@angular/core';
declare var $ : any;

@Component({
 selector: 'app-root',
 templateUrl: './app.component.html',
 styleUrls: ['./app.component.scss']
})
export class AppComponent implements OnInit {

 setting = {
 view: {
 showLine: true,
 showIcon: true,
 fontCss: this.getFont
 },
 data: {
 simpleData: {
 enable: true,
 idKey: 'id',
 pIdKey: 'pId'
 }
 },
 callback: {
 onClick: this.onCzTreeOnClick
 },
 async: {
 enable: true,
 url:"http://localhost:3000/data",
 type: "get",
 // autoParam:["id", "name=n", "level=lv"],
 // otherParam:{"otherParam":"zTreeAsyncTest"},
 dataFilter: this.filter
 }
 };

 // zNodes = [
 // {id: 1, pId: 0, name: '1 一级标题', open: true, iconOpen:"assets/zTree/css/zTreeStyle/img/diy/1_open.png", iconClose:"assets/zTree/css/zTreeStyle/img/diy/1_close.png"},
 // {id: 11, pId: 1, name: '1.1 二级标题', open: true, font:{'background-color':'skyblue', 'color':'white'}},
 // {id: 111, pId: 11, name: '1.1.1 三级标题 -> 博客园1', url: 'http://www.cnblogs.com/NeverCtrl-C/', target: '_blank'},
 // {id: 113, pId: 11, name: '1.1.1 三级标题 -> 博客园2', url: 'http://www.cnblogs.com/NeverCtrl-C/', target: '_self'},
 // {id: 112, pId: 11, name: '1.1.2 三级标题 -> 单击', click: "alert('你单击了')"},
 // {id: 12, pId: 1, name: '1.2 二级标题'},
 // {id: 2, pId: 0, name: '2 一级标题'}
 // ]

 getFont(treeId, node) {
 return node.font ? node.font : {};
 }

 filter(treeId, parentNode,responseData) {
 console.log(responseData);
 if (responseData) {
 for(var i =0; i < responseData.length; i++) {
 responseData[i].name += "动态节点数据" + responseData[i].id;
 }
 }
 return responseData;
 }

 onCzTreeOnClick(event, treeId, treeNode, clickFlag) {
 alert(treeNode.name);
 }

 constructor() { }

 ngOnInit() {
 console.log('打印输出jquery对象');
 console.log($);
 console.log('但因输出zTree对象');
 console.log($.fn.zTree);
 // $.fn.zTree.init($("#ztree"),this.setting,this.zNodes);
 $.fn.zTree.init($("#ztree"),this.setting);
 }
}
TS
3.7.4 效果展示
相关推荐:
The above is the detailed content of Angular combines with zTree to asynchronously load node data instance sharing. For more information, please follow other related articles on the PHP Chinese website!