

What is spi? The full name is Service Provider Interface. In simple translation, it is the service provider interface, which is a mechanism for finding service implementations.
In fact, it is a standard definition, or an implementation standard.
To use an example in life, you buy a Xiaomi mobile phone.
But the charger you use does not have to be a Xiaomi charger. You can use chargers from other manufacturers to charge. As long as it meets the protocol, port and other requirements, then it can be charged. This is also a hot-swappable idea, which is not fixed.
It’s the same in terms of code. I defined an interface, but I didn’t want to fix the specific implementation class, because if I wanted to change the implementation class, I would have to change the source code, which is often not possible. suitable.
Then I can also define a specification. When I need to change the implementation class or add other implementation classes later, I will comply with this specification. I can also dynamically discover these implementation classes.
In SpringBoot, the current SpringBoot platform has defined some norms and standards. Now I want the SpringBoot platform to accept me.
How should I do it?
It’s very simple, do things according to its standards and specifications.
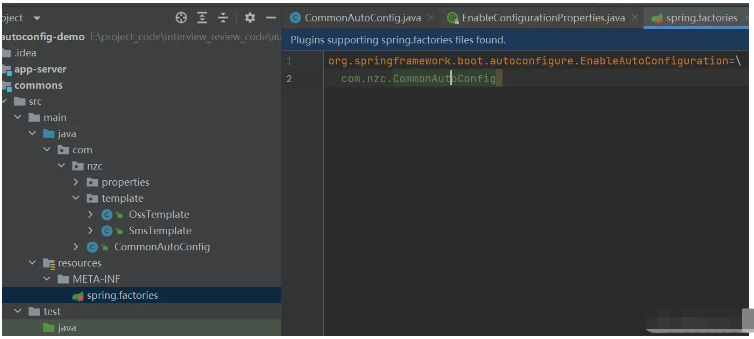
When SpringBoot starts, it will scan all jar packages resource/META-INF/spring.factories files, and use the reflection mechanism to Bean# based on the fully qualified name of the class. ##Load into the container.
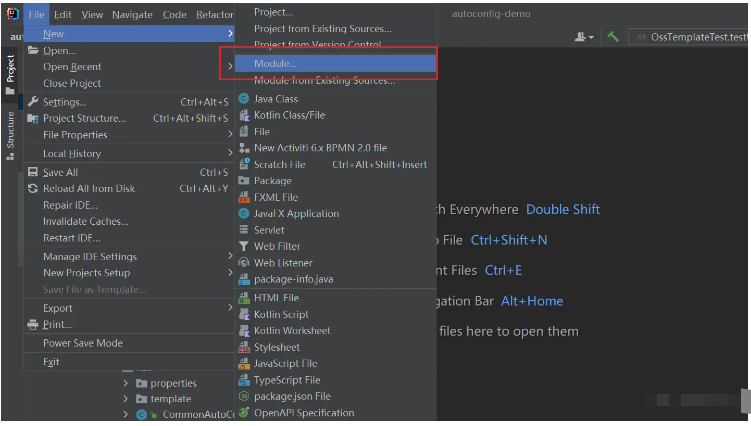
Let me talk about my little practice:
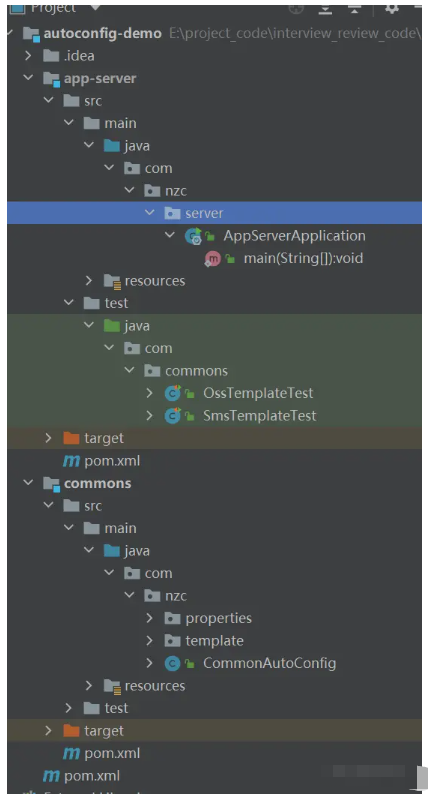
In this starter, implementThere are roughly four steps:
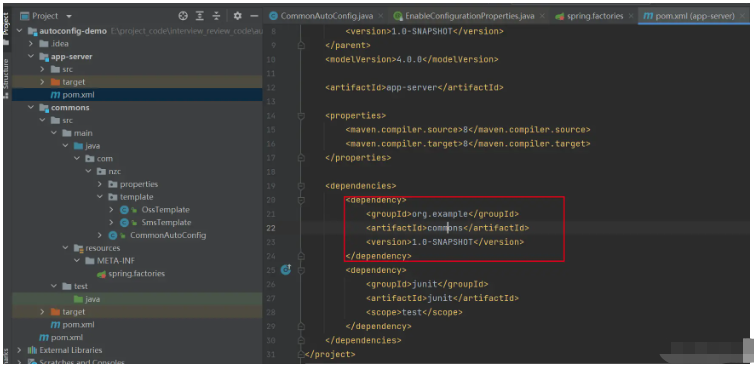
2.2. Prepare the Properties class is used to map the configuration file~org.springframework.boot spring-boot-starter-parent 2.5.2 8 8 org.projectlombok lombok org.springframework.boot spring-boot-starter-web org.springframework.boot spring-boot-starter org.springframework.boot spring-boot-starter-test org.springframework.boot spring-boot-configuration-processor true
 /**
  * @author Ning Zaichun
  */
 @Data
 @ConfigurationProperties(prefix = "nzc.oss")
 public class OssProperties {

     private String accessKey;
     private String secret;
     private String bucketName;
     private String url;
     private String endpoint;
 }
@Data
@ConfigurationProperties(prefix = "nzc.sms")
public class SmsProperties {
private String name;
}2.3. Prepare the class to be injected is the class we will finally inject into the SpringBoot operation through automatic assemblyMy here are OssTemplate and SmsTemplate
 /**
  * @author Ning Zaichun
  */
 public class OssTemplate {

     private OssProperties ossProperties;

     public OssTemplate(OssProperties ossProperties) {
         this.ossProperties = ossProperties;
     }

     public String test() {
         System.out.println(ossProperties.getBucketName());
         return "test";
     }
     public String upload(String filename, InputStream is) {
         // yourEndpoint填写Bucket所在地域对应的Endpoint。以华东1(杭州)为例,Endpoint填写为https://oss-cn-hangzhou.aliyuncs.com。
         String endpoint = ossProperties.getEndpoint();
         // 阿里云主账号AccessKey拥有所有API的访问权限,风险很高。强烈建议您创建并使用RAM账号进行API访问或日常运维,请登录 https://ram.console.aliyun.com 创建RAM账号。
         String accessKeyId = ossProperties.getAccessKey();
         String accessKeySecret = ossProperties.getSecret();

         // 创建OSSClient实例。
         OSS ossClient = new OSSClientBuilder().build(endpoint, accessKeyId, accessKeySecret);

         String storePath = new SimpleDateFormat("yyyy/MM/dd").format(new Date()) + "/" + UUID.randomUUID() + filename.substring(filename.lastIndexOf("."));

         System.out.println(storePath);
         // 依次填写Bucket名称(例如examplebucket)和Object完整路径(例如exampledir/exampleobject.txt)。Object完整路径中不能包含Bucket名称。
         ossClient.putObject(ossProperties.getBucketName(), storePath, is);

         String url = ossProperties.getUrl() + storePath;

         // 关闭OSSClient。
         ossClient.shutdown();
         return url + "#" + storePath;
    }

     public void remove(String fileUrl) {
         // yourEndpoint填写Bucket所在地域对应的Endpoint。以华东1(杭州)为例,Endpoint填写为https://oss-cn-hangzhou.aliyuncs.com。
         String endpoint = ossProperties.getEndpoint();
         // 阿里云账号AccessKey拥有所有API的访问权限,风险很高。强烈建议您创建并使用RAM用户进行API访问或日常运维,请登录RAM控制台创建RAM用户。
         String accessKeyId = ossProperties.getAccessKey();
         String accessKeySecret = ossProperties.getSecret();
         // 填写Bucket名称。
         String bucketName = ossProperties.getBucketName();
         // 填写文件完整路径。文件完整路径中不能包含Bucket名称。
         //2022/01/21/f0870eb3-4714-4fae-9fc3-35e72202f193.jpg
         String objectName = fileUrl;

         // 创建OSSClient实例。
         OSS ossClient = new OSSClientBuilder().build(endpoint, accessKeyId, accessKeySecret);

         // 删除文件或目录。如果要删除目录,目录必须为空。
         ossClient.deleteObject(bucketName, objectName);

         // 关闭OSSClient。
         ossClient.shutdown();
     }
 }
public class SmsTemplate {
private SmsProperties properties;
public SmsTemplate(SmsProperties properties) {
this.properties = properties;
}
public void sendSms(String mobile, String code){
System.out.println(properties.getName()+"=="+mobile+"===="+code);
}
}2.4, AutoConfiguration @EnableConfigurationProperties({
SmsProperties.class,
OssProperties.class
})
public class CommonAutoConfig {
@Bean
public SmsTemplate smsTemplate(SmsProperties smsProperties){
return new SmsTemplate(smsProperties);
}
@Bean
public OssTemplate ossTemplate(OssProperties ossProperties){
return new OssTemplate(ossProperties);
}
}org.springframework.boot.autoconfigure.EnableAutoConfiguration=\ com.nzc.CommonAutoConfig
If there are multiple ones:
org.springframework.boot.autoconfigure.EnableAutoConfiguration=\ com.nzc.CommonAutoConfig \ com.xxx.xxx
 spring:
   application:
     name: app-server
 nzc:
   sms:
     name: ningzaichun
   oss:
     accessKey: xxx
     secret: xxx
     endpoint: oss-cn-shenzhen.aliyuncs.com
     bucketName: xxx
     url: xxx
It can be used if you modify the oss configuration correctly~
Write test class:
@RunWith(SpringRunner.class)
@SpringBootTest(classes = AppServerApplication.class)
public class TemplateTest {
@Autowired
private OssTemplate ossTemplate;
@Test
public void testOss(){
String s = ossTemplate.test();
System.out.println(s);
}
@Test
public void testUpload(){
try {
File file = new File("D:\evectionflow01.png");
InputStream inputStream = new FileInputStream(file);
ossTemplate.upload("123.jpg",inputStream);
} catch (FileNotFoundException e) {
e.printStackTrace();
}
}
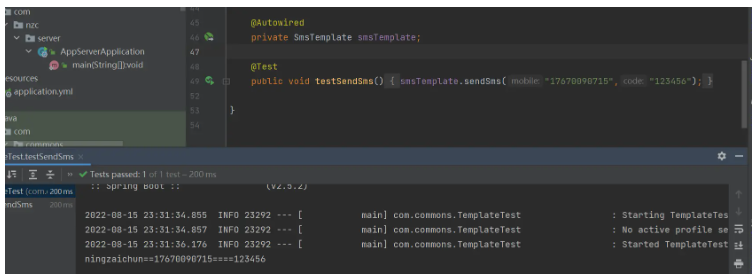
@Autowired
private SmsTemplate smsTemplate;
@Test
public void testSendSms(){
smsTemplate.sendSms("17670090715","123456");
}
}Prove that it can be used~
The above is the detailed content of How to implement SpringBoot SPI mechanism and custom starter. For more information, please follow other related articles on the PHP Chinese website!