

Project creation can be created in IDEA.
Notes:
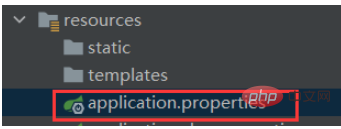
1. All files need to be placed in:
The same level or lower level directory of the Application file In
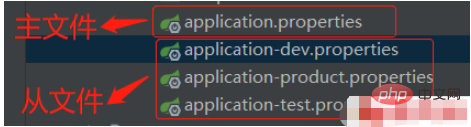
2, application.properties is the main core configuration file of the spring-boot project, and there can only be one core configuration file.
3. When using core configuration files in multiple environments, the file name must start with application-!
application-xxx.properties
(1) Development environment
# 开发环境配置文件
server.port=9000
server.servlet.context-path=/
(2) Test
# 测试环境配置文件
( 3) Production environment
# 生产环境配置文件
server.port=7000
Activate our customized configuration file in the main core configuration file:
#激活我们编写的application-xxx.properties配置文件
spring.profiles.active=dev
4, @Value annotation
spring -How to obtain the custom configuration attributes of the boot core configuration file
The following method can only obtain one attribute at a time!
For example: a configuration website=http://www.baidu.com is customized in the application.properties file
Get this customized configuration in the project:
Use annotation@ Value("${website}")
You can also write a default value. If there is no configuration item, the default value will be used@Value("${website: default value}")
package com.lxc.sprint_boot_01.web;

import org.springframework.beans.factory.annotation.Value;
import org.springframework.stereotype.Controller;
import org.springframework.web.bind.annotation.RequestMapping;
import org.springframework.web.bind.annotation.ResponseBody;

import javax.management.ValueExp;
import javax.print.DocFlavor;

// 声明控制层
@Controller
public class IndexController {
    @Value("${website:values}")
    private String name; // 此时website值会赋给name属性

    @RequestMapping(value = "/self")
    @ResponseBody
    public String self() {
        return name;
    }
}
5, @Component and @ConfigurationProperties(prefix="xxx") annotations
spring-boot core configuration file maps our custom configuration properties to an object (the obtained An object), the prerequisite for using this method: the attributes in the configuration file must be prefixed!
application.properties file
# 属性前边必须要有前缀,我这里前缀是user
user.name=lxc
user.password=123456
config -> user.java file
package com.lxc.sprint_boot_01.config;

import org.springframework.boot.context.properties.ConfigurationProperties;
import org.springframework.stereotype.Component;

@Component // 将此类交给spring容器管理
@ConfigurationProperties(prefix = "user") // 配置属性注解,参数前缀必须有值,值为我们定义的前缀
// 配置完上边的两个注解,下边把配置文件中的属性映射到下边类中去
public class User {
    private String username;
    private String password;

    public String getUsername() {
        return username;
    }

    public void setUsername(String username) {
        this.username = username;
    }

    public String getPassword() {
        return password;
    }

    public void setPassword(String password) {
        this.password = password;
    }
}
Calling properties
package com.lxc.sprint_boot_01.web;
import com.lxc.sprint_boot_01.config.User;
import org.springframework.beans.factory.annotation.Autowired;
import org.springframework.beans.factory.annotation.Value;
import org.springframework.stereotype.Controller;
import org.springframework.web.bind.annotation.RequestMapping;
import org.springframework.web.bind.annotation.ResponseBody;
import javax.management.ValueExp;
import javax.print.DocFlavor;
import java.util.HashMap;
import java.util.Map;
// 声明控制层
@Controller
public class IndexController {
@Autowired // @Autowired 把User类注入进来
private User user;
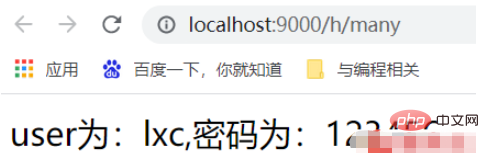
@RequestMapping(value = "/many")
@ResponseBody
public String many() {
return "user为:"+user.getUsername() + ",密码为:"+user.getPassword();
}
}
6. If you add the @ConfigurationProperties annotation, the red warning above will appear. To solve this problem, you need to add a dependency package:
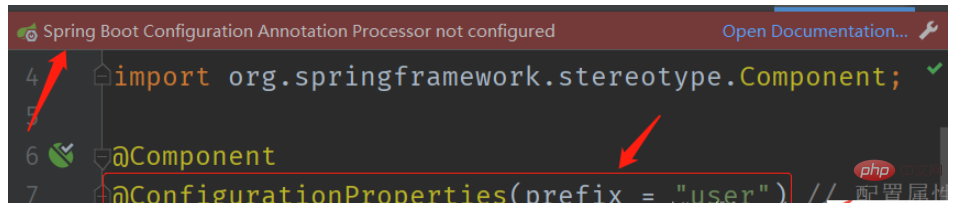
    org.springframework.boot
    spring-boot-configuration-processor
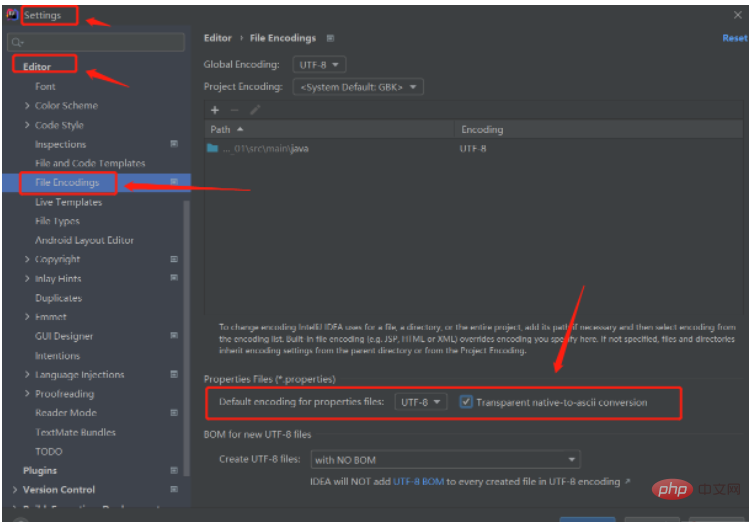
7 . If there are Chinese characters in application.properties, garbled characters will appear. Solve the problem of Chinese garbled characters in IDEA:
8. In the configuration file The key-value pair of the attribute cannot have spaces, otherwise there will be problems with parsing!
9. Spring-boo integrated JSP
First create the webapp folder under the main folder, and then click file -> ; project structure -> Modules As shown below:
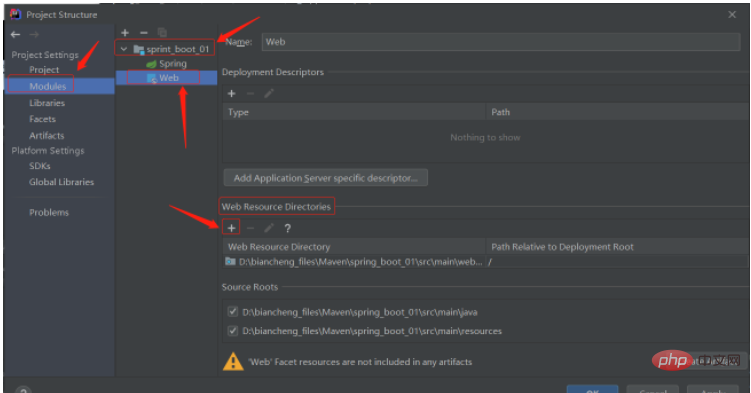
Then click on the file on the right in the pop-up dialog box and find us Just confirm the webapp folder you just created. The details are as follows:
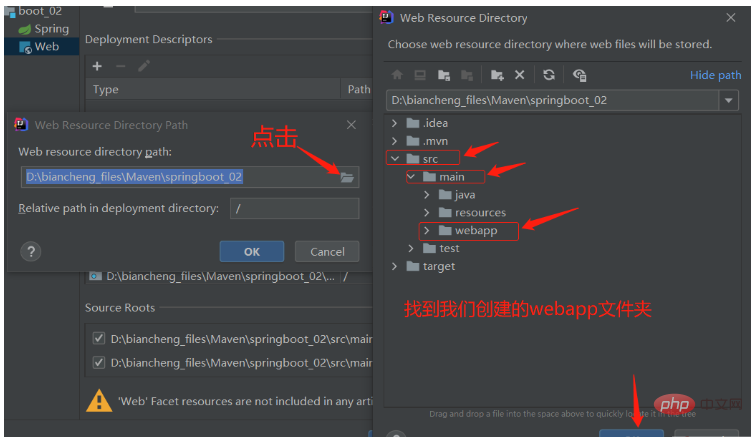
At this time, the webapp will become as follows.

Configuring the pom.xml file
(1) First introduce the spring-boot embedded tomcat's dependency on jsp parsing, and jsp cannot be parsed without adding it
    org.apache.tomcat.embed
    tomcat-embed-jasper
(2) Spring-boot uses the front-end engine thymeleaf by default. Now we want to use springboot to inherit jsp. We need to manually specify the path of the last compiled jsp, and the path for springboot to inherit jsp is the location specified by springboot: META-INF/resources
            src/main/webapp

            META-INF/resources


                *.*
The last step: Configure the view parser in application.properties
# 配置视图解析器
spring.mvc.view.prefix=/ # 前缀
spring.mvc.view.suffix=.jsp # 后缀
Create a .jsp page, test:
    Title


  ${msg}
package com.lxc.boot_02;

import org.springframework.stereotype.Controller;
import org.springframework.web.bind.annotation.RequestMapping;
import org.springframework.web.servlet.ModelAndView;

@Controller
public class controller {
    // 写法一:
    @RequestMapping(value="/say")
    public ModelAndView say() {
        ModelAndView mv = new ModelAndView();
        // 给视图传值
        mv.addObject("msg", "hello");
        // 设置 最终视图的名称
        mv.setViewName("say");
        return mv;
    }

    // 写法二:把视图和模型拆分开,返回一个视图(return的是视图的名字)
    @RequestMapping(value = "/index")
    public String index(Model model) {
        model.addAttribute("msg", "lxc;");
        return "say";
    }
}
Writing method one:
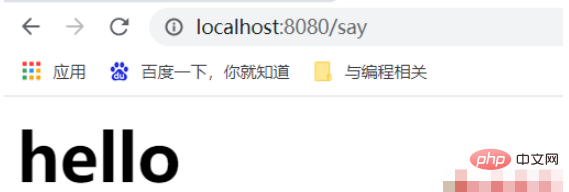
Writing method two:
The above is the detailed content of Springboot Getting Started Usage Example Analysis. For more information, please follow other related articles on the PHP Chinese website!