

Apache Shiro is an open source lightweight Java security framework that provides authentication, authorization, password management, session management and other functions. Compared with Spring Security, the Shiro framework is more intuitive and easier to use, while also providing robust security.
In the traditional SSM framework, there are still many configuration steps to manually integrate Shiro. For Spring Boot, Shiro officially provides shiro-spring-boot-web-starter to simplify Shiro in Spring Boot. configuration.
First create an ordinary Spring Boot Web project, add Shiro dependencies and page template dependencies
  org.apache.shiro
  shiro-spring-boot-web-starter
  1.4.0


  org.springframework.boot
  spring-boot-starter-thymeleaf


  com.github.theborakompanioni
  thymeleaf-extras-shiro
  2.0.0
Not here You need to add spring-boot-starter-web dependency, shiro-spring-boot-web-starter already depends on spring-boot-starter-web. At the same time, the Thymeleaf template is used here. In order to use the shiro tag in Thymeleaf, the thymeleaf-extras-shiro dependency is added.
Configure the basic information of Shiro in application.properties
# Enable Shiro configuration, the default is true
shiro.enabled =true
# Enable Shiro Web configuration, the default is true
shiro.web.enabled=true
# Configure the login address, the default is /login.jsp
shiro.loginUrl=/login
# Configure the address for successful login, the default is /
shiro.successUrl=/index
# Unauthorized default jump address
shiro.unauthorizedUrl=/unauthorized
# Whether to allow sessions through URL parameters Tracking, if the website supports cookies, you can turn off this option, the default is true
shiro.sessionManager.sessionIdUrlRewritingEnabled=true
# Whether to allow session tracking through cookies, the default is true
shiro.sessionManager.sessionIdCookieEnabled=true
Then configure Shiro in the Java code and provide the two most basic beans.
@Configuration
public class ShiroConfig {
    @Bean
    public Realm realm() {
        TextConfigurationRealm realm = new TextConfigurationRealm();
        realm.setUserDefinitions("sang=123,user\n admin=123,admin");
        realm.setRoleDefinitions("admin=read,write\n user=read");
        return realm;
    }
    @Bean
    public ShiroFilterChainDefinition shiroFilterChainDefinition() {
        DefaultShiroFilterChainDefinition chainDefinition =
                new DefaultShiroFilterChainDefinition();
        chainDefinition.addPathDefinition("/login", "anon");
        chainDefinition.addPathDefinition("/doLogin", "anon");
        chainDefinition.addPathDefinition("/logout", "logout");
        chainDefinition.addPathDefinition("/**", "authc");
        return chainDefinition;
    }
    @Bean
    public ShiroDialect shiroDialect() {
        return new ShiroDialect();
    }
}
Code explanation:
Provided here There are two key Beans, one is Realm and the other is ShiroFilterChainDefinition. As for ShiroDialect, it is to support the use of Shiro tags in Thymeleaf. If you do not use Shiro tags in Thymeleaf, you do not need to provide ShiroDialect
Realm can be a custom Realm or Shiro For the provided Realm, for the sake of simplicity, no database connection is configured here. Two users are directly configured: sang/123 and admin/123, corresponding to the roles user and admin respectively.
ShiroFilterChainDefinition Bean is configured with basic filtering rules. "/login" and "/doLogin" can be accessed anonymously. "/logout" is a logout request, and other requests are Authentication is required before access
Then configure the login interface and page access interface
@Controller
public class UserController {
    @PostMapping("/doLogin")
    public String doLogin(String username, String password, Model model) {
        UsernamePasswordToken token = new UsernamePasswordToken(username, password);
        Subject subject = SecurityUtils.getSubject();
        try {
            subject.login(token);
        } catch (AuthenticationException e) {
            model.addAttribute("error", "用户名或密码输入错误!");
            return "login";
        }
        return "redirect:/index";
    }
    @RequiresRoles("admin")
    @GetMapping("/admin")
    public String admin() {
        return "admin";
    }
    @RequiresRoles(value = {"admin", "user"}, logical = Logical.OR)
    @GetMapping("/user")
    public String user() {
        return "user";
    }
}
Code explanation:
In the doLogin method , first build a UsernamePasswordToken instance, then obtain a Subject object and call the login method in the object to perform the login operation. During the execution of the login operation, when an exception is thrown, it means that the login failed, and the error message is returned to the login view; When the login is successful, it is redirected to "/index"
Next exposes two interfaces "/admin" and "/user". For the "/admin" interface, you need to have Only the admin role can be accessed; for the "/user" interface, you can access it if you have either the admin role or the user role
For other interfaces that can be accessed without a role, directly in Just configure it in WebMvc
@Configuration
public class WebMvcConfig implements WebMvcConfigurer{
    @Override
    public void addViewControllers(ViewControllerRegistry registry) {
        registry.addViewController("/login").setViewName("login");
        registry.addViewController("/index").setViewName("index");
        registry.addViewController("/unauthorized").setViewName("unauthorized");
    }
}
Next, create a global exception handler for global exception handling. This is mainly to handle authorization exceptions
@ControllerAdvice
public class ExceptionController {
    @ExceptionHandler(AuthorizationException.class)
    public ModelAndView error(AuthorizationException e) {
        ModelAndView mv = new ModelAndView("unauthorized");
        mv.addObject("error", e.getMessage());
        return mv;
    }
}
When the user accesses unauthorized resources, jump to unauthorized view and carries an error message.
After the configuration is completed, finally create 5 HTML pages in the resources/templates directory for testing.
(1)index.html
Title
Hello,
注销登录
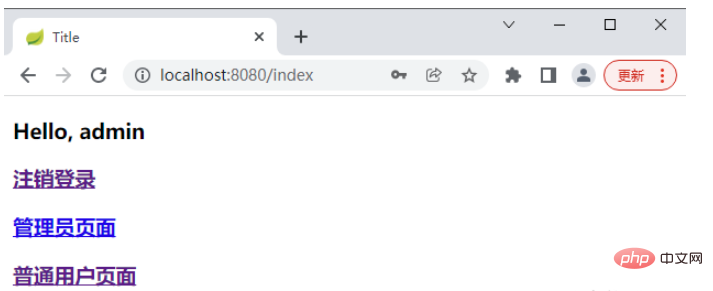
管理员页面
普通用户页面
(2)login.html
Title
(3)user.html
    Title


普通用户页面
(4)admin. html
    Title


管理员页面
(5) unauthorized.html
Title
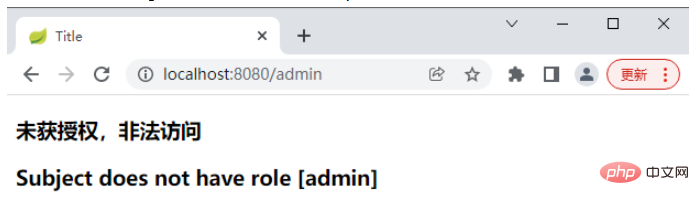
未获授权,非法访问
Start the project, visit the login page, and use sang/123 to log in
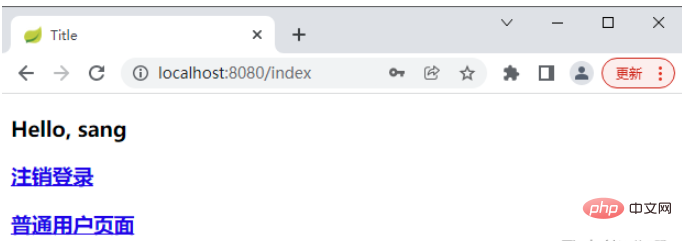
Note: Since the sang user does not have the admin role, the page after successful login does not have a hyperlink to the administrator page.
Then use admin/123 to log in.
If the user uses sang to log in and then accesses: http://localhost:8080/admin, it will jump to the unauthorized page
The above is the detailed content of How to use the Shiro framework of SpringBoot security management. For more information, please follow other related articles on the PHP Chinese website!