

The following editor will bring you an article on implementing java web crawler in hadoop (example explanation). The editor thinks it’s pretty good, so I’ll share it with you now and give it as a reference. Let’s follow the editor and take a look.
The implementation of this web crawler will be related to big data. Based on the first two articles about implementing web crawlers in Java and implementing web crawlers in heritrix, this time we need to complete a complete data collection, data upload, data analysis, data result reading, and data visualization.
You need to use
Cygwin: a UNIX-like simulation environment running on the windows platform, directly search and download it online, and install it;
Hadoop : Configure the Hadoop environment and implement a distributed file system (Hadoop Distributed File System), referred to as HDFS, which is used to directly upload and save the collected data to HDFS, and then analyze it with MapReduce;
Eclipse: Write code, You need to import the hadoop jar package to create a MapReduce project;
Jsoup: HTML parsing jar package, combined with regular expressions, can better parse web page source code;
----- >
Directory:
1. Configure Cygwin
##2. Configuration Hadoop Huang Jing
3. Eclipse development environment setup
4. Network data crawling (jsoup)
-------->1. Install and configure Cygwin
Download the Cygwin installation file from the official website, address: https ://cygwin.com/install.htmlAfter downloading and running, enter the installation interface. Download the expansion package directly from the network image during installation. At least you need to select the ssh and ssl support package After installation, enter the cygwin console interface, Run ssh-host- config command, install SSHInput: no, yes, ntsec, no, noNote: under win7, it needs to be changed to yes, yes, ntsec, no, yes, enter the password and confirm this After step is completed, a Cygwin sshd service will be configured in the windows operating system and the service can be started.
2. Configure the Hadoop environment
Modify the hadoop-env.sh file and add the JAVA_HOME location setting of the JDK installation directory.# The java implementation to use. Required. export JAVA_HOME=/cygdrive/c/Java/jdk1.7.0_67Note in the picture:
Program Files is abbreviated as PROGRA~1
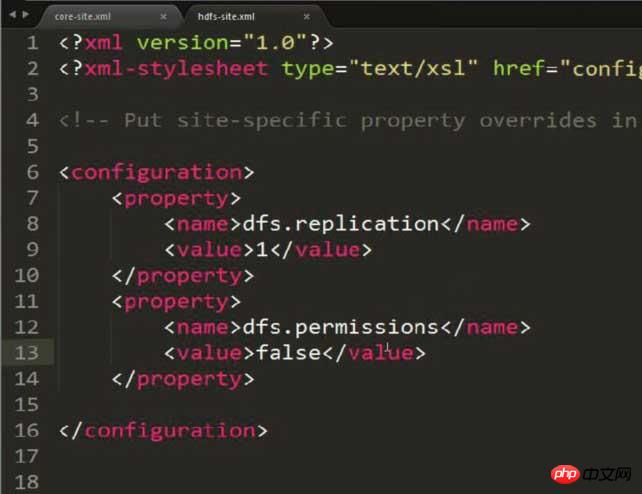
 ##Modify hdfs -site.xml, set the storage copy to 1 (because the configuration is pseudo-distributed)
dfs.replication
1
Note: This picture has an extra property added , the content is to solve possible permission problems! ! ! HDFS: Hadoop Distributed File System
You can dynamically CRUD files or folders through commands in HDFS
Note that permissions may occur The problem needs to be avoided by configuring the following content in hdfs-site.xml:
dfs.permissions
false
 Modify mapred-site.xml, Set the server and port number where JobTracker runs (since it is currently running on this machine, just write localhost directly, and the port can be bound to any idle port)
mapred.job.tracker
localhost:9001
fs.default.name
hdfs://localhost:9000
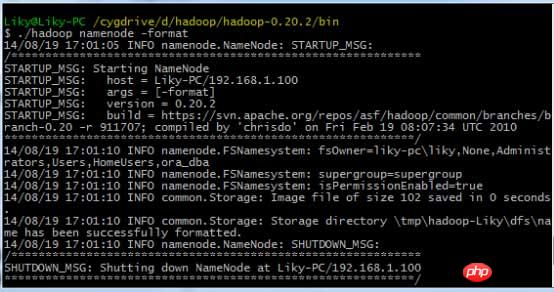
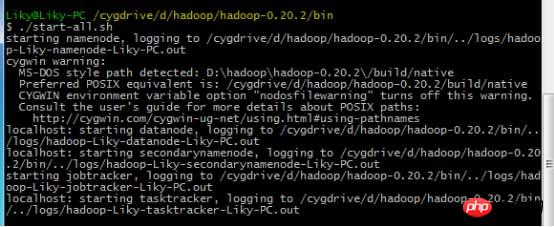
 In the bin directory, format the HDFS file system (must be formatted before first use), and then enter the startup command:
3. Eclipse development environment setup
This is what I wrote The general configuration method is given in Blog Big Data [2] HDFS deployment and file reading and writing (including eclipse hadoop configuration). However, it needs to be improved at this time.Copy the hadoop-eclipse-plugin.jar support package in hadoop to the plugin directory of eclipse to add Hadoop support to eclipse.
After starting Eclipse, switch to the MapReduce interface.
在windows工具选项选择showviews的others里面查找map/reduce locations。
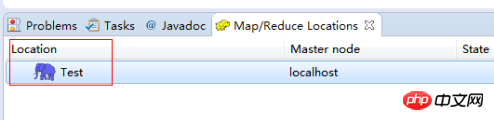
在Map/Reduce Locations窗口中建立一个Hadoop Location,以便与Hadoop进行关联。


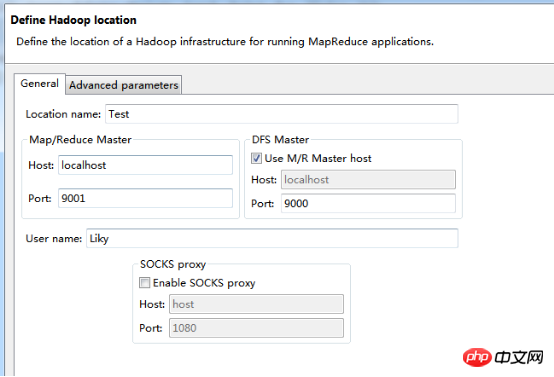
注意:此处的两个端口应为你配置hadoop的时候设置的端口!!!
完成后会建立好一个Hadoop Location
在左侧的DFS Location中,还可以看到HDFS中的各个目录

并且你可以在其目录下自由创建文件夹来存取数据。
下面你就可以创建mapreduce项目了,方法同正常创建一样。
4、网络数据爬取
现在我们通过编写一段程序,来将爬取的新闻内容的有效信息保存到HDFS中。
此时就有了两种网络爬虫的方法:
其一就是利用heritrix工具获取的数据;
其一就是java代码结合jsoup编写的网络爬虫。
方法一的信息保存到HDFS:
直接读取生成的本地文件,用jsoup解析html,此时需要将jsoup的jar包导入到项目中。
package org.liky.sina.save;

//这里用到了JSoup开发包,该包可以很简单的提取到HTML中的有效信息
import java.io.File;
import org.apache.hadoop.conf.Configuration;
import org.apache.hadoop.fs.FSDataOutputStream;
import org.apache.hadoop.fs.FileSystem;
import org.apache.hadoop.fs.Path;
import org.jsoup.Jsoup;
import org.jsoup.nodes.Document;
import org.jsoup.nodes.Element;
import org.jsoup.select.Elements;

public class SinaNewsData {

  private static Configuration conf = new Configuration();

  private static FileSystem fs;

  private static Path path;

  private static int count = 0;

  public static void main(String[] args) {
    parseAllFile(new File(
        "E:/heritrix-1.12.1/jobs/sina_news_job_02-20170814013255352/mirror/"));
  }

  public static void parseAllFile(File file) {
    // 判断类型
    if (file.isDirectory()) {
      // 文件夹
      File[] allFile = file.listFiles();
      if (allFile != null) {
        for (File f : allFile) {
          parseAllFile(f);
        }
      }
    } else {
      // 文件
      if (file.getName().endsWith(".html")
          || file.getName().endsWith(".shtml")) {
        parseContent(file.getAbsolutePath());
      }
    }
  }

  public static void parseContent(String filePath) {
    try {
        //用jsoup的方法读取文件路径
      Document doc = Jsoup.parse(new File(filePath), "utf-8");
      //读取标题
      String title = doc.title();
      Elements descElem = doc.getElementsByAttributeValue("name",
          "description");
      Element descE = descElem.first();

      // 读取内容
      String content = descE.attr("content");

      if (title != null && content != null) {
        //通过Path来保存数据到HDFS中
        path = new Path("hdfs://localhost:9000/input/"
            + System.currentTimeMillis() + ".txt");

        fs = path.getFileSystem(conf);

        // 建立输出流对象
        FSDataOutputStream os = fs.create(path);
        // 使用os完成输出
        os.writeChars(title + "\r\n" + content);

        os.close();

        count++;

        System.out.println("已经完成" + count + " 个!");
      }

    } catch (Exception e) {
      e.printStackTrace();
    }
  }
}
The above is the detailed content of Introduction to the implementation method of Java web crawler in hadoop. For more information, please follow other related articles on the PHP Chinese website!