

This article mainly introduces in detail Android's use of custom View to implement shape graphics drawing, which has certain reference value. Interested friends can refer to it
Overview
I have written an article before that introduces the use of Shape resources by drawables in Android. By defining the shape resources in drawables, simple graphic effects can be drawn, such as rectangles, ellipses, lines and rings, etc. Later, I happened to encounter such a requirement in the project, which was to display a vertical dotted line at a specific position. Just when I confidently put the resource file above in, I discovered that it did not meet my requirements. The vertical dotted line drawn using shape is actually a horizontal line rotated 90 degrees. But the disadvantage of this is that the effective area of the View is the area that coincides with the original position after being rotated 90 degrees, and cannot be changed at will. This effect cannot be used at all. So I thought of using a custom view to draw the results I wanted.
1. Draw a horizontal dotted line
The code is as follows:
import android.content.Context;
import android.graphics.Canvas;
import android.graphics.Color;
import android.graphics.DashPathEffect;
import android.graphics.Paint;
import android.util.AttributeSet;
import android.view.View;

public class CustView extends View{

  private Paint mPaint; //定义画笔

  public CustView(Context context, AttributeSet attrs) {
    super(context, attrs);

    //初始化画笔
    initPaint();
    setLayerType(View.LAYER_TYPE_SOFTWARE, mPaint); //4.0以上关闭硬件加速,否则虚线不显示
  }

  private void initPaint() {
    mPaint = new Paint();
    mPaint.setAntiAlias(true); //设置抗锯齿的效果
    mPaint.setStyle(Paint.Style.STROKE); //设置画笔样式为描边
    mPaint.setStrokeWidth(3); //设置笔刷的粗细度
    mPaint.setColor(Color.RED); //设置画笔的颜色
    mPaint.setPathEffect(new DashPathEffect(new float[]{5,5,5,5}, 1)); //设置画笔的路径效果为虚线效果
  }

  @Override
  protected void onDraw(Canvas canvas) {
    super.onDraw(canvas);

    canvas.drawLine(0, 0, 100, 0, mPaint);
  }
}
The layout file is quoted as follows:
Instructions : In the code of the custom View, the full name of the drawLine method executed in the onDraw method is as follows:
public void drawLine (float startX, float startY, float stopX, float stopY, Paint paint)
startX: x coordinate of the starting end point
startY: y coordinate of the starting end point
stopX: x coordinate of the ending end point
stopY: y coordinate of the ending end point
The above four left values are all calculated in relative position, that is, relative to the control on the left. If there is no control on the left, the relative position of the left border of the mobile phone screen is calculated.
canvas.drawLine(0, 0, 100, 0, mPaint); means starting from the position where the x and y coordinates are 0 relative to the left, and drawing a 100px dotted line to the right.
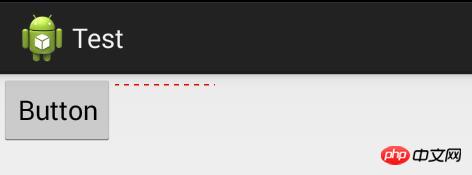
After removing the Button button, the relative position starts to be calculated based on the left border of the screen, as shown in the figure:

Another thing to note is that the values of stopX and stopY cannot exceed the values of layout_width and layout_height of the control in xml. Otherwise, the smallest value will be used as the basis, and the exceeded length will be invalid.
2. Draw a vertical dotted line
is consistent with the above code, and only needs to be modified to the following:
canvas.drawLine( 0, 0, 0, 100, mPaint);
3.Draw a solid circle
1).First set the brush style to solid
mPaint.setStyle(Paint.Style.FILL); //Set the brush style to fill
2). Draw a circle in the canvas
canvas.drawCircle(50, 50, 50, mPaint);
The same values of X and Y cannot exceed the values of layout_width and layout_height of the control in xml.
4. Draw a circle
Just modify the code slightly:
  @Override
  protected void onDraw(Canvas canvas) {
    super.onDraw(canvas);

    canvas.drawCircle(50, 50, 50, mPaint); //画一个外圆
    mPaint.setColor(Color.WHITE);      //重新设置画笔颜色
    canvas.drawCircle(50, 50, 30, mPaint); //画一个内圆
  }
5. Draw a rectangle
  @Override
  protected void onDraw(Canvas canvas) {
    super.onDraw(canvas);

    RectF rect = new RectF(0, 0, 80, 60);
    canvas.drawRect(rect, mPaint);
  }
The above is the detailed content of Teach you how to use Android custom View to implement shape graphics drawing.. For more information, please follow other related articles on the PHP Chinese website!