ListView is a commonly used component in Android development. It displays specific content in the form of a list and can display adaptively according to the length of the data. I took the time to sort out the use of ListView and wrote a small example, as shown below.
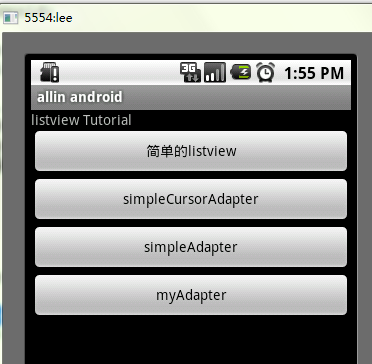
The display of the list requires three elements:
1. ListVeiw View used to display lists.
2. Adapter is used to map data to the mediator on the ListView.
3. Data The specific string, image, or basic component that will be mapped.
According to the adapter type of the list, the list is divided into three types, ArrayAdapter, SimpleAdapter and SimpleCursorAdapter
Among them, ArrayAdapter is the simplest and can only display one line of words. SimpleAdapter has the best scalability and can customize various effects. SimpleCursorAdapter can be thought of as a simple combination of SimpleAdapter with the database, which can display the contents of the database in the form of a list.
We start with the simplest ListView:
/**
 * @author allin
 *
 */
public class MyListView extends Activity {

    private ListView listView;
    //private List data = new ArrayList();
    @Override
    public void onCreate(Bundle savedInstanceState){
        super.onCreate(savedInstanceState);

        listView = new ListView(this);
        listView.setAdapter(new ArrayAdapter(this, android.R.layout.simple_expandable_list_item_1,getData()));
        setContentView(listView);
    }


    private List getData(){

        List data = new ArrayList();
        data.add("测试数据1");
        data.add("测试数据2");
        data.add("测试数据3");
        data.add("测试数据4");

        return data;
    }
}
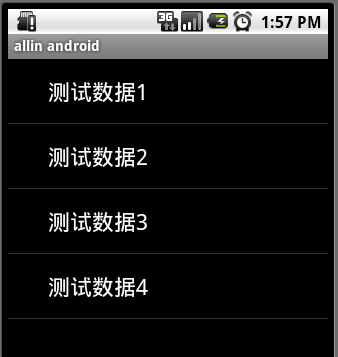
The above code uses ArrayAdapter (Context context, int textViewResourceId, List8742468051c85b06f0a0af9e3e506b5c objects) to assemble the data. To assemble these data, you need a connection between the ListView view object and the array data. The adapter is used to adapt the two. The construction of ArrayAdapter requires three parameters, which are this and the layout file (note that the layout file here describes the layout of each row of the list. android.R.layout.simple_list_item_1 is defined by the system. The layout file only displays one line of text and the data source (a List collection). At the same time, setAdapter() is used to complete the final work of adaptation. The actual structure after running is as follows:
SimpleCursorAdapter
The explanation of sdk is as follows. : An easy adapter to map columns from a cursor to TextViews or ImageViews defined in an XML file. You can specify which columns you want, which views you want to display the columns, and the XML file that defines the appearance of these views. It is convenient to display the data obtained from the cursor in a list and map the specified columns to the corresponding TextView. The following program displays contacts from the phone book into the address book first. Add a contact as the database data. Then get a Cursor pointing to the database and define a layout file (of course you can also use the system’s own one)
/**
 * @author allin
 *
 */
public class MyListView2 extends Activity {

    private ListView listView;
    //private List data = new ArrayList();
    @Override
    public void onCreate(Bundle savedInstanceState){
        super.onCreate(savedInstanceState);

        listView = new ListView(this);

        Cursor cursor = getContentResolver().query(People.CONTENT_URI, null, null, null, null);
        startManagingCursor(cursor);

        ListAdapter listAdapter = new SimpleCursorAdapter(this, android.R.layout.simple_expandable_list_item_1,
                cursor,
                new String[]{People.NAME},
                new int[]{android.R.id.text1});

        listView.setAdapter(listAdapter);
        setContentView(listView);
    }


}
Cursor cursor = getContentResolver().query(People.CONTENT_URI, null). , null, null, null); First obtain a Cursor object pointing to the system address book database to obtain the data source.
startManagingCursor(cursor); We will hand over the obtained Cursor object to Activity management, so that the Cursor life cycle and Activity can be managed. Automatic synchronization, eliminating the need to manually manage Cursor. The first three parameters of the SimpleCursorAdapter constructor are the same as those of ArrayAdapter. The last two parameters are: a String array containing the columns of the database, and an int containing the corresponding component id in the layout file. type array. Its function is to automatically map each column of data represented by the String array to the component with the corresponding ID in the layout file. The above code maps the data in the NAME column to the component with ID text1 in the layout file.
Note: You need permissions in AndroidManifest.xml: ddcf1f2c1370941dc9e6e48051b0c5d1715e355a41f150f13c9dfb3c5419088c
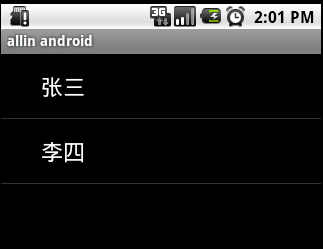
The effect after running is as follows:
SimpleAdapter
 simpleAdapter has the best scalability and can define a variety of layouts. You can put ImageView (picture), Button (button), CheckBox (checkbox), etc. The following codes directly inherit ListActivity. ListActivity is not much different from ordinary Activity. The difference is that many optimizations have been made to display ListView, just in terms of display.
The following program implements a class table with pictures.
First you need to define an xml to display the content of each column
vlist.xml
The following is the implementation code:
/**
 * @author allin
 *
 */
public class MyListView3 extends ListActivity {


    // private List data = new ArrayList();
    @Override
    public void onCreate(Bundle savedInstanceState) {
        super.onCreate(savedInstanceState);

        SimpleAdapter adapter = new SimpleAdapter(this,getData(),R.layout.vlist,
                new String[]{"title","info","img"},
                new int[]{R.id.title,R.id.info,R.id.img});
        setListAdapter(adapter);
    }

    private List> getData() {
        List> list = new ArrayList>();

        Map map = new HashMap();
        map.put("title", "G1");
        map.put("info", "google 1");
        map.put("img", R.drawable.i1);
        list.add(map);

        map = new HashMap();
        map.put("title", "G2");
        map.put("info", "google 2");
        map.put("img", R.drawable.i2);
        list.add(map);

        map = new HashMap();
        map.put("title", "G3");
        map.put("info", "google 3");
        map.put("img", R.drawable.i3);
        list.add(map);

        return list;
    }
}
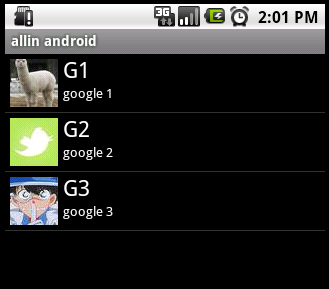
The data using simpleAdapter is generally a List composed of HashMap, and each section of the list Corresponds to each row of ListView. Each key-value data of HashMap is mapped to the component with the corresponding ID in the layout file. Because the system does not have a corresponding layout file available, we can define a layout vlist.xml ourselves. Next, do the adaptation. The parameters of a new SimpleAdapter are: this, layout file (vlist.xml), title and info of HashMap, img. The component id, title, info, img of the layout file. Each component of the layout file is mapped to each element of the HashMap to complete the adaptation.
The operation effect is as follows:
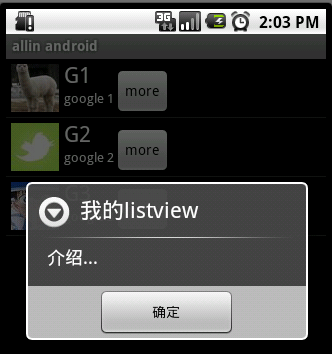
有按钮的ListView
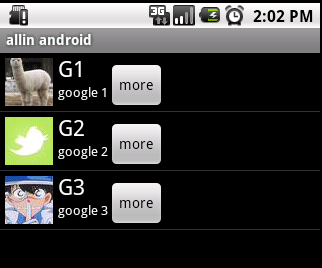
但是有时候,列表不光会用来做显示用,我们同样可以在在上面添加按钮。添加按钮首先要写一个有按钮的xml文件,然后自然会想到用上面的方法定义一个适配器,然后将数据映射到布局文件上。但是事实并非这样,因为按钮是无法映射的,即使你成功的用布局文件显示出了按钮也无法添加按钮的响应,这时就要研究一下ListView是如何现实的了,而且必须要重写一个类继承BaseAdapter。下面的示例将显示一个按钮和一个图片,两行字如果单击按钮将删除此按钮的所在行。并告诉你ListView究竟是如何工作的。效果如下:
vlist2.xml
程序代码:
/**
 * @author allin
 *
 */
public class MyListView4 extends ListActivity {


    private List> mData;

    @Override
    public void onCreate(Bundle savedInstanceState) {
        super.onCreate(savedInstanceState);
        mData = getData();
        MyAdapter adapter = new MyAdapter(this);
        setListAdapter(adapter);
    }

    private List> getData() {
        List> list = new ArrayList>();

        Map map = new HashMap();
        map.put("title", "G1");
        map.put("info", "google 1");
        map.put("img", R.drawable.i1);
        list.add(map);

        map = new HashMap();
        map.put("title", "G2");
        map.put("info", "google 2");
        map.put("img", R.drawable.i2);
        list.add(map);

        map = new HashMap();
        map.put("title", "G3");
        map.put("info", "google 3");
        map.put("img", R.drawable.i3);
        list.add(map);

        return list;
    }

    // ListView 中某项被选中后的逻辑
    @Override
    protected void onListItemClick(ListView l, View v, int position, long id) {

        Log.v("MyListView4-click", (String)mData.get(position).get("title"));
    }

    /**
     * listview中点击按键弹出对话框
     */
    public void showInfo(){
        new AlertDialog.Builder(this)
        .setTitle("我的listview")
        .setMessage("介绍...")
        .setPositiveButton("确定", new DialogInterface.OnClickListener() {
            @Override
            public void onClick(DialogInterface dialog, int which) {
            }
        })
        .show();

    }


    public final class ViewHolder{
        public ImageView img;
        public TextView title;
        public TextView info;
        public Button viewBtn;
    }


    public class MyAdapter extends BaseAdapter{

        private LayoutInflater mInflater;


        public MyAdapter(Context context){
            this.mInflater = LayoutInflater.from(context);
        }
        @Override
        public int getCount() {
            // TODO Auto-generated method stub
            return mData.size();
        }

        @Override
        public Object getItem(int arg0) {
            // TODO Auto-generated method stub
            return null;
        }

        @Override
        public long getItemId(int arg0) {
            // TODO Auto-generated method stub
            return 0;
        }

        @Override
        public View getView(int position, View convertView, ViewGroup parent) {

            ViewHolder holder = null;
            if (convertView == null) {

                holder=new ViewHolder();

                convertView = mInflater.inflate(R.layout.vlist2, null);
                holder.img = (ImageView)convertView.findViewById(R.id.img);
                holder.title = (TextView)convertView.findViewById(R.id.title);
                holder.info = (TextView)convertView.findViewById(R.id.info);
                holder.viewBtn = (Button)convertView.findViewById(R.id.view_btn);
                convertView.setTag(holder);

            }else {

                holder = (ViewHolder)convertView.getTag();
            }


            holder.img.setBackgroundResource((Integer)mData.get(position).get("img"));
            holder.title.setText((String)mData.get(position).get("title"));
            holder.info.setText((String)mData.get(position).get("info"));

            holder.viewBtn.setOnClickListener(new View.OnClickListener() {

                @Override
                public void onClick(View v) {
                    showInfo();
                }
            });


            return convertView;
        }

    }


}
下面将对上述代码,做详细的解释,listView在开始绘制的时候,系统首先调用getCount()函数,根据他的返回值得到listView的长度(这也是为什么在开始的第一张图特别的标出列表长度),然后根据这个长度,调用getView()逐一绘制每一行。如果你的getCount()返回值是0的话,列表将不显示同样return 1,就只显示一行。
系统显示列表时,首先实例化一个适配器(这里将实例化自定义的适配器)。当手动完成适配时,必须手动映射数据,这需要重写getView()方法。系统在绘制列表的每一行的时候将调用此方法。getView()有三个参数,position表示将显示的是第几行,covertView是从布局文件中inflate来的布局。我们用LayoutInflater的方法将定义好的vlist2.xml文件提取成View实例用来显示。然后将xml文件中的各个组件实例化(简单的findViewById()方法)。这样便可以将数据对应到各个组件上了。但是按钮为了响应点击事件,需要为它添加点击监听器,这样就能捕获点击事件。至此一个自定义的listView就完成了,现在让我们回过头从新审视这个过程。系统要绘制ListView了,他首先获得要绘制的这个列表的长度,然后开始绘制第一行,怎么绘制呢?调用getView()函数。在这个函数里面首先获得一个View(实际上是一个ViewGroup),然后再实例并设置各个组件,显示之。好了,绘制完这一行了。那 再绘制下一行,直到绘完为止。在实际的运行过程中会发现listView的每一行没有焦点了,这是因为Button抢夺了listView的焦点,只要布局文件中将Button设置为没有焦点就OK了。
运行效果如下图:
