
Home > Article > Web Front-end > HTML5 Canvas implements the filling method of drawing unclosed paths and gradient colors

This article mainly introduces the filling method of drawing unclosed paths and gradient colors in HTML5 Canvas. It has a certain reference value. Now I share it with you. Friends in need can refer to it.
General There are two ways to draw, namely fill and stroke. The previous article has already talked about the stroke method. This article will talk about the method of filling graphics in Canvas.
There are generally two ways of drawing, namely filling and stroking. The previous article has already talked about the stroke method. This article will talk about the method of filling graphics in Canvas.
Filling is fill(), very straightforward, right? And just like strokeStyle represents the stroke style, fillStyle represents the fill style.
ctx.fillStyle = 'Color';The default fill style is opaque black
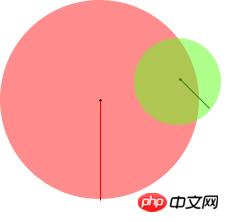
Question: Can unclosed paths be filled?
Can. The Canvas will connect directly from the end point of your current path to the start point and then fill it. As shown in the picture:
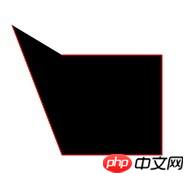
# But you can find that the last paragraph has no stroke.
Remember that in our previous article we drew a square with 4 lines, but canvas is not so bad, and it doesn’t even have a function to draw a rectangle directly. You can use fillRect() to directly fill a rectangle:
ctx.fillRect(x,y,width,height);
The x and y here refer to the coordinates of the starting point of the upper left corner of the rectangle, remember.
Speaking of fillRect, we have to mention strokeRect. You guessed it, it means to directly stroke a rectangle.
There are also fillText and strokeText. As for their functions, you may have guessed them. I won’t go into them here. Let’s preview them first.
Canvas fill gradient color
In Canvas, gradient color is also divided into two types, namely linear gradient and radial gradient, and the methods of creating them are also independent. Let's first look at how to create a linear gradient.
Create Linear Gradient = createLinearGradient - Look, still a very straightforward word. His syntax is as follows:
createLinearGradient(x1,y1,x2,y2) has 4 parameters! It seems so complicated, but in fact this is quite simple, because as we have said before, a point in the flat world is determined by the x coordinate and y coordinate. Therefore, x1, y1 represents the starting point coordinates of the linear gradient, and x2, y2 represents the end point coordinates.
The benefits of this are obvious. If we want to create a diagonal linear gradient, it is very convenient. But let's try creating a horizontal linear gradient first.
var linear = ctx.createLinearGradient(100,100,200,100);The gradient seems to be created, so can we fill it? ————This gradient is empty and has no color.
The method to add color to the gradient bar is addColorStop (position, color). But please note that this addColorStop is not added to the brush, but to the previous variable that holds the gradient. Here I am linear.
var linear = ctx.createLinearGradient(100,100,200,100);
linear.addColorStop(0,'#fff');
linear.addColorStop(0.5,'#f0f');
linear.addColorStop(1,'#333');
Three addColorStops are used here, which means three colors are added to the gradient bar.
Note: The position parameter of addColorStop is always a number between 0-1, which can be two decimal places, indicating a percentage. He cannot receive parameters like '3px'.
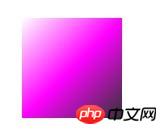
At this time, we can fill the gradient color, but we must first assign the defined gradient to fillStyle.
var linear = ctx.createLinearGradient(100,100,200,100);
linear.addColorStop(0,'#fff');
linear.addColorStop(0.5,'#f0f');
linear.addColorStop(1,'#333');
ctx.fillStyle = linear; //把渐变赋给填充样式
ctx.fillRect(100,100,100,100);
ctx.stroke();
Note that fillRect and strokeRect draws independent paths. As shown in the above code, calling stroke after fillRect will not stroke the rectangle just drawn. The same is true for strokeRect.
After testing, I discovered a very annoying problem, that is, the coordinates of the linear gradient are relative to the entire Canvas range. For example, here, the starting point of my linear gradient is 100,100. If I draw a rectangle at 0,0 and fill it with this gradient, I will find that there is no filling - because the range of my gradient simply exceeds the rectangle. scope.
This is really a cheating setting.
Question: Will the color be filled before the starting point of the gradient and after the ending point of the gradient?
meeting. The color before the starting point is the starting color, and the color after the end point is always the end color.
How to terminate the end color, you can fill in a transparent end color after the end color. For example:
linear.addColorStop(0.99,'#333');
linear.addColorStop(1,'rgba(51,51,51,0)');
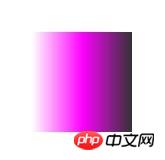
According to the previous plan, I will try to build a tilted linear gradient. Just change the parameters of createLinearGradient.
var linear = ctx.createLinearGradient(100,100,200,200);
The effect is as shown:
Then, let us try the radial direction Gradient (circular gradient). Similar to createLinearGradient, the method to create a radial gradient is: createRadialGradient, but their parameters can be very different:
createRadialGradient(x1,y1,r1,x2,y2,r2) where x1,y1,x2,y2 are still the same Represents the starting point and end point, but the starting point and end point here are both a circle, and x, y are the coordinates of the center of the circle. Therefore, r1 and r2 are the radius of the starting circle and the radius of the end circle respectively. As shown in the picture:
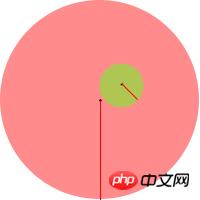
在我的印象中,貌似径向渐变就是一个圆,圆心就是起点,圆的半径就是终点。但canvas里面的径向渐变竟然搞的不一样了,起点一个圆,终点一个圆,和我的理解有差距。
我们从最简单的做起。首先,做一个很正规的径向渐变,即渐变圆形的圆心就是渐变的起点。由于正规的径向渐变,中心即圆心,所以我们应该尽量避免发生偏斜。那么,我们把终点圆的圆心与起点圆的圆心重合吧?
var radial = ctx.createRadialGradient(55,55,10,55,55,55); //重合的圆心坐标
radial.addColorStop(0,'#fff');
radial.addColorStop(0.5,'#ff0');
radial.addColorStop(0.9,'#555');
radial.addColorStop(1,'#f00');
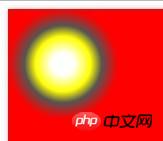
这里我设置的径向渐变起点圆和终点圆的圆心坐标相同,而起点圆半径为10,终点圆半径为55.最后画出的径向渐变范围是一个宽高110的圆形,说明渐变范围以终点圆的范围为准。
(可以看到终点圆范围之外还是有颜色,这个颜色就是终点色,但是,如果你企图使用radial.addColorStop(1.5,’#0f0′);这样来定义渐变范围之外的颜色,你还是会收到一个错误).
那么,起点圆的半径有什么用呢?——本来正常的径向渐变的中心(姑且称之为“变心”…吧)只是一个点,不应该是一个圆的。其实我们没错,这个起点圆就相当于一个圆点而已,只是可能比较大。
让我们把起点圆的半径变得很大,接近于终点圆的半径:
var radial = ctx.createRadialGradient(55,55,50,55,55,55); //很接近
其他的colorStop都不变,然后图形就变成了这个样子。
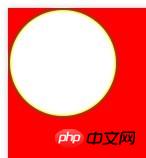
也就是说,canvas中径向渐变的起点色,是从起点圆的范围之外绘制的,而起点圆的整个颜色都是起点色。
我们把起点圆的半径设为0,那径向渐变的“变心”,就真的是一个点了。
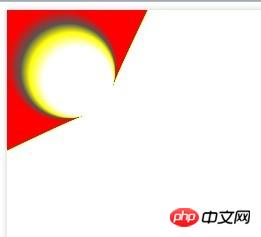
大部分时候我们都不需要很正规的径向渐变,反而希望他的变心是偏移的,类似下图:
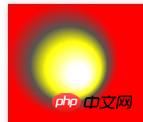
这个时候,canvas径向渐变两个圆的优势就出来了,只要我们起点圆与终点圆的圆心不重合,那变心也就会偏移:
var radial = ctx.createRadialGradient(75,75,0,55,55,55);但此时的渐变范围依然是终点圆的范围哈。
很多人天生就有一种搞破坏的心理,比如这里,终点圆的半径总比起点圆大,但如果把他们反过来会怎么样呢?
var radial = ctx.createRadialGradient(75,75,55,55,55,0);
经测试,这样不会报错,只是原来的从内到外的渐变反过来变成了从外到内的渐变了。这是个好用法。
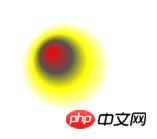
还有个问题,如果我们把起点圆的圆心偏移了,并且起点圆的范围超出了终点圆的范围,
这时会发生什么?
啊!?这是什么情况?!
当起点圆和终点圆只有部分重叠的时候,就会出现这种情况。所以,如果你需要正常的径向渐变,请保证其中一个圆完全包住了另一个圆。
另外,既然渐变可以赋给fillStyle,那么也可以赋给strokeStyle。效果你懂的。
以上就是本文的全部内容,希望对大家的学习有所帮助,更多相关内容请关注PHP中文网!
相关推荐:
The above is the detailed content of HTML5 Canvas implements the filling method of drawing unclosed paths and gradient colors. For more information, please follow other related articles on the PHP Chinese website!