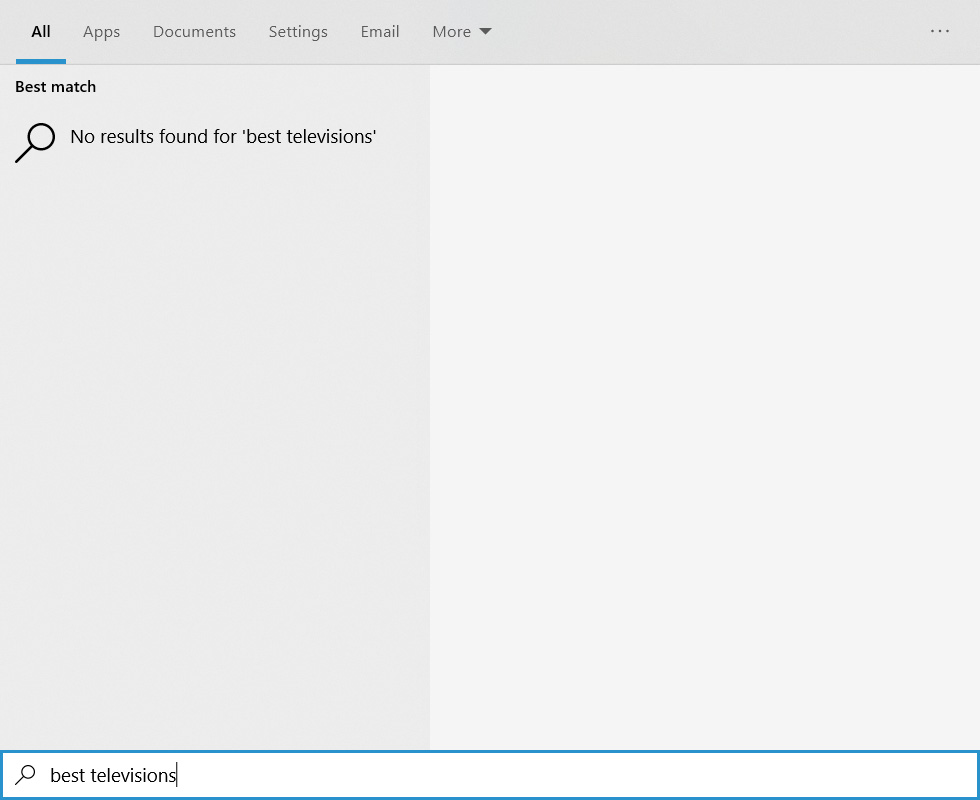
Local search fails to find anything in sync with the built-in Bing search in Windows 10's Start menu feature. This article will explain how to disable Bing Search in the Start Menu, whether for privacy protection, bug fixing, or personal preference. When you search in the Windows 10 Start menu, Windows will first look for local search results, such as Settings, Files, or Programs, and display any results.
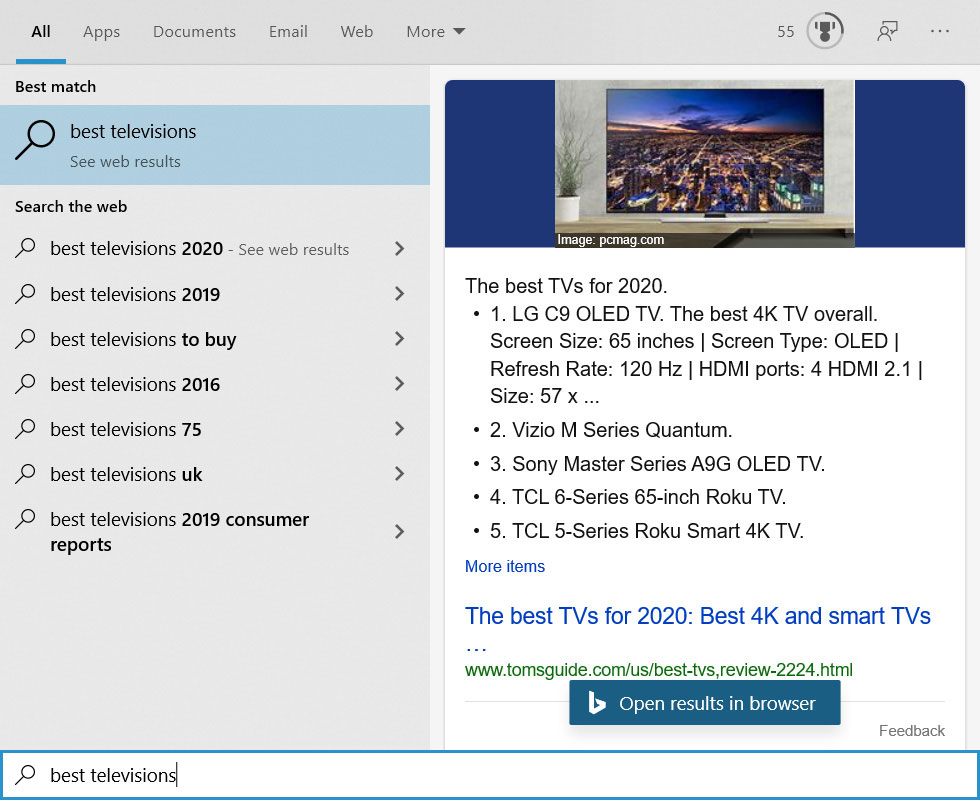
If there are no local results, Windows will conduct a Bing search for the search keyword and list the results in the Start menu, as shown below.

# Once you're signed in to your Microsoft account, these searches will be uploaded to Microsoft, which will then be listed in your account's privacy dashboard. I'm concerned that Microsoft will use this data to track your online behavior, so this could be considered a privacy issue.
In the past, a bug in the Bing search component caused the Windows 10 Start menu to be completely blank. To prevent these errors from happening in the future, you must disable the use of Bing search functionality.
There are two ways to disable Bing search in the Windows 10 Start menu.
How to disable searching for Bing in the Windows 10 Start menu?
Unfortunately, Microsoft doesn't provide an easy way for those who want to disable the Bing search menu.
Instead, Windows users need to modify the registry in order to use the following registry values.
[HKEY_CURRENT_USER\SOFTWARE\Policies\Microsoft\Windows\Explorer]
"isableSearchBoxSuggestions" dword:000001.
For those who like to modify the registry, we use the Registry Editor to set the correct values.
For those who are not satisfied with registry modifications, please refer to method two, which includes an easy-to-use pre-made registry file that can be set up for you.
Method 1: BING search results are disabled by Group Policy Editor.
Windows 10 Professional has a set of policy editors available in the Start menu.
To disable the search, please follow these steps:
Search for gpedit.msc and select it in the start menu.
When the Group Policy Editor opens, navigate to the following path: User Configuration\Administrative Templates\Windows Components\File Explorer.
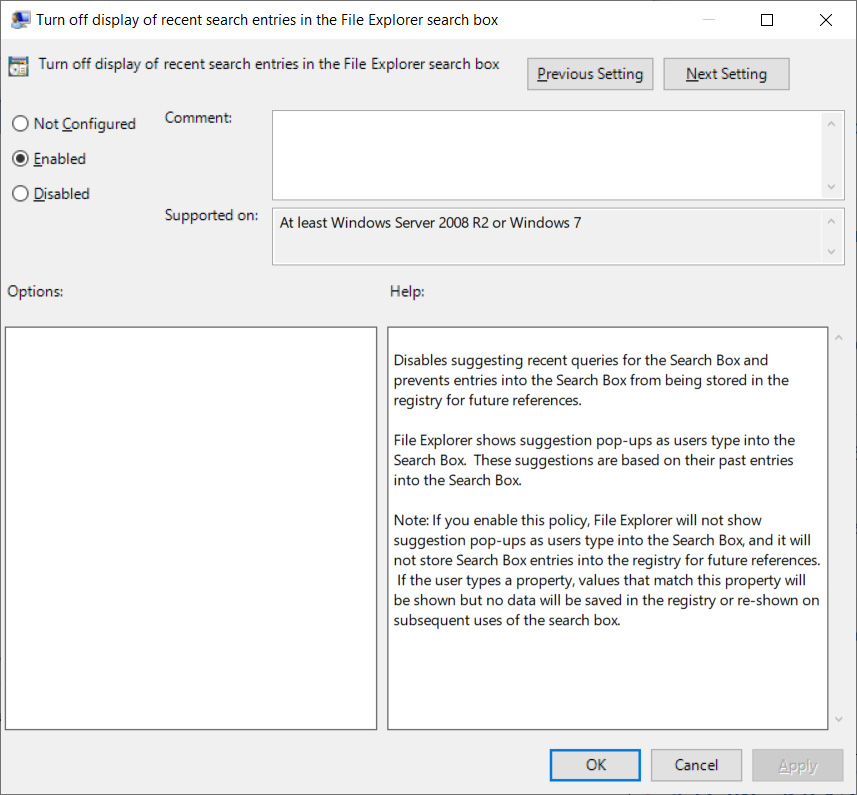
In the File Explorer section, you will see the latest search entries displayed in the Close File Explorer search box policy. Open the double-click strategy.

To disable Bing searches, please set this policy to Enabled.

When finished, click Apply and then click the OK button to save the policy.
You can now close Group Policy Editor, restart Windows Explorer or restart your computer.
After restarting, search will no longer appear in the start menu.
Method 2: Use the registry editor to disable BING integration.
If you use Windows 10 Home Edition and are accustomed to using the Windows Registry, you can use Registry Editor to disable integration in Windows Search.
Hold down the Windows key, then press the R key and enter "regedit" in the pop-up window to open the Windows Registry Editor. Open the Action: dialog box and enter regedit and press the OK button.

Windows will display a UAC prompt asking you if you wish to allow Registry Editor to make changes to the system. Press the button to continue.
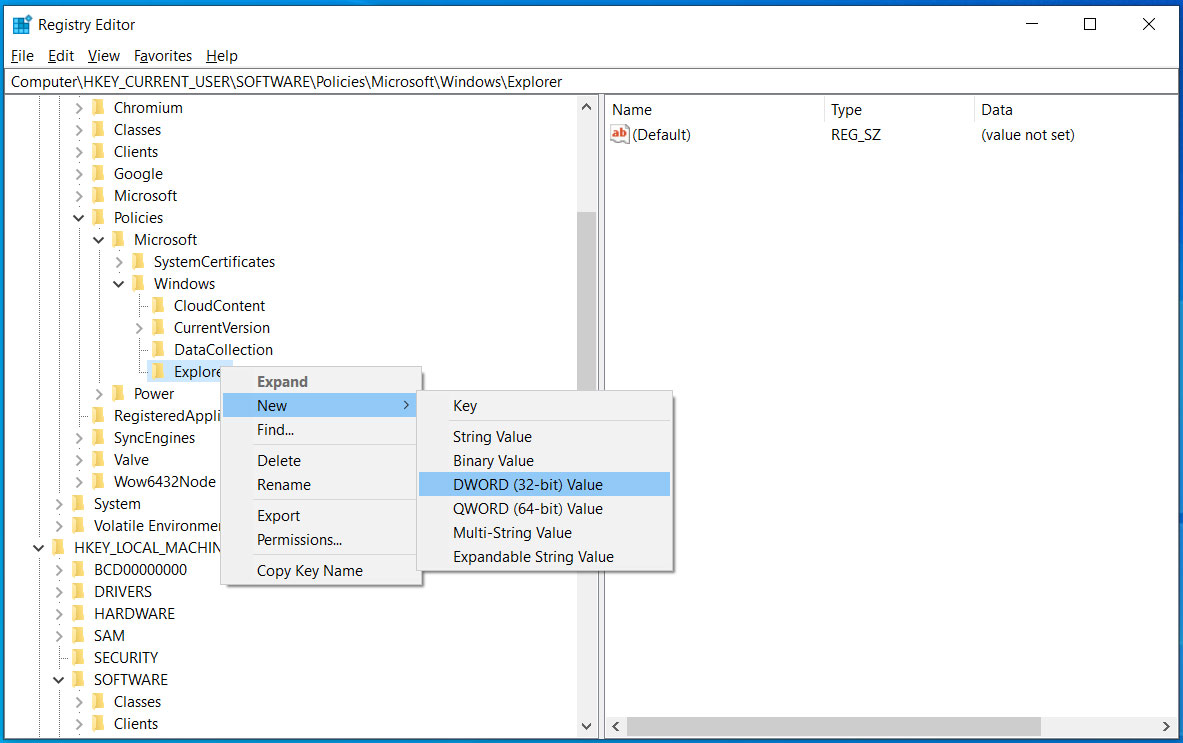
Navigate to the HKEY_CURRENT_USER\SOFTWARE\Policies\Microsoft\Windows\Explorer key. If the key does not exist, create the necessary folders in the Explorer key.
Click Explorer, select New, and then select a DWORD (32-bit) value as shown below.

You will be prompted for a name for the new value. Press the Enter key on your keyboard and enter DisableSearchBoxSuggestions. Create a new value that should be automatically set to 0. Here, make a double click and set BingSearchEnabled to 1 value and confirm by clicking OK button.
Once completed, you should create the BingSearchEnabled value and set it to 1.

You can now close the Registry Editor, restart Windows Explorer or restart your computer.
After restarting, Must Search will no longer work in the Windows 10 Start Menu.

Use Bing integration again.
To enable Bing integration again, simply disable Group Policy or edit the registry and delete the DisableSearchBoxSuggestions value under the HKEY_CURRENT_USER\SOFTWARE\Policies\Microsoft\Windows\Explorer registry key.
Start the Explorer process or computer again and the Bing integration will work again.
The above is the detailed content of Starting from Win10, Bing must be searched in the menu.. For more information, please follow other related articles on the PHP Chinese website!