Home >Common Problem >Detailed step-by-step tutorial on how to install the system after assembling the computer
Many people don’t like to buy a complete computer, but will buy computer hardware to assemble it themselves. The system is an essential environment for the computer to run. We must install the system after assembling the computer, otherwise the computer will It doesn't work. Some users don't know how to install the system after assembling the computer. Here I will give you a detailed tutorial on how to install the system after assembling the computer.
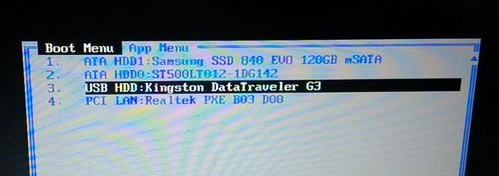
1. Make a USB boot disk, then insert the USB disk into the computer. After restarting, hold down F12, F11, Esc and other shortcut keys to open the boot menu, select the USB option and press Enter;
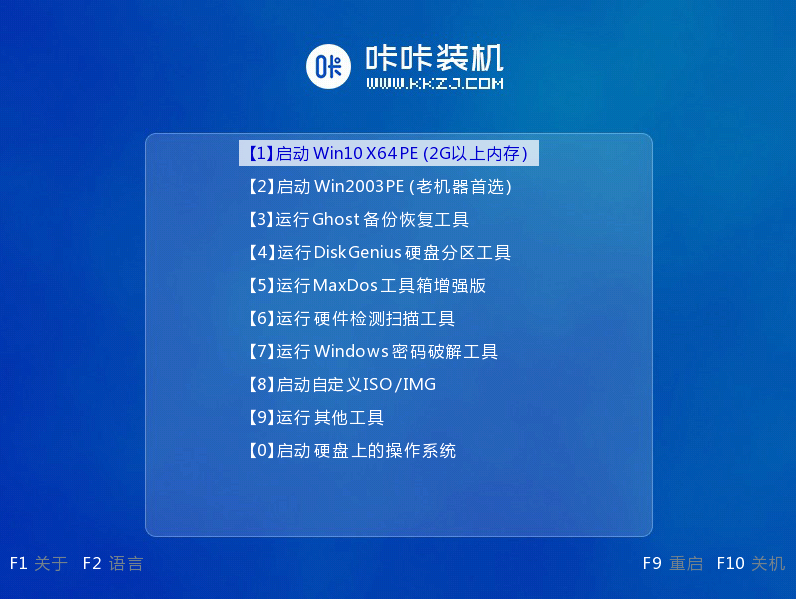
2. Boot into the U disk main menu and press Enter to enter the PE system;
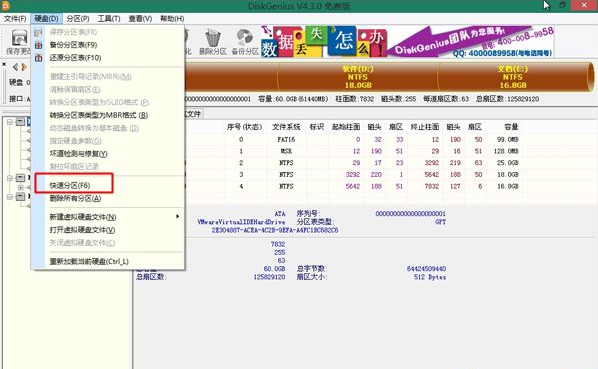
3. Open the DiskGenius partition tool under the PE system , click [Hard Disk] - [Quick Partition];
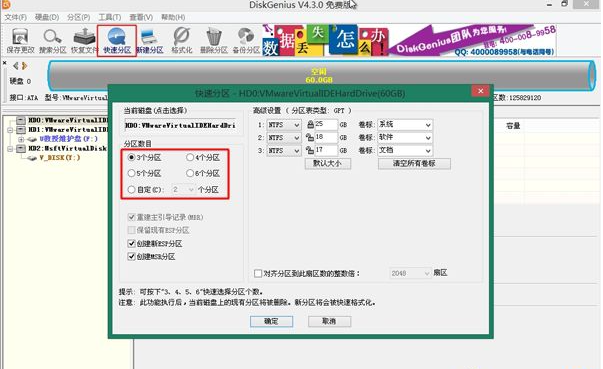
4. Set the number of partitions and set the size of each partition. It is recommended that the C drive be above 50G. Click OK. Format;
#5. Enter the pe installation system interface and select a system we need to install.
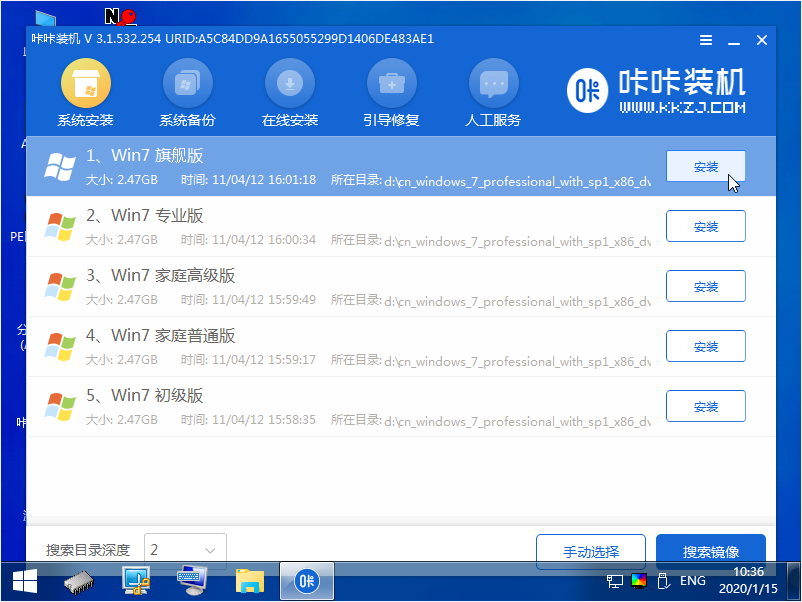
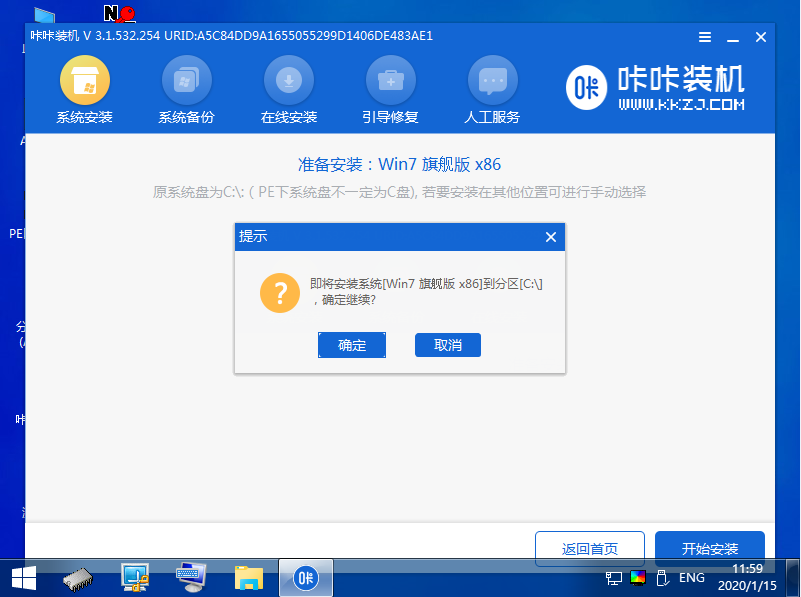
6. Change the target partition to "Disk C" and click "Start Installation".
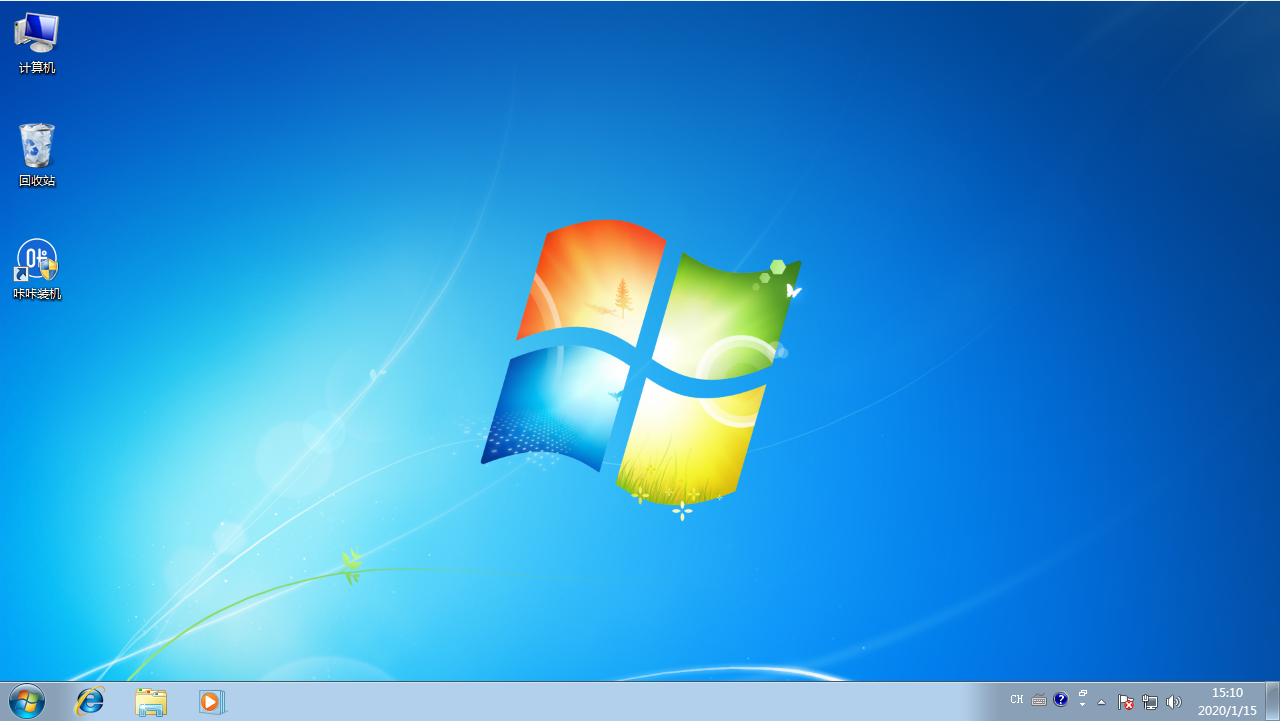
7. After the system image installation is completed, unplug the USB disk and restart the computer to enter the system desktop.
The above is a detailed step-by-step tutorial on how to install the system after assembling the computer. I hope it can help everyone.
The above is the detailed content of Detailed step-by-step tutorial on how to install the system after assembling the computer. For more information, please follow other related articles on the PHP Chinese website!