Home >Operation and Maintenance >Nginx >How Docker uses nginx to build a tomcat cluster
First create the tomcat folder. In order to facilitate the configuration of docker, I will create it directly in the root directory. Step 1: Create the folder: publish the folder
mkdir -p /docker/tomcat/webapp8081

mkdir -p /docker/tomcat/webapp8082

mkdir -p /docker/tomcat/webapp8083
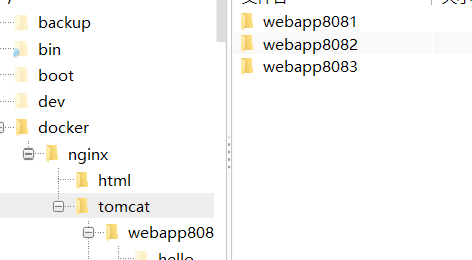
Step 2: Create a tomcat container (the port can be changed according to your actual situation)
docker run -d --name tomcat8081 -p 8081:8080 -v /docker/tomcat/webapp8081:/usr/local/tomcat/webapps/ tomcat
docker run -d --name tomcat8082 -p 8082:8080 -v /docker/tomcat/webapp8082:/usr/local/tomcat/webapps/ tomcat
docker run -d --name tomcat8083 -p 8083:8080 -v /docker/tomcat/webapp8083:/usr/local/tomcat/webapps/ tomcat
After the creation is completed, use the docker ps command to check whether the creation is successful and use

Step 3: Check tomcat’s ip. Use the command to query. Only the first example is used.
docker inspect tomcat8081
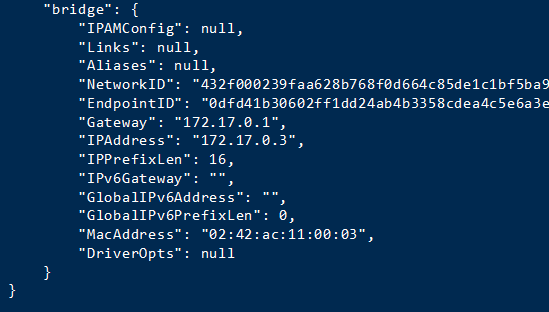
Step 4: In order to facilitate testing, I will not upload the war package here, and directly create a hello/index.html file in it
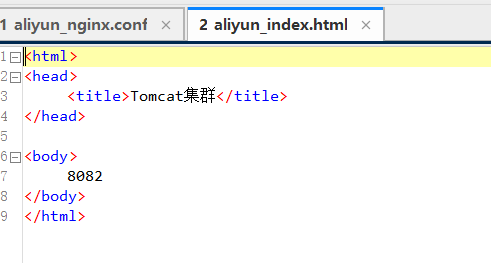
Note: If nginx is docker The container must use the tomact container ip, otherwise it will not be connected.
First download the official version of nginx from the official website
Official website:
Click download on the right navigation bar to enter the download Select the corresponding version in the interface to download. I will use nginx-1.6.2.tar
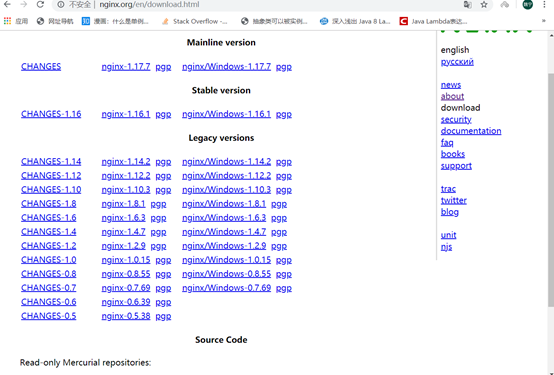
After the download is completed, put the file in a custom folder. Here I will Place it in /usr/local/tools/nginx-1.6.2

Use this command to decompress nginx:
tar vxf nginx-1.6 .2.tar.gz
After decompression is completed, I return to the root directory and create a host folder in the root directory. The purpose is to create files so that nginx can be mounted (you can also Customized)
Create the host folder here
mkdir -p /docker/nginx/
vim /docker/nginx/nginx.conf
mkdir -p /docker/nginx/html
Copy the index.html 50x.html in the html folder in negix you decompressed to the /docker/nginx/html folder
Here is a negix conf file. If you add annotations, the format may change. Remember to delete the annotations.
nginx.conf:
user root;
worker_processes 2; #Set your number of threads here
#error_log logs/error.log;
#error_log logs/error.log notice;
#error_log logs/error.log info;
#pid logs/nginx.pid;
events {
worker_connections 1024; #最大连接数量
}
http {
include mime.types;
default_type application/octet-stream;
upstream mytomcat{
server 172.17.0.3:8080 weight=10;
# 另外mytomcat 这里名字和下方的名字保持一致 这里需要和你的tomcat ip保持一致
server 172.17.0.4:8080 weight=50;
server 172.17.0.5:8080 weight=10;
}
#log_format main '$remote_addr - $remote_user [$time_local] "$request" '
# '$status $body_bytes_sent "$http_referer" '
# '"$http_user_agent" "$http_x_forwarded_for"';
#access_log logs/access.log main;
sendfile on;
#tcp_nopush on;
#keepalive_timeout 0;
keepalive_timeout 65;
#gzip on;
server {
listen 80;
server_name mytomcat;
#charset koi8-r;
#access_log logs/host.access.log main;
location / {
# root html;
# index index.html index.htm;
proxy_connect_timeout 50;
proxy_read_timeout 10;
proxy_send_timeout 20;
proxy_pass http://mytomcat;
}
#error_page 404 /404.html;
# redirect server error pages to the static page /50x.html
#
error_page 500 502 503 504 /50x.html;
location = /50x.html {
root html;
}
# proxy the php scripts to apache listening on 127.0.0.1:80
#
#location ~ \.php$ {
# proxy_pass http://127.0.0.1;
#}
# pass the php scripts to fastcgi server listening on 127.0.0.1:9000
#
#location ~ \.php$ {
# root html;
# fastcgi_pass 127.0.0.1:9000;
# fastcgi_index index.php;
# fastcgi_param script_filename /scripts$fastcgi_script_name;
# include fastcgi_params;
#}
# deny access to .htaccess files, if apache's document root
# concurs with nginx's one
#
#location ~ /\.ht {
# deny all;
#}
}
# another virtual host using mix of ip-, name-, and port-based configuration
#
#server {
# listen 8000;
# listen somename:8080;
# server_name somename alias another.alias;
# location / {
# root html;
# index index.html index.htm;
# }
#}
# https server
#
#server {
# listen 443 ssl;
# server_name localhost;
# ssl_certificate cert.pem;
# ssl_certificate_key cert.key;
# ssl_session_cache shared:ssl:1m;
# ssl_session_timeout 5m;
# ssl_ciphers high:!anull:!md5;
# ssl_prefer_server_ciphers on;
# location / {
# root html;
# index index.html index.htm;
# }
#}
}
Use docker to start
Create and run the container
81:Yes The port for external network access can be modified according to the actual situation
/docker/nginx/nginx.conf The local host file
/etc/nginx/nginx.conf The decompressed directory (it can also be used without Change)
/docker/nginx/html Local host file
/usr/share/nginx/html Unzipped directory
docker run -d --name nginx81 -p 81:80 -v /docker/nginx/nginx.conf:/etc/nginx/nginx.conf -v /docker/nginx/html:/usr/share/nginx/html nginx
Test
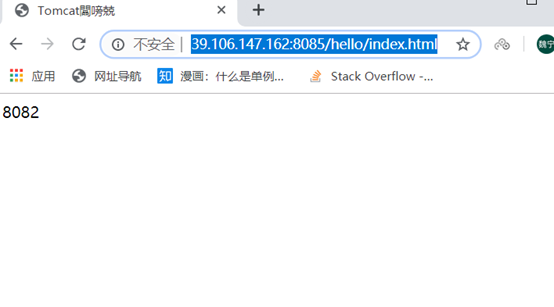
http ://39.106.147.162:8085/hello/index.html What I configure here is port 8085
Direct access
The above is the detailed content of How Docker uses nginx to build a tomcat cluster. For more information, please follow other related articles on the PHP Chinese website!