Home >Common Problem >How to safely set high priority for apps in Windows 11?
Windows does a great job of allocating system resources to the processes and programs that need it most by assigning priorities to them. Most applications you install will run perfectly fine at the default "normal" priority level.
However, sometimes, you may need to run a program, such as a game, at a higher level than the default normal level to improve its performance. But this comes at a cost, and it's a deal worth pondering.
Windows has a total of six priority levels for running different processes and programs - low, below normal, normal, above normal, high and real-time.
Windows will rank and queue applications based on their priority. The higher the priority, the more time the application gets. Therefore, services and processes that are very important to Windows will run with high priority. Unless you have a good reason to change application priorities, it's best to let Windows decide which processes to prioritize when allocating resources.
Of course, if you want an application to run particularly slowly, you might consider setting its priority to the "High" category, which is much higher than normal. But be aware that doing so will take away some resources from where they are needed most, and can lead to some jarring results, such as freezing or lagging mouse and keyboard input.
Whether you should give an application high priority depends heavily on your processor and the task itself.
You can save yourself a lot of trouble if the application doesn't take up a lot of resources. However, if you plan on giving a video editor app or game some boost (which is what most people think of when it comes to meddling priorities), your system will take a noticeable hit. There's no point in having it in the first place if you have a high-priority application that's taking up all your system resources and can't even get your commands through.
Again, this will depend on the resources your system has to offer and the applications you want to run. However, if you want to experiment with what happens when you run a CPU-intensive application at high priority, then go ahead. Doing this won't damage your computer (although you'll have to reach for the power button to reboot) and the priority change will revert to default when the system reboots.
There are some things you should avoid before setting an application as high priority.
User Account Control (UAC) protects your system from potentially harmful applications and settings changes by preventing you from making these changes. However, UAC can be troublesome if you know what you're doing. While it doesn't completely prevent you from making any changes, it does throw out confirmation prompts for every little thing. It's better to disable it and get rid of its annoying presence. That's it:
Press Start, type UAC, and then select Change User Account Control Settings.
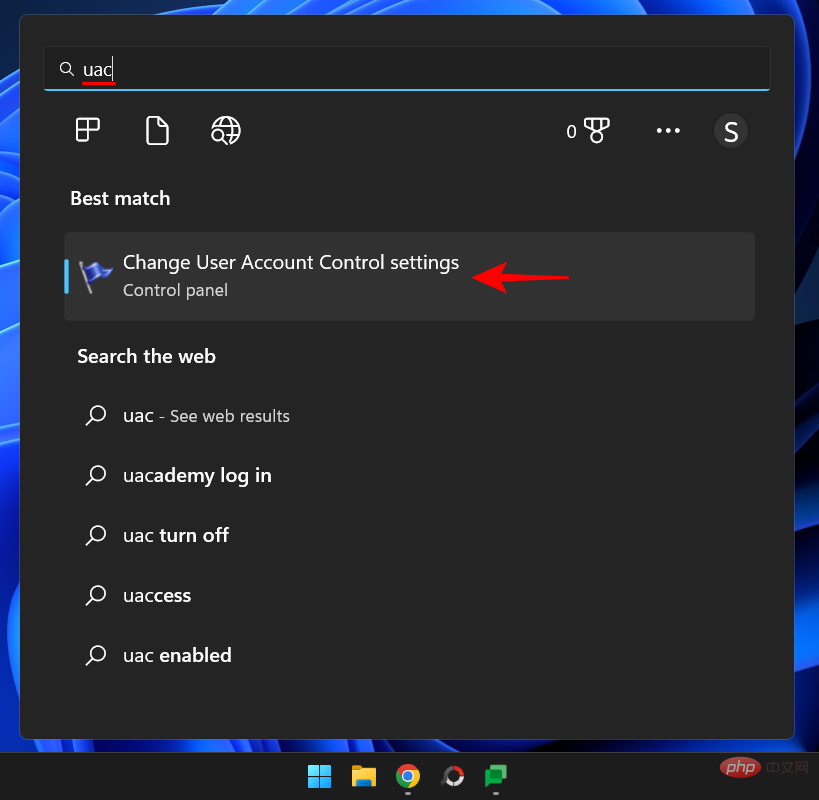
Move the notification slider all the way down to "Never notify."
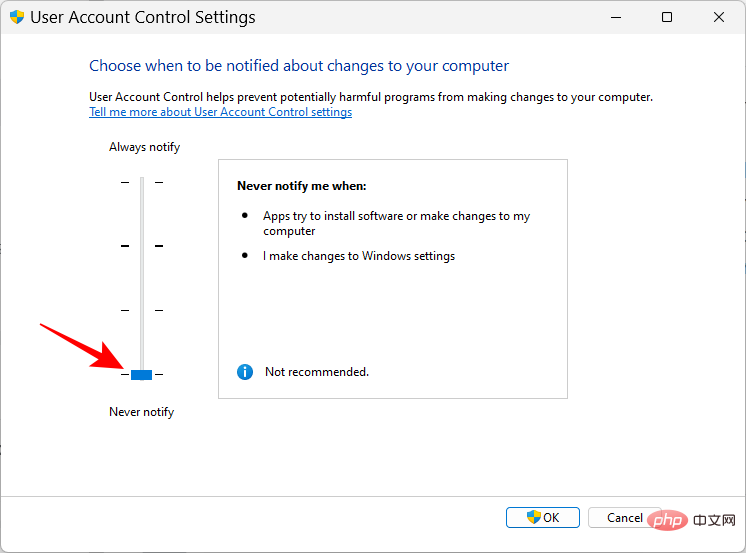
Then click "OK".
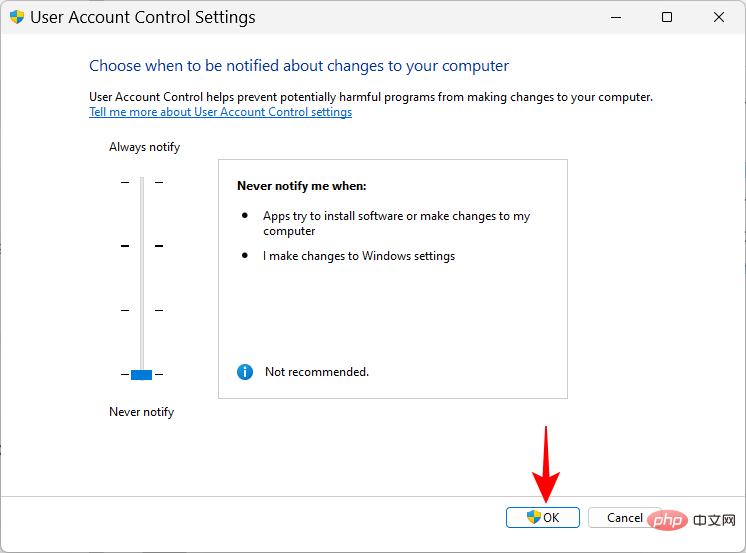
That’s it, UAC is no problem.
Another, probably more important change you need to make is to grant admin rights to the application you are trying to give high priority. Here's how to do it:
Open your application so that its process is running. Then right-click on the taskbar and select Task Manager.
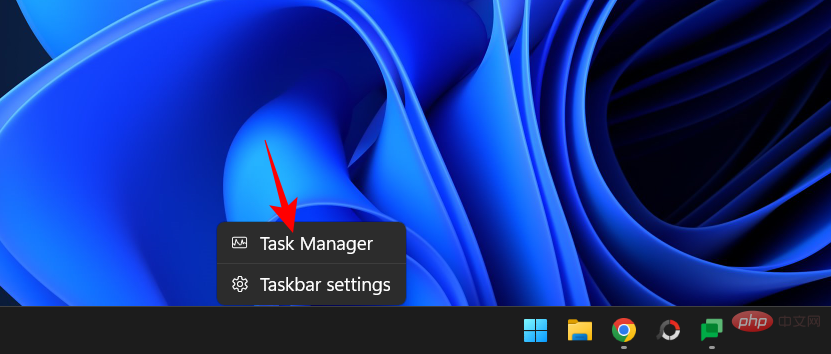
Alternatively, press Ctrl Shift Esc to bring up the Task Manager. Then find your application's process in Task Manager. Right click on it and select Properties.

Click on the "Security " tab to switch to it.

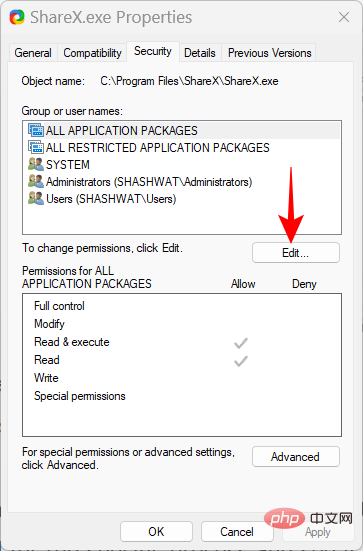
Then click the Edit box.
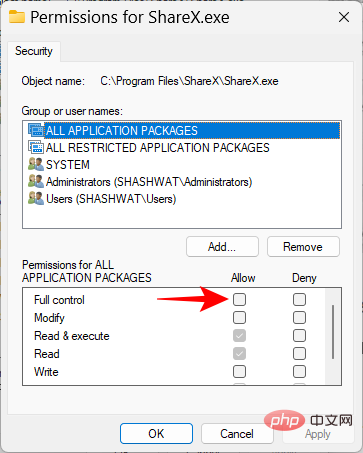
Then give "Full Control" to your application by clicking the box under "Allow".
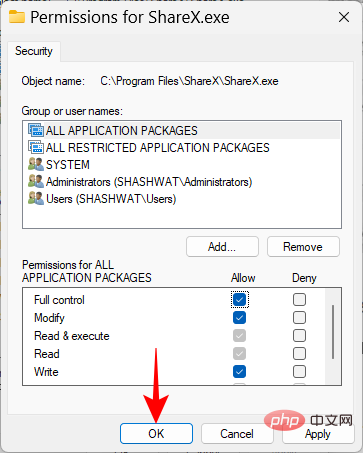
Then click "OK".
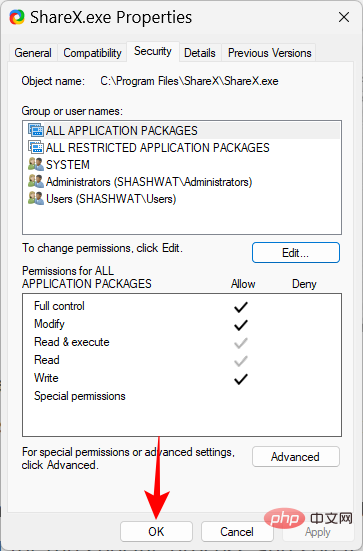
Click "OK " again.
For some methods, such as using a command terminal like PowerShell and the command prompt given below, you have to enter the priority ID to change the priority of the application process. These priority IDs are as follows:
Low – 64
Below Normal – 16384
Normal – 32
Higher than normal – 32768
High – 128
Real-time- 256
Out of these six methods, you need priority ID number "128" to use the methods given below.
Now that you know what to keep in mind when setting an app to high priority, here are a few ways to do it:
Press Start, type powershell, right-click the result, and select "Run as administrator" .
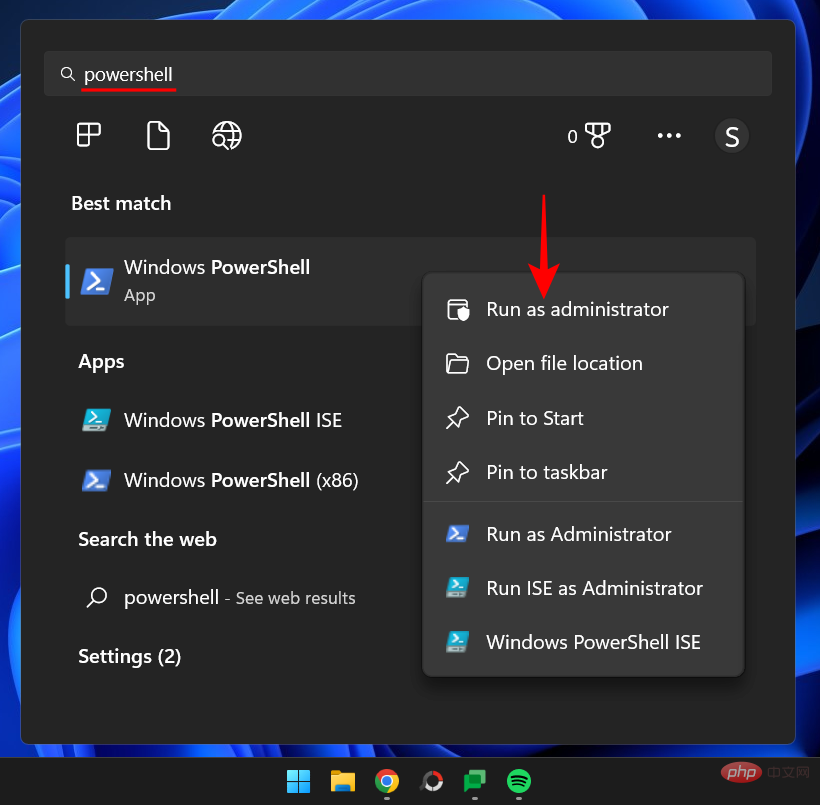
Now type the following command:
Get-WmiObject Win32_process -filter 'name = "ProcessName"' | foreach-object { $_. SetPriority(PriorityLevelID) }
Replace ProcessName with the full name of the application executable (and its extension) and PriorityLevelID with High priority ID number 128.
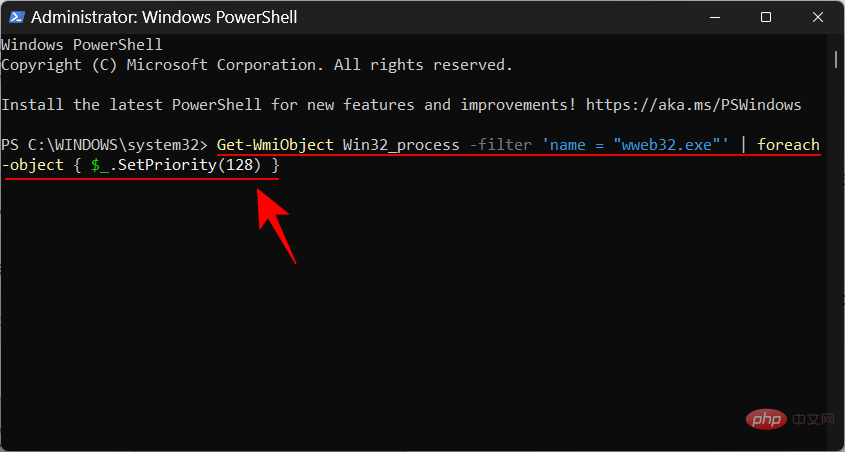
Then press Enter. That's it, you've used PowerShell to set your app as high priority.
The command prompt command is slightly easier to handle. Here's how to use it to give an application high priority:
Press Start, type cmd, then right-click on the top matching result and select to manage Run as member".
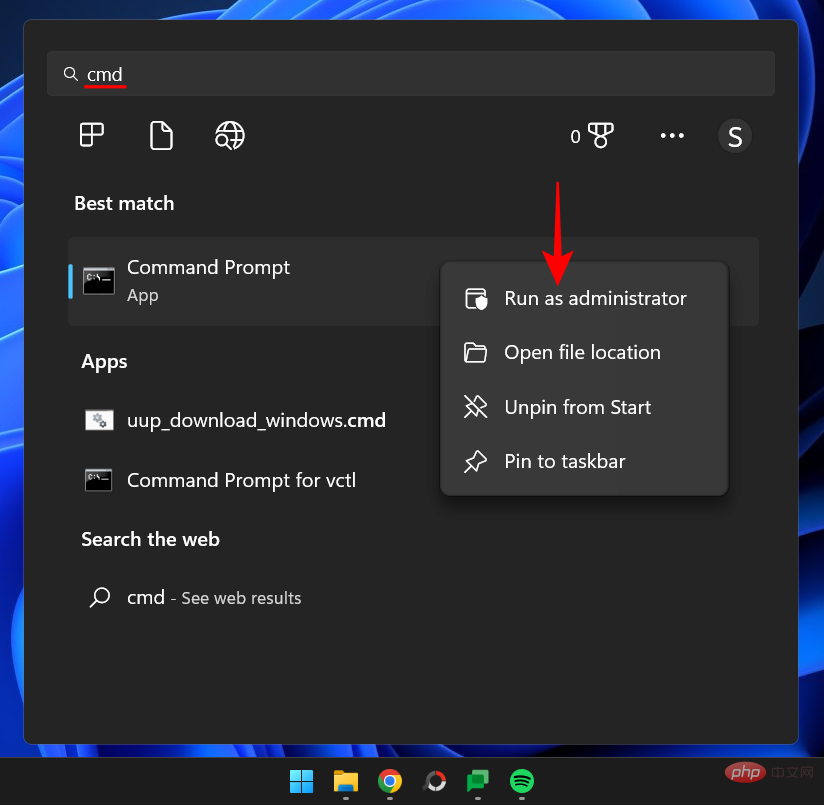
Now type the following command:
wmic process where name="ProcessName" CALL setpriority ProrityLevelID
Make sure Replace ProcessName with the name of your application and PriorityLevelID with 128 (for high priority), as follows:
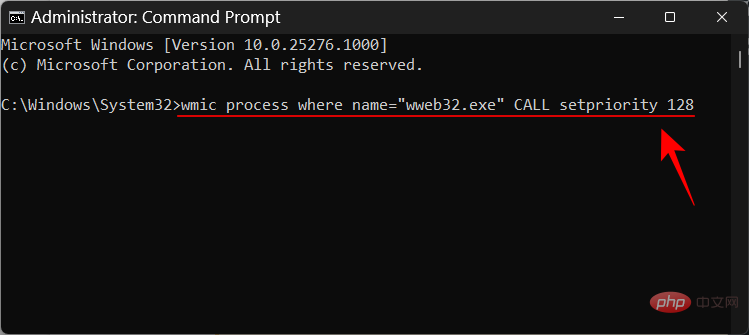
Then press Enter. The application's priority will be set to high.
So far, we have learned how to set the priority of applications that are already running. But you can also use Command Prompt to launch high-priority applications. That's it:
Open a command prompt with administrative rights and type the following command:
start ""/'Prioritylevel' "ApplicationPath"
Make sure to replace "Prioritylevel" with High (without quotes) and ApplicationPath with the full path to your application (with quotes).
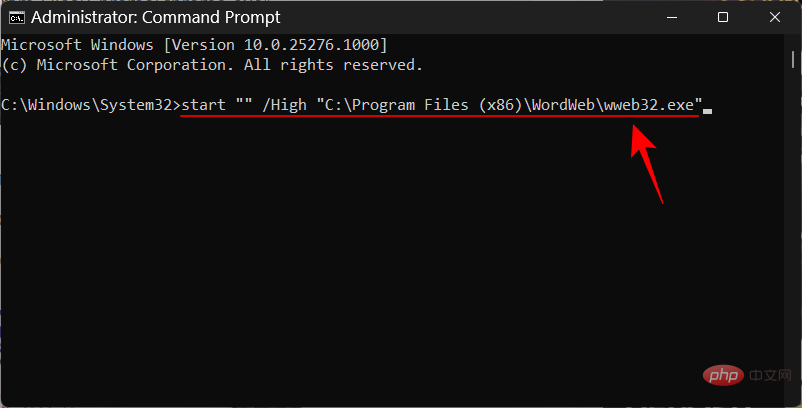
That's it, you launched the application with high priority.
By default, all changes you make to application priority will be reset after you restart your PC. To make the changes permanent, we'll add a Command Prompt command to the application's shortcut.
First, navigate to the application’s folder, right-click it and select Show more options.
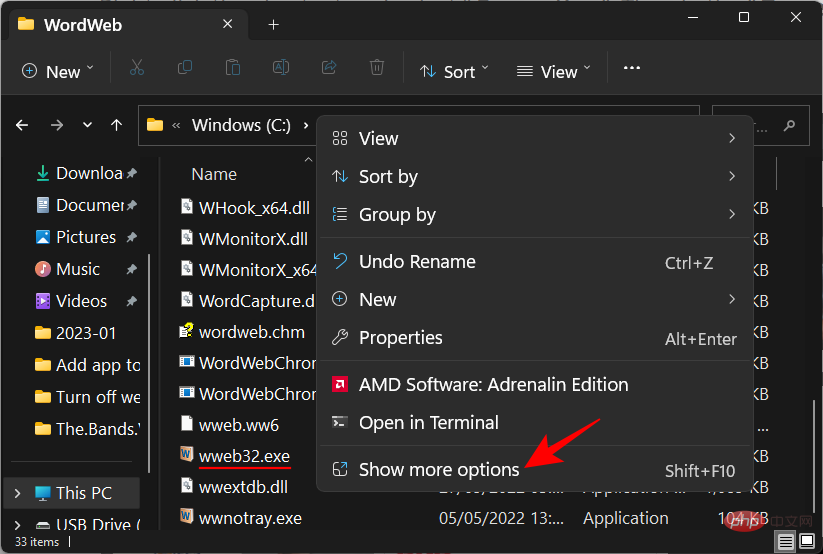
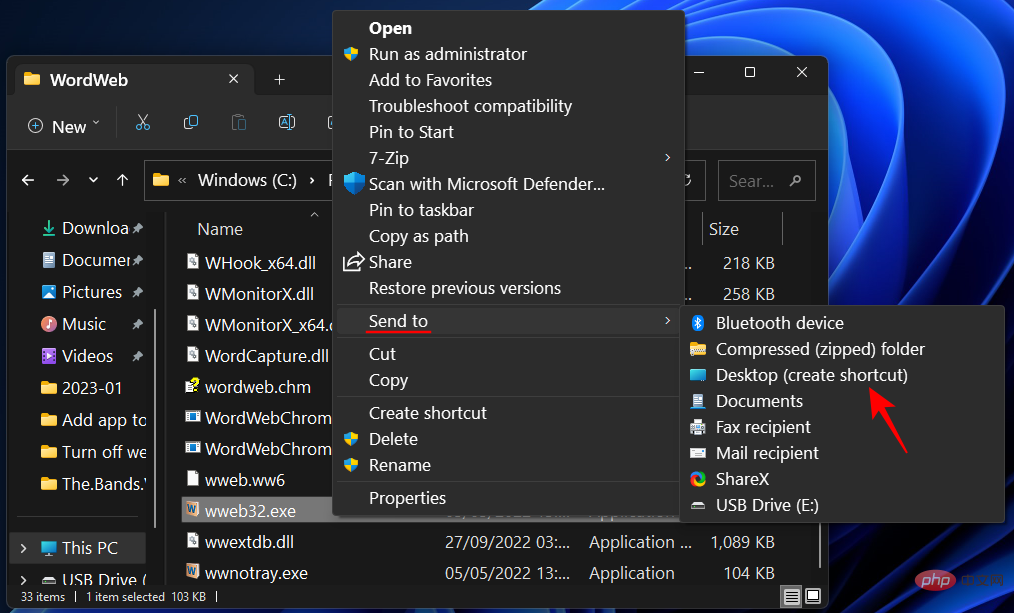
Then select Send to , then select Desktop (create shortcut).
Now right click on the shortcut and select Properties.
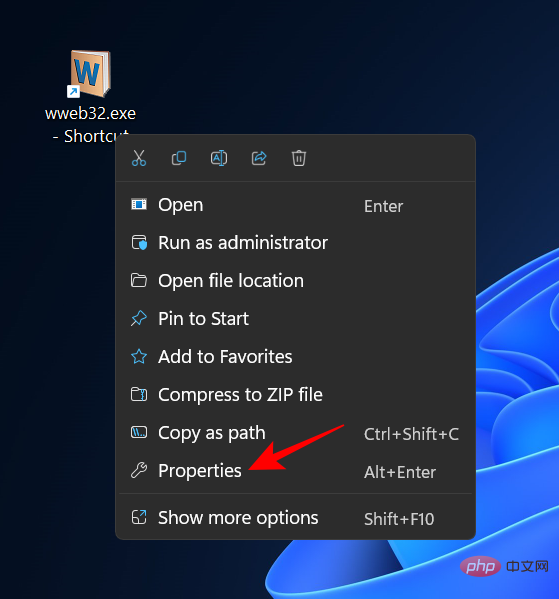
Next to the Target field you should see the location of your application.
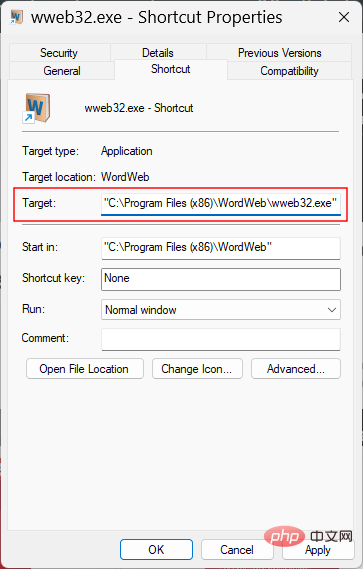
Move the cursor to the beginning of the location path and copy the following:
%windir%\system32\cmd.exe /c start "" /high
and paste it before the location of the application in the Target field. It should look like this:
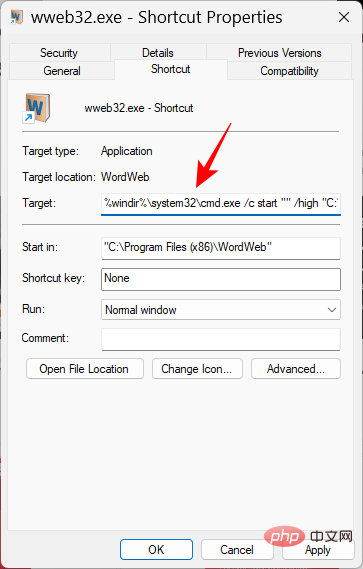
#Then click OK.
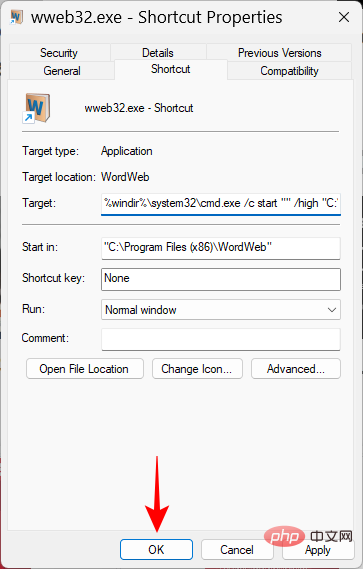
Now every time you run this application using the shortcut, it will run with high priority.

Processor affinity is not the same as the application's priority. Without changing priorities, this option lets you decide how many CPU cores you want your application to be able to use. If you give a relatively heavy application high priority, limiting its CPU core usage can help lighten the load on your PC so that essential services can run smoothly.
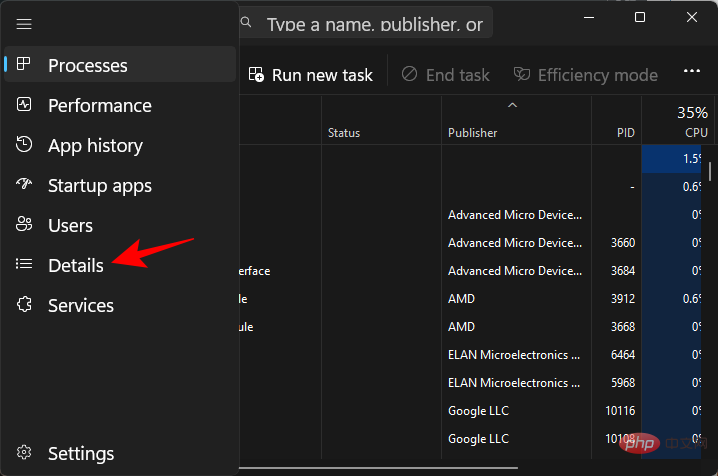
This change can be made from Task Manager. Press Ctrl Shift Esc to open it. Then click on the hamburger icon in the upper left corner. 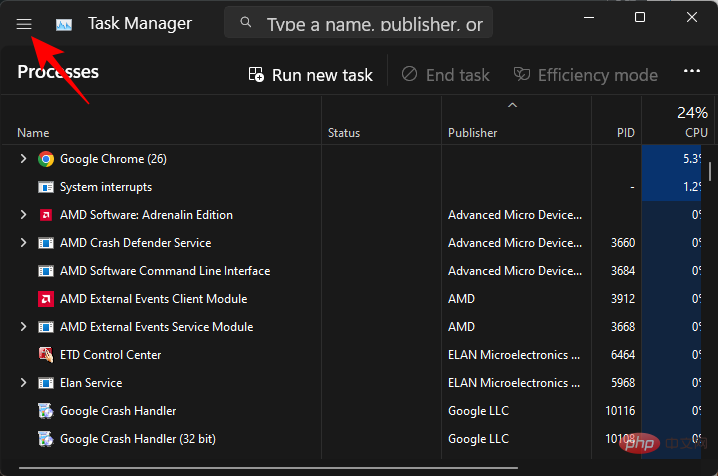
Then select Details.
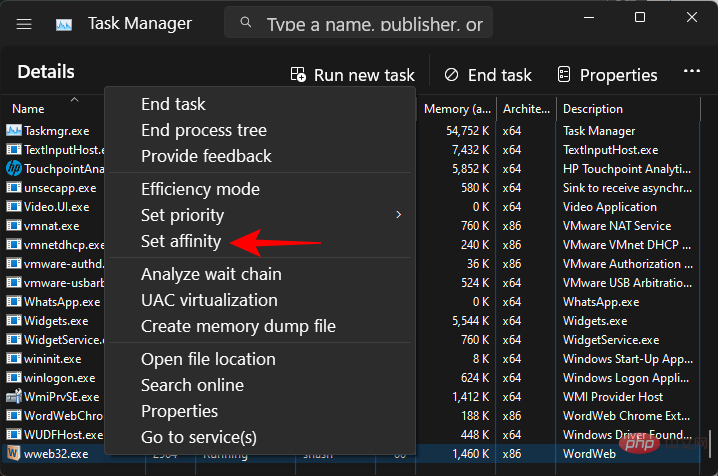
Search for your application, right-click on it and select Set affinity.
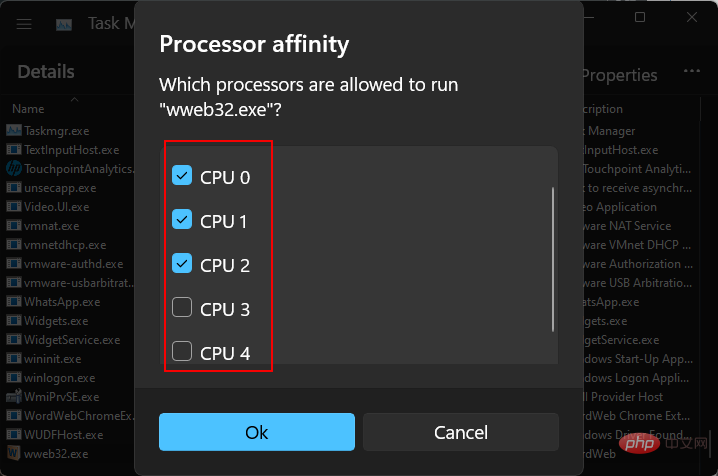
#Here, limit the number of CPU cores available to the application by unchecking some processors.
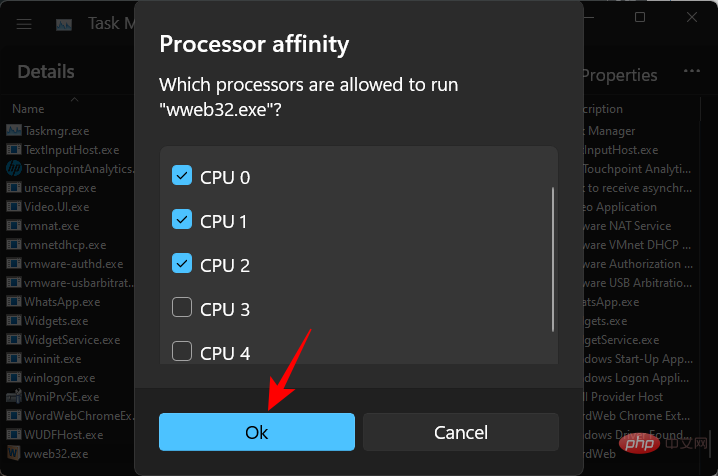
Then click "OK" .
In almost all cases, the answer is no. Real-time priority is primarily reserved for applications that must "talk" directly to the hardware, such as the keyboard and mouse, or perform tasks that require minimal interruption. If you have an application running with real-time priority, you can almost always expect Windows registration to have issues with even the most basic commands.
The above is the detailed content of How to safely set high priority for apps in Windows 11?. For more information, please follow other related articles on the PHP Chinese website!