Home >Common Problem >Steam app already running issue fixed in Windows 11/10
Steam caters to most of the PC gamers around the world. However, just like other launchers, there are some bugs that can really annoy you. You may stumble across an error message " The application is already running. " when opening the Steam client, trying to run a game, and the game hasn't started yet! Actually, this error message appears when the game instance is already running in the background and you try to access another instance. Follow these simple fixes to find a quick solution.
Sometimes just logging out of Steam and back in works.
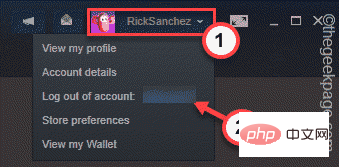
1. In the Steam app, click your account name at the top.
2. Now click on "Cancel Account:" account name once to cancel your account.
[
If there is a Steam game/app already running in the background, you will be asked to stop it. In this case, skip directly to Fix 2.
]
3. You will be warned once. Don't worry. You won't lose data. Therefore, click " LOGOUT " to log out of Steam.
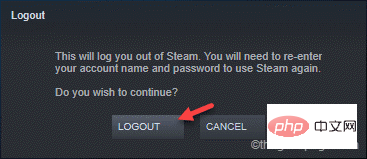
This will log you out of Steam and close it.
4. Now, launch the Steam client.
5. After that, enter your SteamUsername and Password.
6. Finally, click "LOGIN" to log in to Steam.
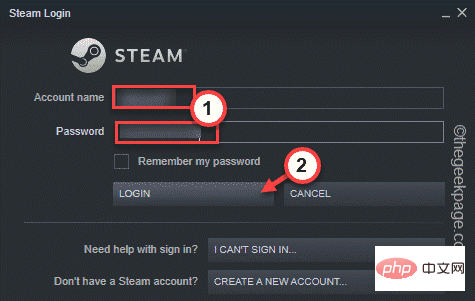
Once completed, try launching the Steam app from the library. Check if this works.
Another game process causing the problem may already be running in the background.
1. You can view all Windows processes from Task Manager.
2. To open it, right-click the Win key and click "Task Manager" to access it.
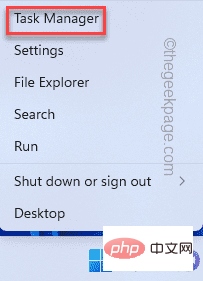
#3. In Task Manager, look for any Steam game processes running in the background.
4. If you can see one, right-click on it and click "End Mission" to kill it immediately.
In this way, kill all game-related processes. However, do not kill any Steam processes (such as the Steam client WebHelper) as it will crash Steam unexpectedly.
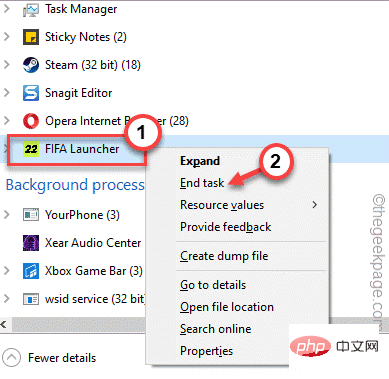
After that, try launching the app from Steam and check if the problem persists.
There is another way to do this. You have to force close Steam and restart it.
1. If the Steam app is still open, close it.
2. This will usually minimize Steam and continue running in the background.
3. You can now click on the up arrow icon ( ˄) on the taskbar and then right-click on the " Steam ” icon, then click “Exit” to close the Steam application.
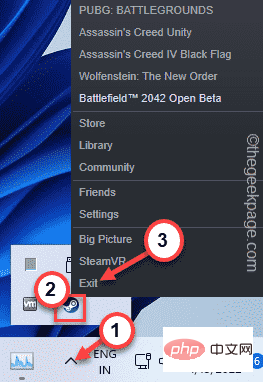
4. Next, press the Ctrl Shift Esc keys simultaneously to access the Task Manager.
5. Enter the "Details" page.
6. Simply scroll down the process list and try to find Steam-related tasks. If you can find such a process, right-click it and click "End Task" to kill it.
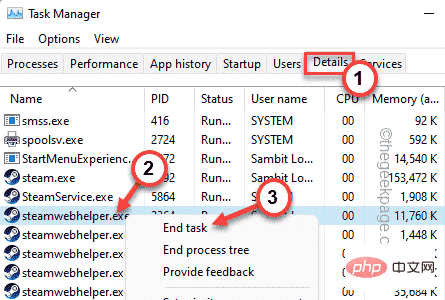
In this way, kill all Steam-related and game-related processes.
7. Once you are sure that no Steam-related or game-related processes are running, open File Explorer and proceed this way -
C:\Program Files (x86)\Steam
[This location may vary. If you have Steam installed on a different drive, go there. ]
8. Just select the " appcache " folder and delete it from your system.
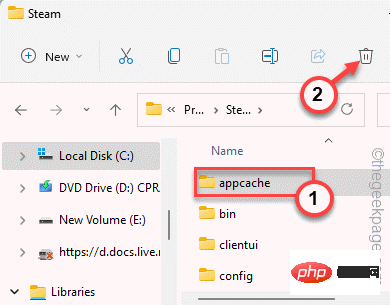
#After that, restart Steam and check if it works. Steam will automatically create a new appcache folder and the game will run without issue.
If force closing Steam doesn’t work, you can refresh Steam Configuration and resolve the issue. This will clear all download cache files but will not delete any downloaded games.
1. First, you must open the running terminal. To do this, just press the Win key R key combination.
2. Simply paste this line into Run and press the Enter key to refresh the configuration.
steam://flushconfig
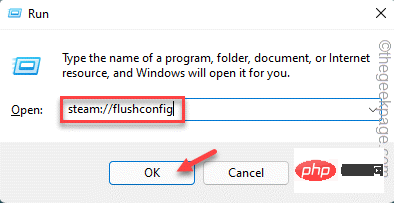
You will be prompted on the Steam page.
3. Then, click "OK" to confirm your operation.

After refreshing the configuration, restart Steam and launch the game. Test if this works.
Another thing you can do is run the game as administrator.
1. After opening Steam, go to "Library".
2. Now, right-click on the game you want to play and click on "Properties".
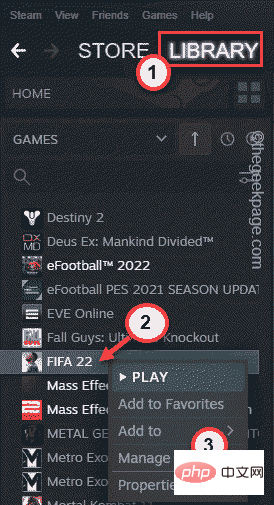
3. In the game properties interface, enter the "Local Files" section.
4. In the right pane, you will see an option called "Browse...". click it.
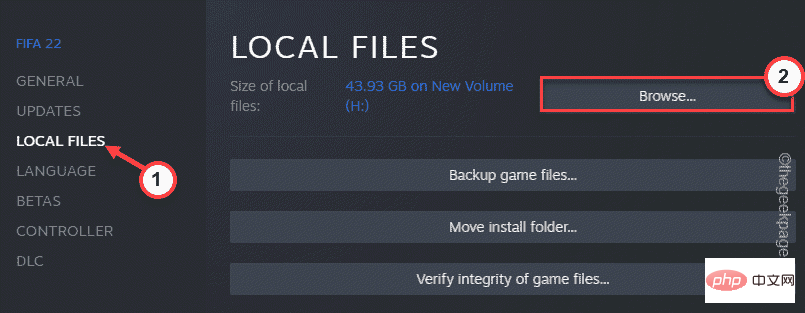
#5. When this leads you to the game's installation directory. Now, scroll down through all the files and folders and look for the game application.
6. Once you find it, right-click on it and click "Properties".
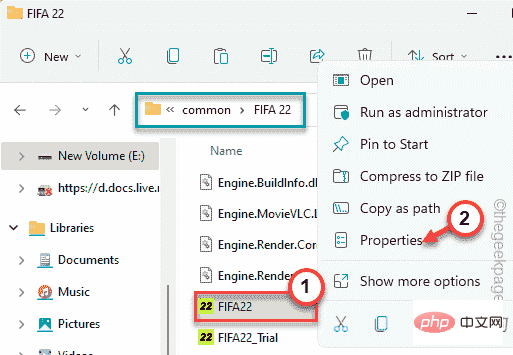
7. Just go to the "Compatibility" tab.
8. Here, just check the "Run this program as an administrator" option.
9. Finally, click “OK”.
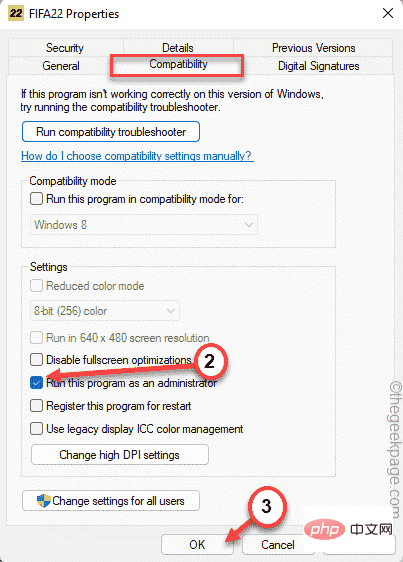
Now, once this program is set up to run as administrator, launch the game from Steam and test if that works.
If nothing works, some key files may be missing from the game files.
1. You must run a file verification check on your game files.
2. Launch the Steam client.
3. Then, go to "Library" and find all the games in the left pane.
4. After that, right-click the game and click "Properties".
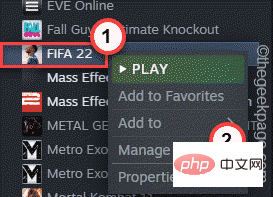
5. Now, you have to go to the “Local Files” section.
6. You can run an integrity check of the game files. Click "Verify the integrity of the game files...".
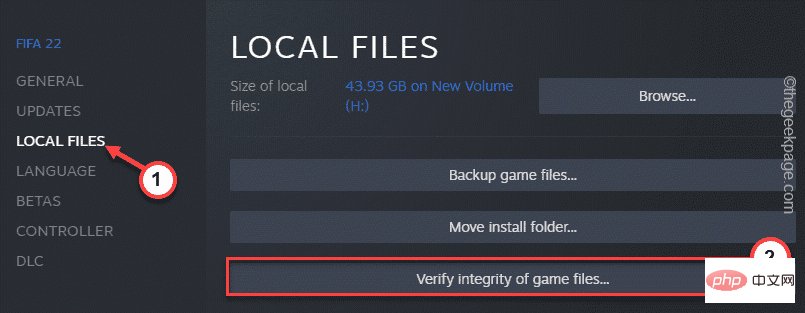
Steam will scan the game files for any missing files and replace them with the actual files. So, this process takes a while. So wait until the process is completed.
After that, restart the game and check if it works.
If you participated in the Steam Beta Program, you should opt out.
1. Open the Steam app.
2. After that, click on “ Steam ” on the menu bar, and then click on “Settings” to open it.
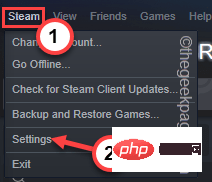
3. In Steam Settings, click "Account" settings.
4. You can view your Steam account details, including the "Beta Participation:" setting.
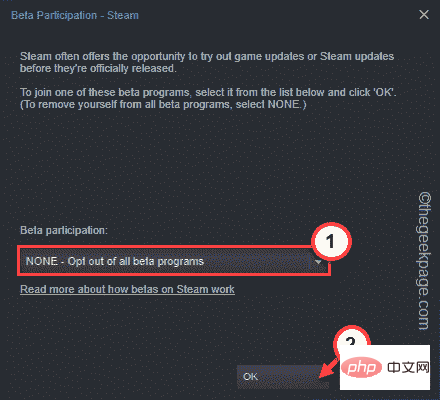
5. After that, select “ NONE – Opt out of all beta programs ” from the drop-down list.
6. Finally, click "OK".
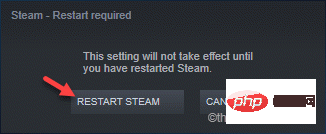
7. Finally, click " RESTART STEAM " to restart the Steam application.
Now, once rebooted, launch the game again. It will start normally and now you can enjoy the game.
Your problem is solved.
The above is the detailed content of Steam app already running issue fixed in Windows 11/10. For more information, please follow other related articles on the PHP Chinese website!