Home >Common Problem >How to enable Windows Installer logging in Windows 11/10
Windows Installer, also known as Microsoft Installer, is a component included in the Windows operating system and is used to deploy applications (software installation, removal and maintenance) on Windows PCs ). In order to identify issues related to Windows Setup, you can use the logging service provided in Windows. You must have noticed that sometimes the installation of some applications fails because the Windows installer is unable to perform the process.
If you have problems installing applications on your Windows PC, you can view the logs maintained by Windows Installer. First, you need to enable these logs if you want to reference them when you encounter software installation problems. After you enable Windows Installer logging, you need to attempt to install the program so that Windows Installer can record the installation progress in a log file. These log files can help troubleshoot package installation issues.
Windows Installer logging can be enabled by adding keys and values to the registry. You can try the installation after adding and enabling the registry key. Windows Installer will now track the installation progress and add it to the Temp folder. The name of the log file can be any random name, but the first letter of the name will have "Msi" and a .log extension at the end of the file. These log files will contain any error codes generated by Windows Installer when logging is enabled.
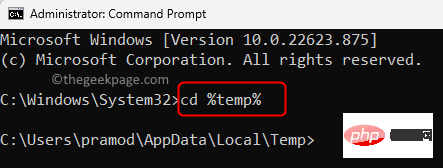
To open the Temp folder, open Command Prompt and type the following command
cd %temp%
After typing the above command, you will see the command The prompt changes to the location of the Temp folder.
In this article, we have discussed two methods using which you can enable Windows Installer logging on Windows 11/10 PC.
Since you are making modifications to the registry, it is always recommended that you take a registry backup or create a restore before proceeding point so that you can restore the system to its original state if any issues arise after the changes.
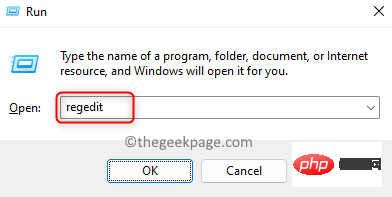
step 1. Press Windows R to open the "Run" box.
Step 2. Type Registry Editor and press Enter to open Registry Editor.
When User Account Control prompts for permissions, click "Yes".
Step 3. Copy and paste the path given below into the navigation bar or use the folders in the left pane to navigate.
HKEY_LOCAL_MACHINE\Software\Policies\Microsoft\Windows\Installer
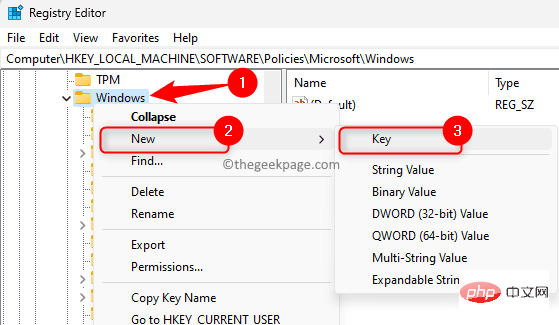
Step 4. If you cannot find the Installer folder, right-click the Windows folder in the left pane and select New –>Key.
Name this new folder Installer.
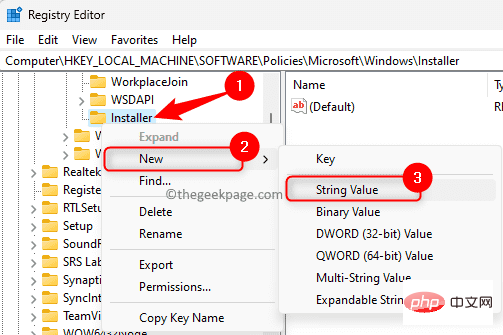
Step 5. Now, right click on the Installer folder and select the option New –>String Value.
Name this string log record.
Step 6. In the right pane, double-click the Logging entry to open its Edit window.
Step 7. In the "Edit String" window, set the "Value Data" field to voicewarmupx.
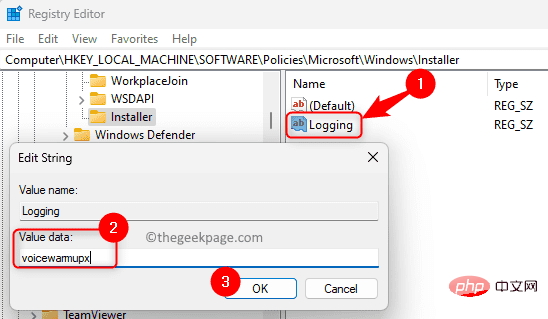
#The value data field can contain letters in any order. Each letter here is used to enable a different logging mode. The alphabetical functions for MSI version 1.1 are as follows:
Step 8. Click OK and close the Registry Editor.
Step 9. Restart your PC after enabling Windows Setup logging.
Try to install the program so that log files can be created.
Note:
After you complete the troubleshooting process for a specific application installation, you need to disable Windows Installer logging. Leaving it enabled may affect system performance and disk space. In order to disable it, you need to delete the Logging entry in the registry. Otherwise, a new log file will be created every time the application is installed or removed.
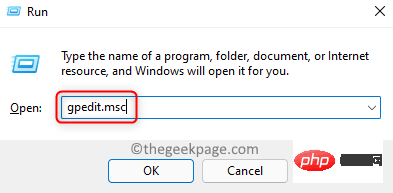
Step 1. Use the Windows and R key combination to open the Run box.
Step 2. Type gpedit.msc and press Enter to open Local Group Policy Editor.
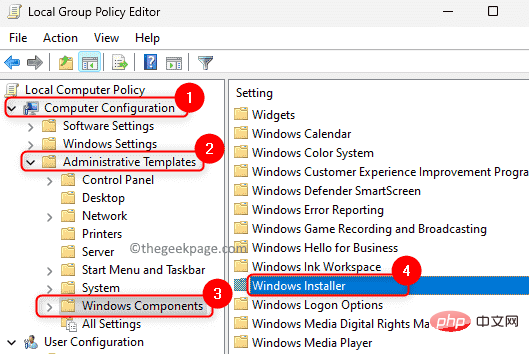
Step 3. Using the folders in the left panel, navigate in the folder order mentioned below.
Computer Configuration –> Administrative Templates –> Windows Components –> Windows Installer
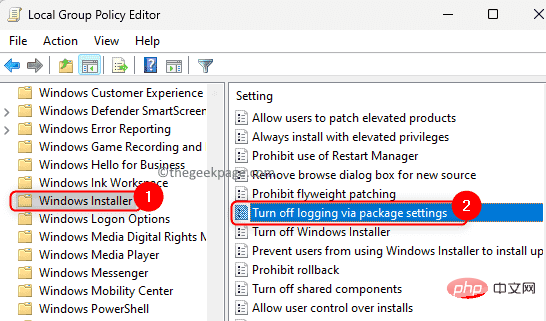
Step 4. Find the settings associated with Logging in the right pane.
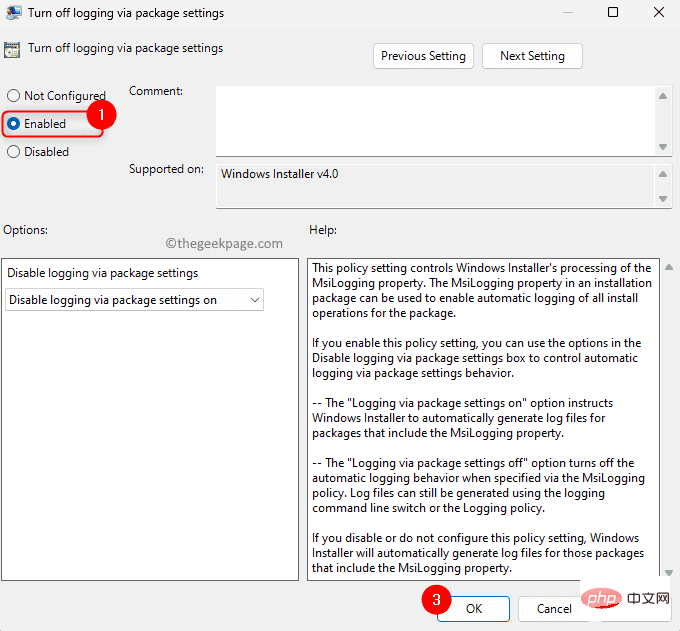
Double-click "Turn off logging through package settings" to change its properties.
Step 5. Select the Enabled option.
In Options, select the logging options to use from the two options in the drop-down list.
The log files will appear in the Temp folder.
Step 6. Click "Apply" and then "OK" to save the changes.
Step 7.Restart the computer and check the log files when trying to deploy the application.
The above is the detailed content of How to enable Windows Installer logging in Windows 11/10. For more information, please follow other related articles on the PHP Chinese website!