Home >Common Problem >How to Fix Thermal Trip Error on Windows 11/10
Every CPU is designed to operate within specific temperature limits. Whenever the CPU temperature reaches a certain zone, it automatically trips and the system automatically shuts down/restarts. However, if you see this error message during system boot, there are some solutions you can try. Read on and implement these simple fixes to resolve the issue.
NOTE——
This processor thermal trip is designed to protect your system. When you perform processor-intensive work for an extended period of time, the processor may have reached its limits and activated a thermal trip. We recommend that you double-check these solutions and consult a technician if this happens repeatedly.
There are certain checks you can perform to check if this is a hardware issue.
The fan is the main part of the cooling system. If the fan stops working, the CPU and other components will overheat and cause a processor thermal trip.
1. Shut down your system. Make sure your power switch is also off.
2. Then, carefully open the back cabinet.
3. Check the fans on the CPU, GPU and power supply unit. Look carefully for any obstructions on the fan blades.
3. Now, when the case is open, click on the power button to start the system.
Normally, the fans on the PSU and CPU should start spinning as soon as the computer starts booting. If you notice that the CPU fan is not spinning during system startup, there may be some problem and you should consult a computer technician.
The fans on gaming laptops are usually located on the back. Therefore, you should not place your laptop on a solid surface (like a table, desk, etc.). You can use your laptop's cooling pad to regulate the ambient temperature more effectively.
In addition to fans, the environment in which you use your device also plays an important role in thermal management. You should keep your system running in a cool, well-ventilated environment. An excessively hot environment can cause the processor to overheat.
Playing games while heavy tasks are running in the background can put a lot of stress on the CPU, causing it to trip due to excessive temperatures.
1. Click the Ctrl Shift Esc key at the same time to call the Task Manager.
2. Once opened, check the CPU tab and look for processes with very high CPU usage.
3. If you can find any such process, select the task and click "End Task" to kill it.
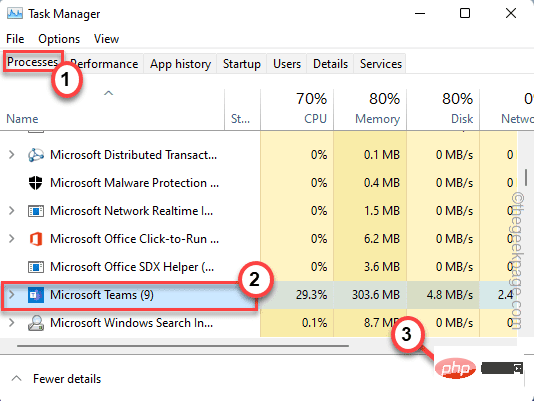
Make sure that any unnecessary processes are not using a lot of CPU processing power.
Close Task Manager when finished. Now, play games or do anything. You will no longer see the processor thermal trip error message.
There are some malwares like Crypto Mining Trojans that can overload the CPU and cause the entire system to crash! We recommend running a full scan using Windows Security Center.
1. Use the Start menu to launch the Windows Security application.
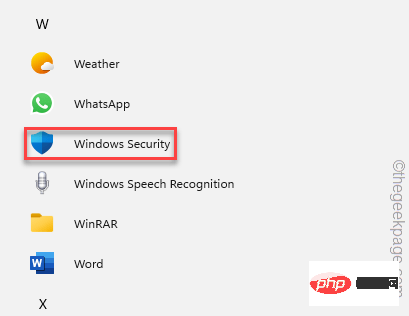
2. When the Windows Security page opens, click on the "Virus & Threat Protection" setting.
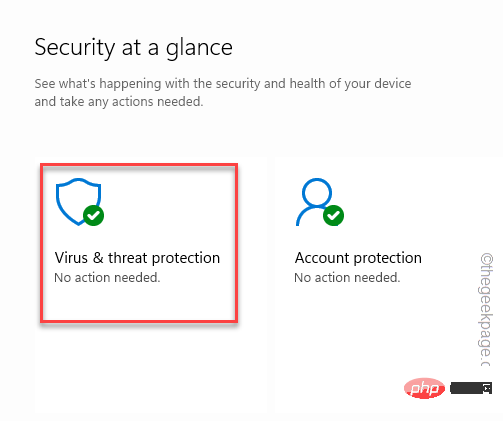
#3. On the next page, you will see the results of previous scans and more options.
4. Here, just click on "Scan Options" to access it.
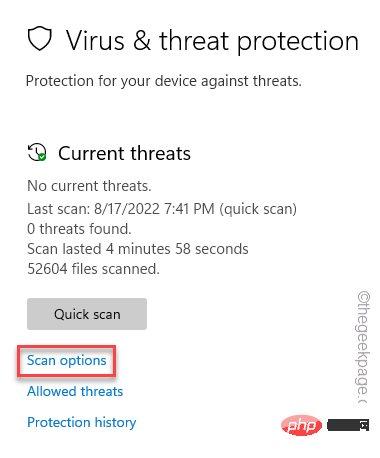
7. Now, select "Full Scan" and click on the "Scan Now" button to run a complete system-wide scan .
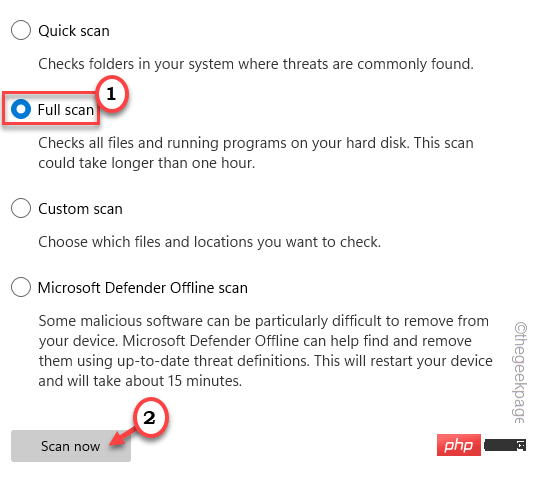
The scan time may vary depending on the number of files and folders you have.
If Windows Security Center detects any malware infection, you may have to restart your system so that Windows can quarantine and permanently remove it.
Hope this helps.
Overclocking also means overheating. If you have enabled it, disable it.
1. Press the Win key and I key simultaneously.
2. When the settings window opens, click "System".
3. After that, scroll and click on "Restore".
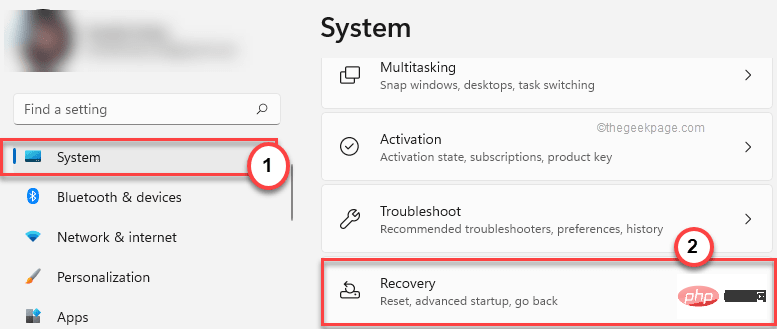
#4. Later, click "Restart Now" in the Advanced Startup section.
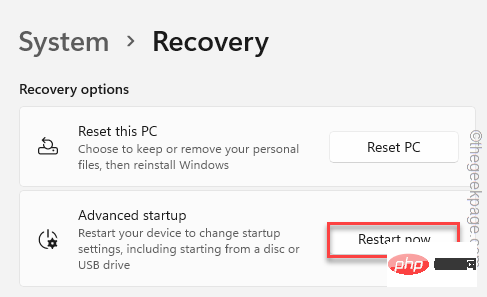
This will reboot the system.
5. Just click "Troubleshoot" to continue.
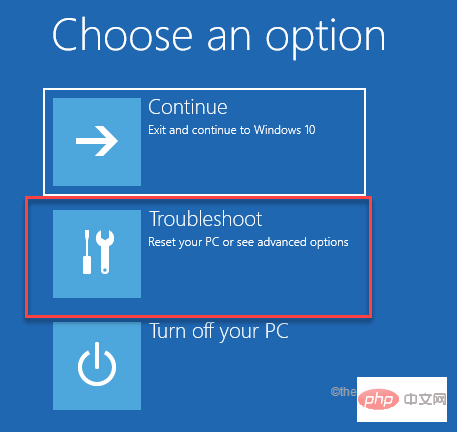
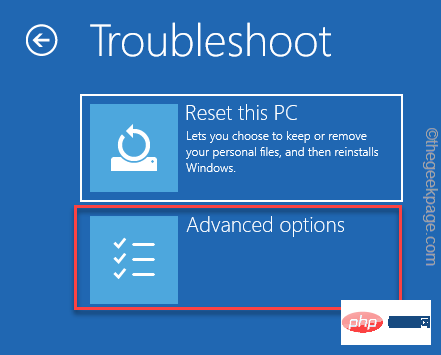
6. Next, just click on “Advanced Options” to enter the next settings page.
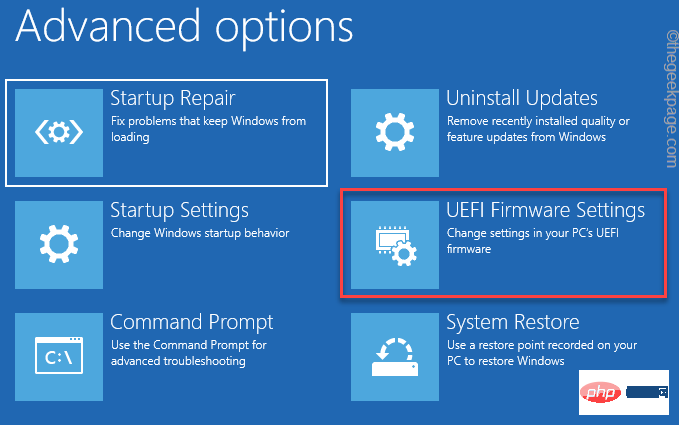
7. You have to click on “UEFI Firmware Settings”.
8. Now, click " Restart " to restart the system and open the BIOS settings.

9. Now, go to the "Performance" tab.
10.Here, look for the “Overclocking” option. Select it and set it to "Disable" mode.
Now, save the settings and exit the BIOS page.
11. Return to the homepage and click "Continue".
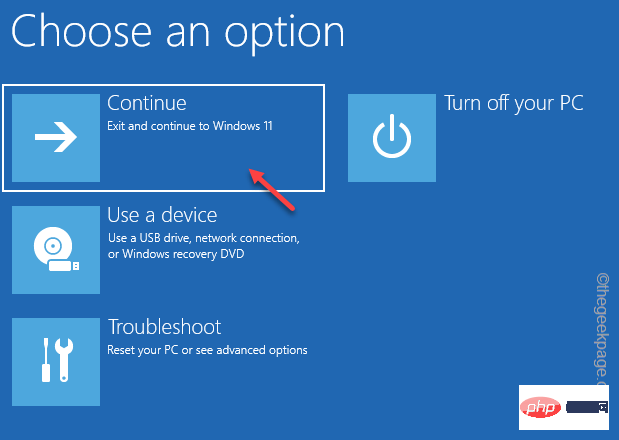
Once the system boots up, you won't have thermal trip issues at all.
Ideally, the CPU operates within a defined temperature range. Check the temperature reading yourself.
For PC computers, the idle CPU temperature is 49°C and the maximum temperature should be around 79°C. In the case of laptops, the higher range can reach 90°C.
1. Visit the CoreTemp website.
2. Now, click "Download" to download the CoreTemp installer.

3. Then, double-click " Core-Temp-setup" to access it.
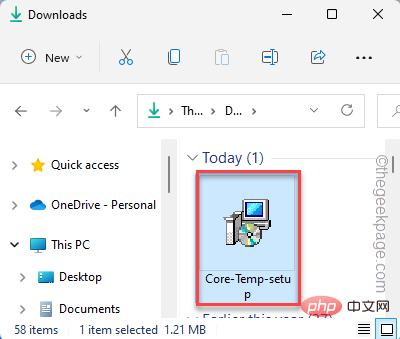
#4. Now, just follow the on-screen instructions to complete the last step.
5. Then, click "Install" to start installing the tool.
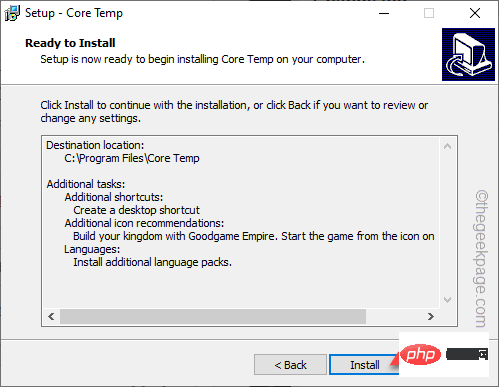
Come to the completion step, click "Complete" to complete the step.
CoreTemp should start automatically. If not, start the tool.
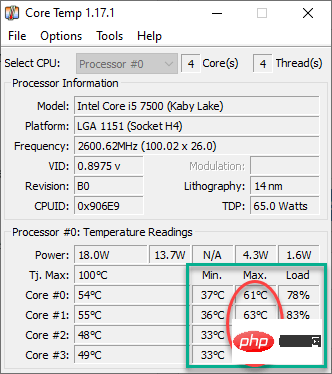
1. Once CoreTemp is turned on, check the temperature and load of each core.
2. If you find that the maximum temperature exceeds 65°C, despite applying all the fixes on this page, you should consult a technician.
You can set the system power plan to high-performance mode.
1. First, press the Windows key and R key at the same time.
2. Then, Type it and click "OK".
电源配置文件

3. When the control panel opens, click "Show additional plans".

4. After that, select the "High Performance" mode.
[
Note – There is an additional option to use the “ Ulitmate Performance ” mode if desired. To enable this hidden power plan on your system, follow the steps mentioned in our tutorial.
]
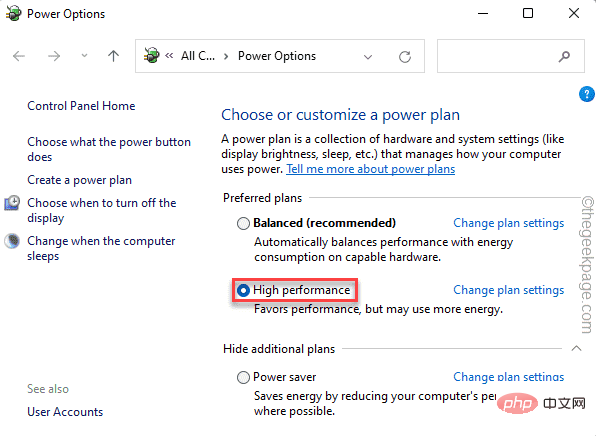
You can close the control panel page. Now, play the game and test it out. Your system will no longer trip due to heat.
Additional Tips–
1. You should increase your system RAM. If you have 4 GB, you should upgrade it to 8 GB.
2. You should replace the thermal paste on the heat sink. It can significantly reduce CPU temperature. Typically, thermal paste lasts 3 years. So if your PC is older than this, call a technician or you can reapply thermal paste yourself.
The above is the detailed content of How to Fix Thermal Trip Error on Windows 11/10. For more information, please follow other related articles on the PHP Chinese website!