Home >Common Problem >How to fix Camera app error 0xA00F4288 in Windows 11
The Camera app on Windows shows the error message "Close other applications. It looks like another application is already using the camera. If you need it, here is the error code: 0xA00F4288
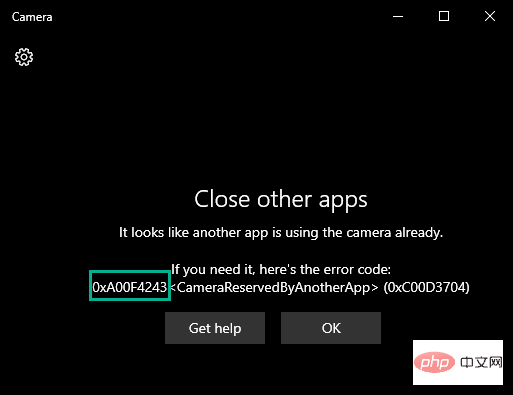
The most obvious reason behind this issue is that other camera-related apps are denying camera access to the camera app.
1. You can find all tasks and processes in Task Manager.
To open it, press the Win key and the X key simultaneously, then click on "Task Manager".
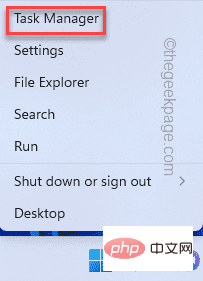
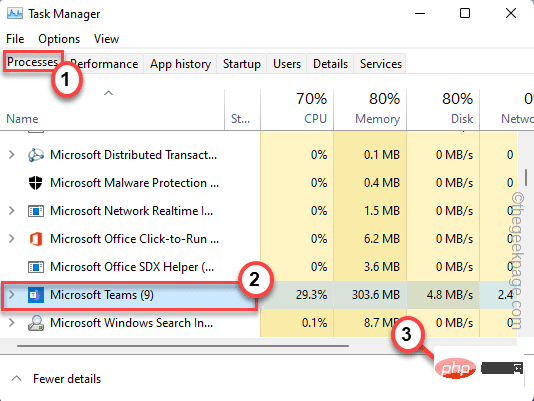
2. After opening the Task Manager, access the "Processes" tab.
3. In this Processes list, see if you can find any applications that may be using the camera.
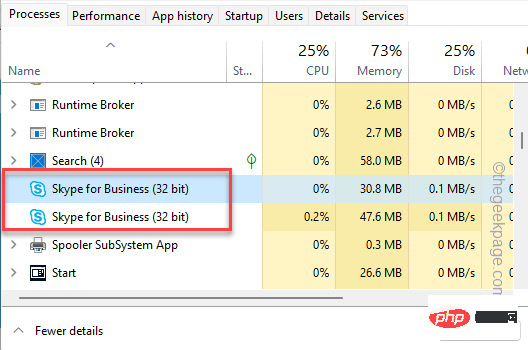
Like - any video conferencing application, Zoom, Teams, Skype for Business, etc., or any imaging software.
4. If you encounter such a process, select it and click "End Task" to kill the application.
#5. In this way, all camera-related applications will be killed one by one.
Don't forget to scroll the "Background Processes" thread to check if any such applications are still running.
Once completed, close the Task Manager application and launch the Camera application.
There is a simple registry trick that solves the problem for many users.
1. You must press the Win key and enter "regedit".
2. Then you will see "Registry Editor" in the search results and click on it.
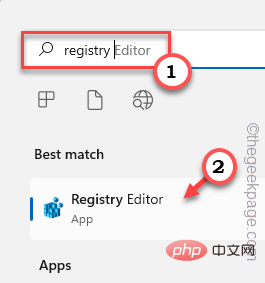
Warning – Adding or removing values in Registry Editor is a dangerous process, and any improper behavior may result in fatal system errors. Therefore, you should create a new registry backup before completing the entire process.
one. Once the Registry Editor screen opens, click "File" in the menu bar.
Bay. You can click "Export..." to export the current registry data.
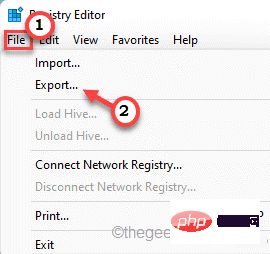
Now you should store this backup in a discrete location.
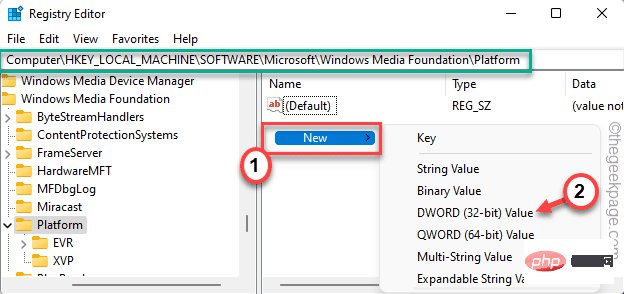
3. On the left, go here -
计算机\HKEY_LOCAL_MACHINE\SOFTWARE\Microsoft\Windows Media Foundation\Platform
4. You will add a new value.
5. So, on the right side, right click on the space and click on " New> " and click on " DWORD (32-bit) Value " to create a new value.
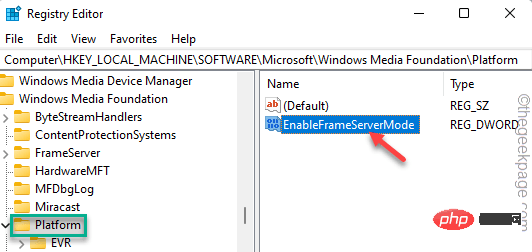
5. Set the name of the value to " EnableFrameServerMode ".
6. Now, just double-click the item to edit it.
7. Click "Value Data:" and set it to "1".
8. Finally, click "OK" to save this change.
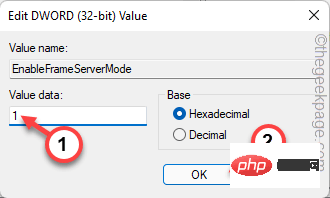
Exit the Registry Editor and restart the system. After restarting the system, open the camera and check.
The Camera app may display this error code due to lack of appropriate permissions.
1. First, open the Settings app. You must press the Win key and the I key at the same time.
2. In the left pane, click the "Privacy & Security" tab.
3. Now, on the right side, scroll down and click on the "Camera" settings to access it.
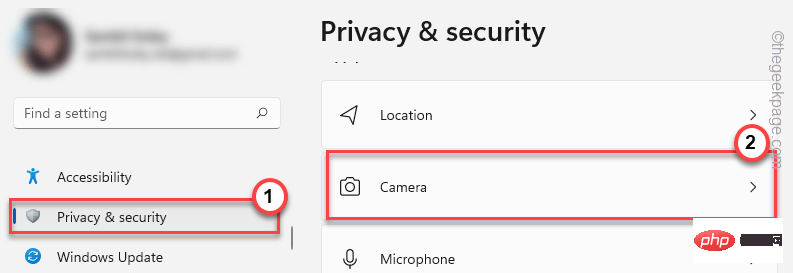
4. Now, make sure Camera Access is turned on.
5. Then, set the "Let apps access your camera" option to "On" setting.
6. Next, simply switch the "Camera" app to the "Off" and "On" settings.
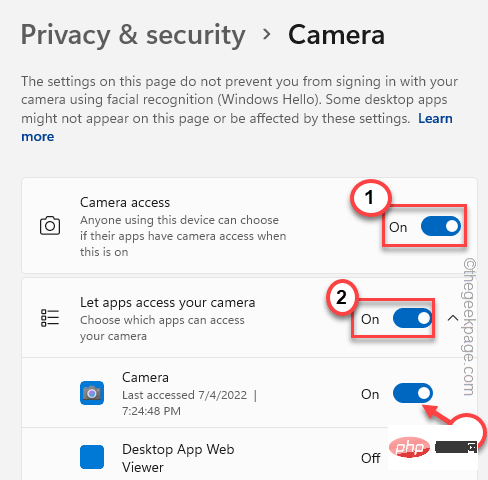
Now you can close the Settings page. Then, launch the camera app and test if it works.
You can repair the Camera app and reset it if needed.
1. You must right-click on the Windows icon and click "Apps and Features".
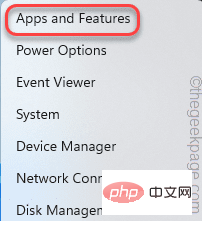
#2. When the Applications and Features page opens, you will see all the applications on your machine there.
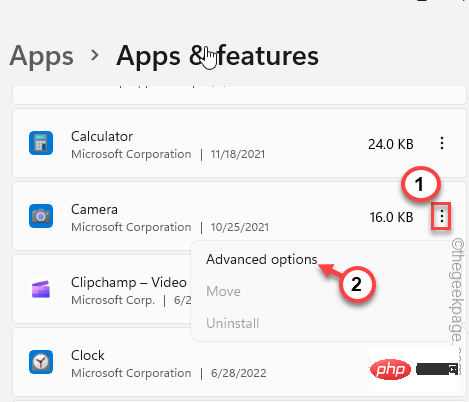
3. Look for the "Camera" app until you find it. Click the three-dot menu and then click "Advanced Options".
4. If you go down through the right pane, click "Repair" to repair the application.
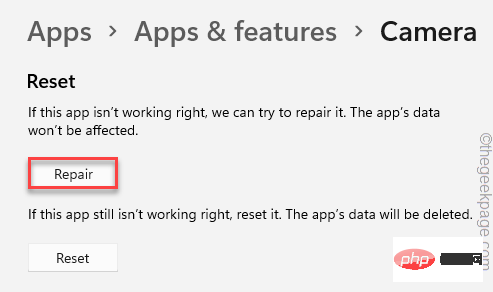
Wait one minute for Windows to repair the application. Once done, launch the camera app and check if the issue persists.
If the problem persists, please return to the Settings page.
5. This time, click "Reset" once and then click "Reset" to reset the application.
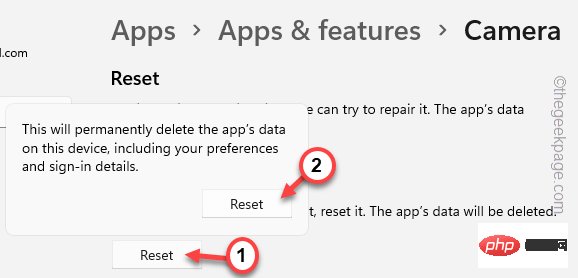
After resetting the app, launch the camera app and test if it works.
You can revoke camera permissions from apps that are not used directly as a camera app.
You must stop all camera related applications.
1. Press the Win key and the X key at the same time and click "Task Manager".
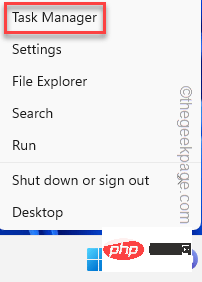
2. You will find all processes in the "Processes" tab.
3. Look for any application-related processes that may be using the camera (any video conferencing applications, Zoom, Teams, etc.). Simply select it and click "End Task" to terminate the application.

After ending these applications, close the Task Manager.
You can now revoke camera permissions from all other apps except the Camera app.
1. Open the setup utility window.
2. Then, click "Privacy and Security".
3. Next, click "Camera" to explore.

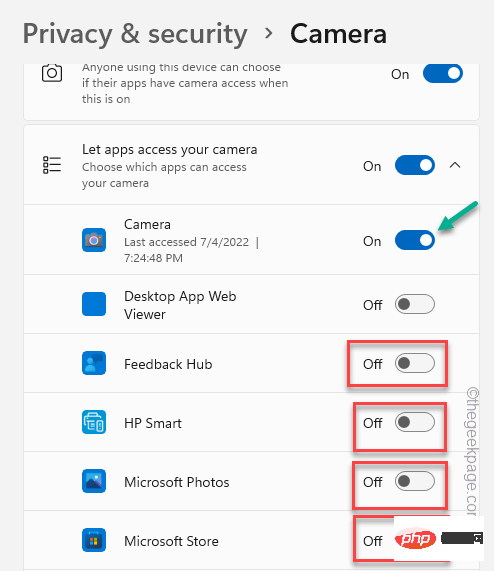
#4. Now, on the right side, you can find all the apps that can access the camera.
5. Now, turn off this access for all apps that are not used as camera apps
#Make sure you do not enable it for the "Camera" app this access.
This way, no other unnecessary apps can use the camera except the camera.
Use the search box to launch the camera app and check if the issue is resolved.
You can run the Camera Troubleshooter to check and resolve the issue.
1. Open settings.
2. Now, click on the first option “System” on the left pane.
3. Next, you can click on "Troubleshooting".
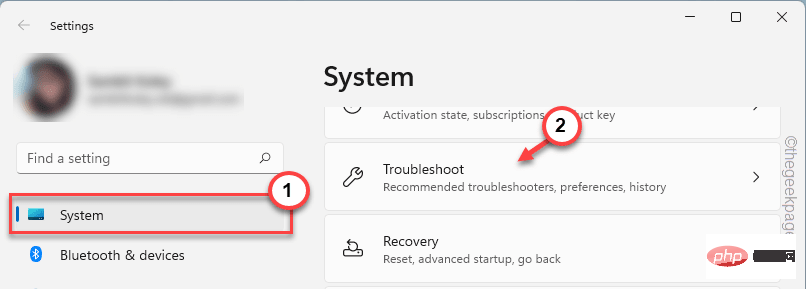
#4. This will launch the troubleshooting page.
5. On the right side, click "Additional Troubleshooters".
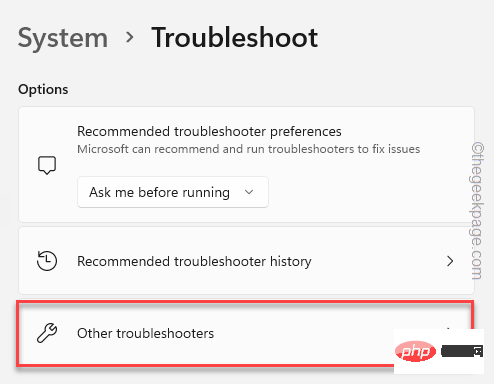
#6. On this page you can find all the troubleshooting tips.
7. Now, click on “Camera” Troubleshooter. Now, click "Run" to run the troubleshooter.
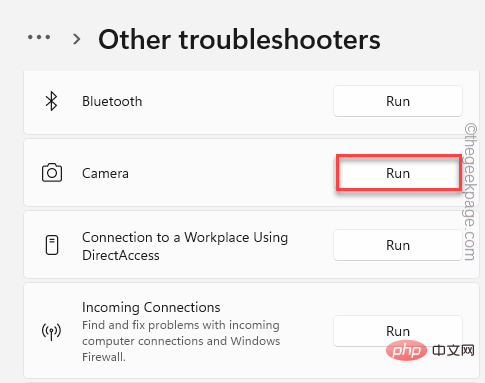
#Camera Troubleshooter will now check and fix any camera-related issues. After you finish troubleshooting the camera app, test to see if it works.
卸载相机驱动程序,然后重新安装。检查这是否适合您。
1. 同时按下 ⊞ Win键+R 键。
2. 然后,在该框中键入并单击“确定”。
devmgmt.msc
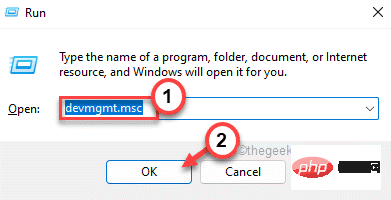
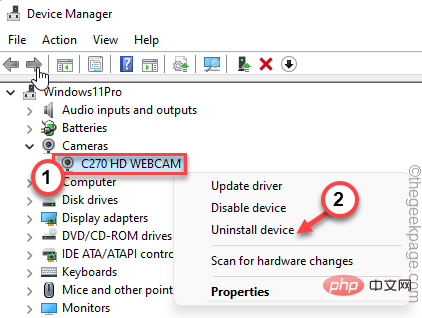
3. 您必须点击“相机”设备。
4. 在该列表中,当您注意到相机驱动程序时,只需右键单击该列表并单击“卸载驱动程序”即可将其卸载。
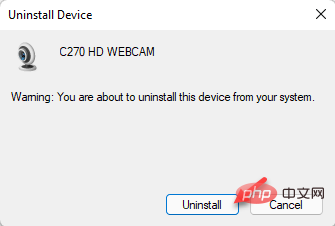
5. 您将收到一条警告消息。点击“卸载”完成该过程。
6. 卸载网络摄像头驱动后,点击菜单栏中的“操作”即可。
7.接下来,单击“扫描硬件更改”。
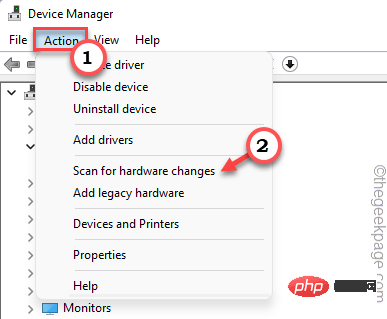
现在,您应该重新启动系统,Windows 将自动重新安装驱动程序。
更新系统上的网络摄像头驱动程序。
1. 同时按下Windows 键和X键应调出上下文菜单。
2. 点击“设备管理器”打开它。
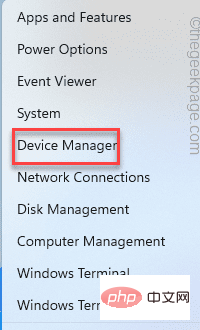
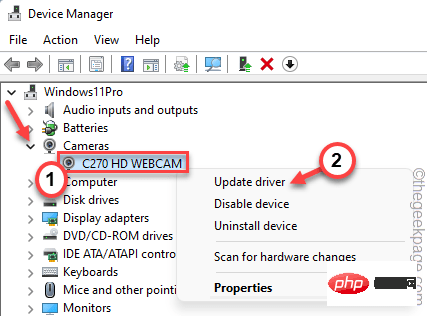
3. 在设备管理器页面,展开“相机”部分。只需将其展开以查看您的相机设备。
2.只需右键点击相机驱动程序,然后点击“更新驱动程序”。
3.在下一步中,只需单击“自动搜索驱动程序”。
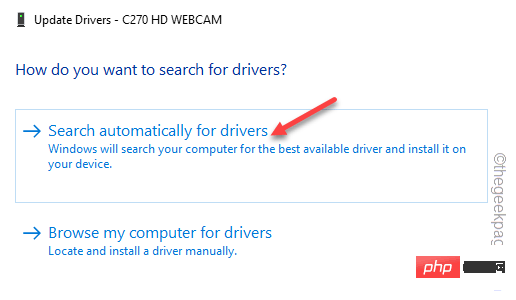
关闭设备管理器。启动相机应用程序并再次测试。
如果网络摄像头没有自动更新,请按照以下步骤操作。
1. 启动设置窗口。
2. 现在,只需单击左侧窗格中的“ Windows 更新”部分。
3. 只需单击右侧窗格中的“高级选项”菜单。
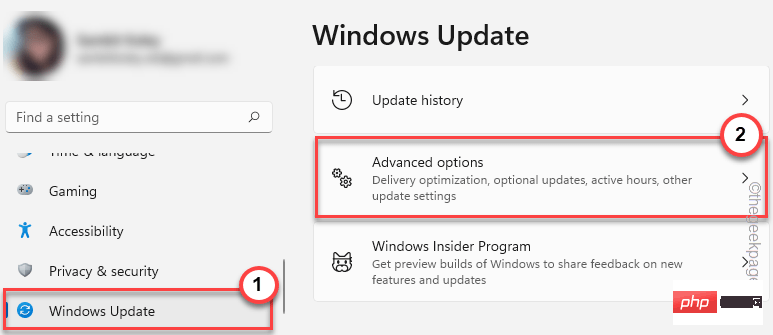
4. 现在,您将看到摄像头驱动程序。只需检查页面上的所有驱动程序。
5. 接下来,只需点击“下载并安装”即可安装这些更新。
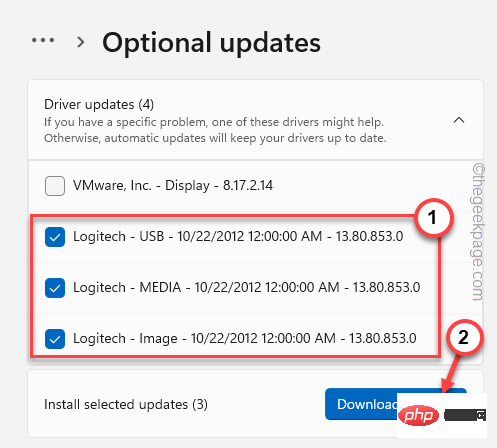
Windows 现在将下载并安装可用的最新版本的网络摄像头驱动程序。
这些驱动程序更新应该可以正常工作而无需重新启动系统。
只需手动重新启动系统。测试这是否能解决您的问题。
The above is the detailed content of How to fix Camera app error 0xA00F4288 in Windows 11. For more information, please follow other related articles on the PHP Chinese website!