Home > Article > Operation and Maintenance > How to enable wireless function in win7
How to turn on the wireless function in win7: 1. Click Start and open the Control Panel; 2. Enter Network and Internet Options, click Network and Sharing Center; 3. Enter Change Adapter Settings, right-click Ethernet, and select Enable That’s it.

#The operating environment of this article: windows7 system, thinkpad t480 computer.
Specific method:
After turning on the computer, click [Start] and click [Control Panel] on the right.

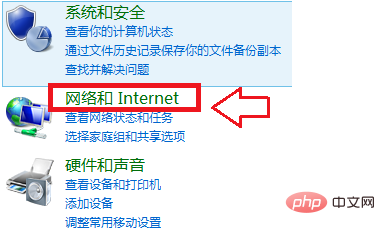
Click [Network and Internet].

Click [Network and Sharing Center].

Then click [Change Adapter Settings].

Place the mouse on the [Wireless Network Connection] option, right-click the mouse, and click [Enable].

Related recommendations: windows system
The above is the detailed content of How to enable wireless function in win7. For more information, please follow other related articles on the PHP Chinese website!