Home >Operation and Maintenance >Windows Operation and Maintenance >How to upgrade win7 system from 32-bit to 64-bit

Download the win7 x64 system iso image locally, right-click and use WinRAR and other tools to extract it.
Put the win7.gho file and the Onekey ghost tool in the same directory, such as the D drive, not the C drive or desktop.

Double-click to open the Onekey ghost installation tool, select "Restore Partition", select the win7.gho file as the image path, select the installation location, such as C drive, or judge based on the disk capacity. Install the system disk and click OK.

#A prompt box will pop up. After confirming that there is no important data, click Yes to restart the computer immediately to restore the computer.

At this time, the computer restarts, and Onekey Ghost is listed as the startup item. This Onekey Ghost is selected by default.

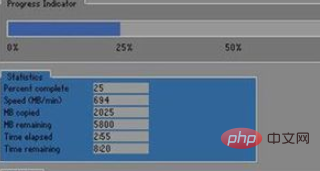
Start to enter this interface, perform the operation of restoring the win7 64-bit system to the C drive, and wait for the progress bar to complete.

After the operation is completed, the computer automatically restarts and continues the win7 x64 system installation and configuration process.

The upgrade and installation process will involve multiple restarts. After the final restart to enter the new system desktop, win7 32-bit will be upgraded to win7 64-bit.

Recommended tutorial: windows tutorial
The above is the detailed content of How to upgrade win7 system from 32-bit to 64-bit. For more information, please follow other related articles on the PHP Chinese website!