Home  >  Article  >  Operation and Maintenance  >  Tutorial on installing Jenkins instance on CentOS 7

Tutorial on installing Jenkins instance on CentOS 7

PHP中文网
PHP中文网Original
2017-06-21 13:38:391884browse

Installing Jenkins on CentOS 7

Jenkins Installation

Step 1: Update CentOS 7

One of the best practices for Linux system administrators is to keep their systems up to date. Install the latest stable package and reboot.

Step 2: Install Java

Before installing Jenkins, you need to set up a Java virtual machine on the system. Here, let us install the latest OpenJDK Runtime Environment 1.8.0 using YUM:

After the installation is complete, you can confirm by running the following command:

To help Java-based applications correctly locate the Java virtual machine, two environment variables need to be set: "JAVA_HOME" and "JRE_HOME".

Finally, test

Step 3: Jenkins

Install using the official YUM repoLatest stable version Jenkins

Start the Jenkins service and set it to run on startup:

In order to allow visitors to access Jenkins, you need to allow inbound traffic on port 8080:

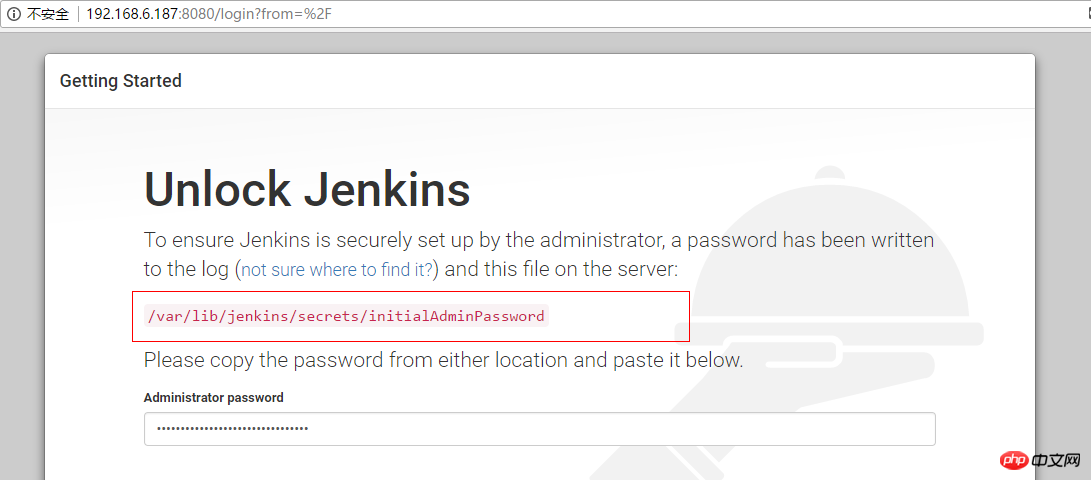
##Now, test Jenkins by accessing the following address from your web browser:

http://:8080

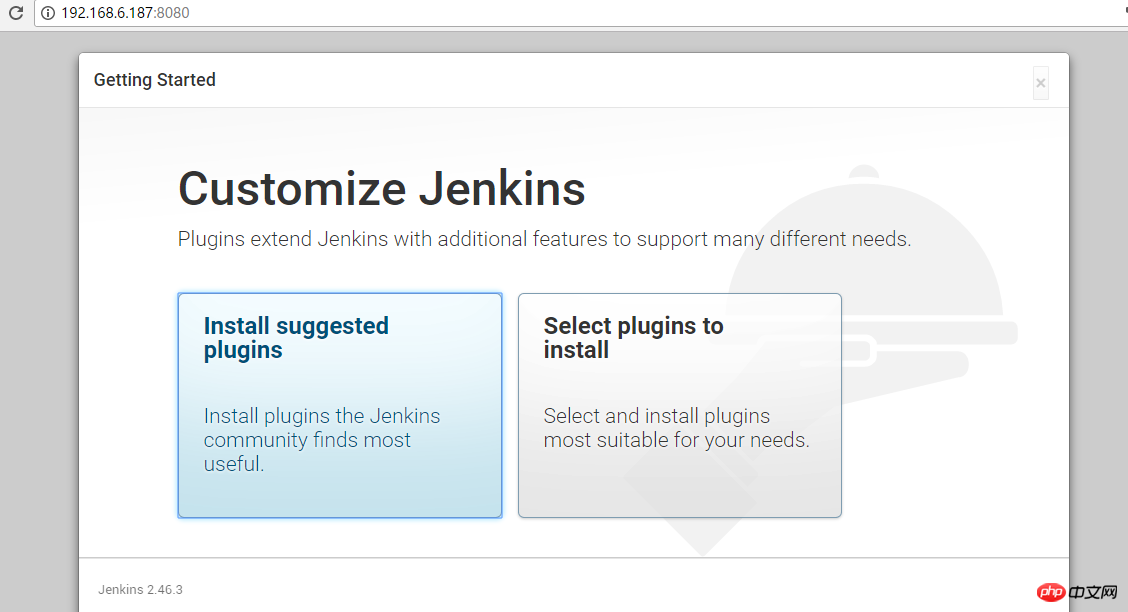
<span style="color: #008000">Access is successful as shown below<span style="font-weight: bold"></span></span>

Check the password as follows

It’s done, it’s that simple

The above is the detailed content of Tutorial on installing Jenkins instance on CentOS 7. For more information, please follow other related articles on the PHP Chinese website!

Statement:
The content of this article is voluntarily contributed by netizens, and the copyright belongs to the original author. This site does not assume corresponding legal responsibility. If you find any content suspected of plagiarism or infringement, please contact admin@php.cn
Previous article:Introduction to the concept of file descriptors and FILENext article:Introduction to the concept of file descriptors and FILE

Related articles

See more