
Home > Article > Web Front-end > Examples of how Grunt compresses CSS and HTML

In a word: it is automation. For tasks that require repeated tasks, such as compression, compilation, unit testing, linting, etc., automation tools can reduce your labor and simplify
Your work. When you have configured the task in the Gruntfile file, the task runner will automatically help you or your team complete most of the boring work.
Grunt and Grunt plug-ins are installed and managed through npm, which is the package manager of Node.js. So in other words, if you want to install Grunt, just You must install Node. If you want to install Grunt, you must install Node. If you want to install Grunt, you must install Node. Say the important things three times! ٩(๑>◡<๑)۶
You need to install the Grunt command line (cli) into the global environment first. During installation, you may need to use sudo permissions or execute the following commands as an administrator,

After the above command is executed, the Grunt command will be added to your system path, and you can execute this command in any directory in the future.
Note, installationgrunt-cli does not mean Grunt is installed! The task of the Grunt CLI is simple: call Grunt in the same directory as Gruntfile. The advantage of this is that it allows you to install multiple versions of Grunt on the same system at the same time.
This allows multiple versions of Grunt to be installed on the same machine at the same time.
Similarly, Grunt plug-ins and other node modules can be installed in the same way. The example shown below Just install the htmlmin task module:

Then there is the cssmin task module:

module.exports = function(grunt){//1.引入grunt.loadNpmTasks('grunt-contrib-cssmin');grunt.loadNpmTasks('grunt-contrib-htmlmin'); //2.设置任务:    grunt.initConfig({//        //压缩CSS        cssmin:{
            yasuo:{
                options:{
                    mangle:false},
                expand: true,
                cwd: 'css',//压缩那个文件夹里的文件
                src:'*.css',//压缩那个文件
                dest:'yscss',放压缩后文件的文件夹
                ext:'.min.css'压缩后文件的的名字}
        },//        //压缩HTML        htmlmin:{
            options: {
                    removeComments: true, //移除注释removeCommentsFromCDATA: true,//移除来自字符数据的注释collapseWhitespace: true,//无用空格collapseBooleanAttributes: true,//失败的布尔属性removeAttributeQuotes: true,//移除属性引号      有些属性不可移走引号removeRedundantAttributes: true,//移除多余的属性useShortDoctype: true,//使用短的跟元素removeEmptyAttributes: true,//移除空的属性removeOptionalTags: true//移除可选附加标签                  },
            yasuo:{
                expand: true,
                cwd: 'index',
                src: ['*.html'],
                dest: 'yshtml'}
        }


    });//设置默认任务grunt.registerTask('default',['cssmin','htmlmin']);
}
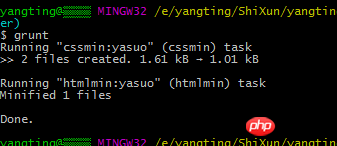
Then, Win+r brings up the command line.Enter grunt and press Enter
The above is the detailed content of Examples of how Grunt compresses CSS and HTML. For more information, please follow other related articles on the PHP Chinese website!