
Home > Article > Backend Development > Detailed graphic explanation of HttpClient calling ASP.NET Web API

This article mainly introduces the example of calling ASP.NET Web API through HttpClient. The editor thinks it is quite good, so I will share it with you now and give it as a reference. Let’s follow the editor and take a look
In the previous two articles, we introduced the basic knowledge and principles of ASP.NET Web API, and learned its basic (CRUD) operations through simple examples. We perform data operations on Web API through JQuery and Ajax. In this article, we will introduce how to use HttpClient to perform data operations on Web API.
Here we will continue to use the operation example of Product to demonstrate its basic application.
Create ASP.NET Web API application
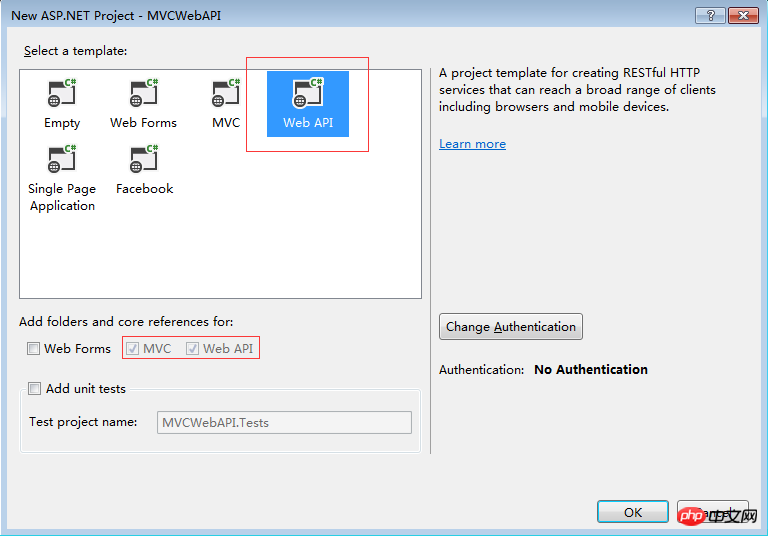
Choose to create an ASP.NET Web Application application in VS, and select Web API in the next window of the wizard template.
Create Model
Here we create a simple Product model class in the Models folder to pass data.
Right-click on the Models folder and select Add -> Class
  public class Product
  {
    public int ProductID { get; set; }
    public string ProductName { get; set; }
    public decimal Price { get; set; }
    public int Count { get; set; }
    public string Description { get; set; }
  }
Create Cotroller
Then create an API under the Controllers folder Controller, named "ProductsController".
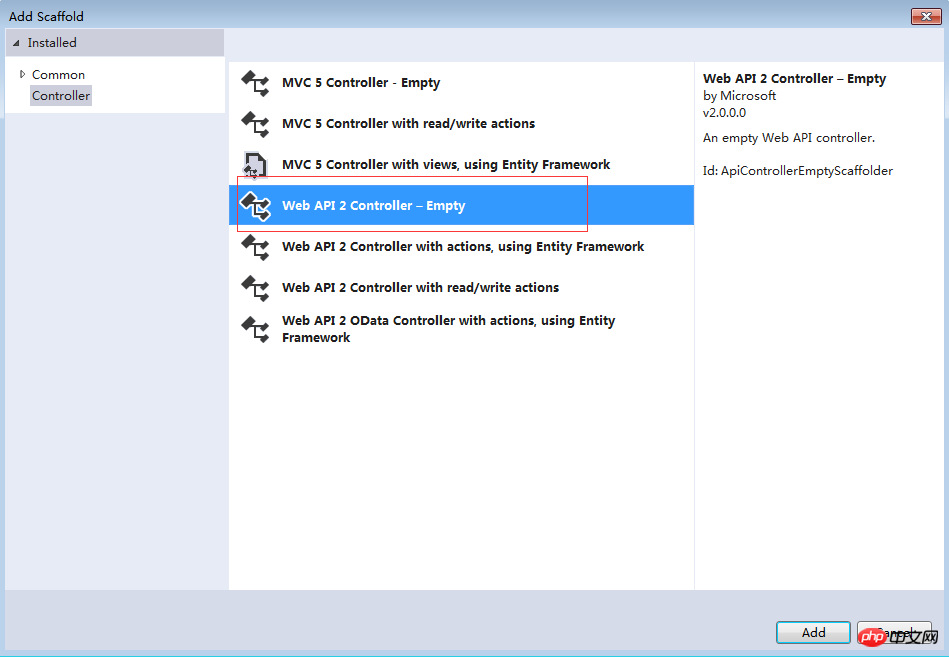
Right-click on the Controllers folder, select Add -> Controller, select Web API 2 Controller - Empty in the pop-up wizard
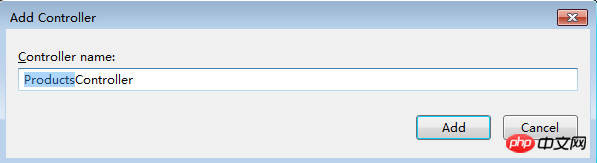
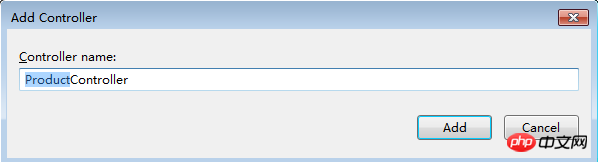
Under the wizard Enter the API Controller name as "ProductsController" in one step.
Because we need to call the Web API through HttpClient, we also need to create an MVC Controller here.
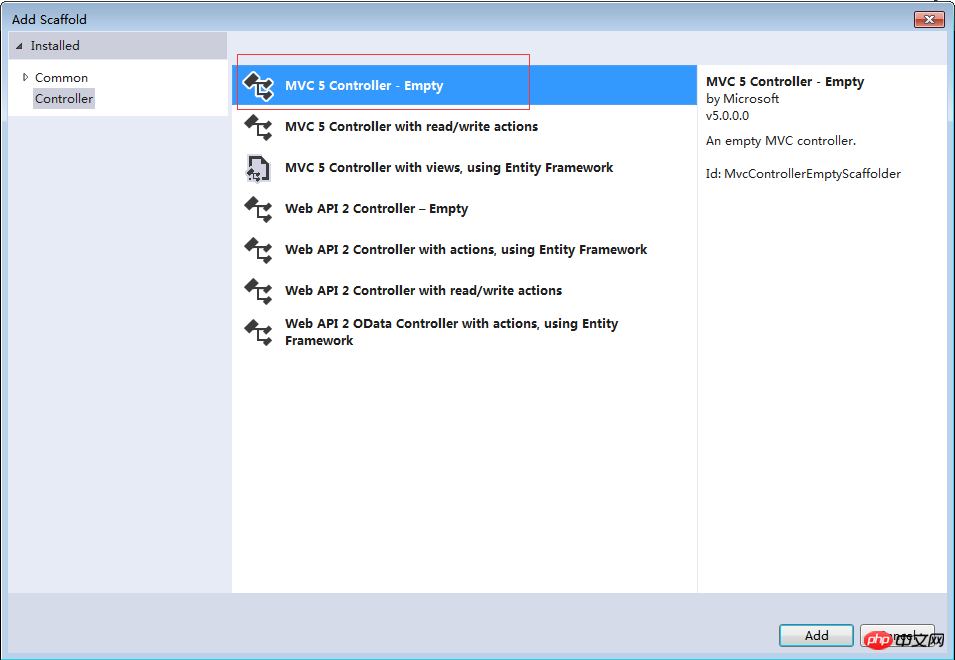
Similarly right-click on the Controllers folder, select Add -> Controller, and select MVC 5 Controller - Empty in the pop-up wizard
Under the wizard Enter the MVC 5 Controller name as "ProductController" in one step.
Create Web API method (CRUD)
Here we still use simulated data to create a simple CRUD Web API method. This was explained in detail in the previous chapters, so I won’t go into details here. Go directly to the code.
  public class ProductsController : ApiController
  {
    // Mock product list
    public static List productList = initProductMockDataList();

    private static List initProductMockDataList()
    {
      return new List()
      {
        new Product {ProductID=1,ProductName="Product A",Price=1000000,Count=5,Description="Description A"},
        new Product {ProductID=2,ProductName="Product B",Price=200000,Count=2,Description="Description B"},
        new Product {ProductID=3,ProductName="Product C",Price=500000,Count=8,Description="Description C"},
        new Product {ProductID=4,ProductName="Product D",Price=80000,Count=10,Description="Description D"},
        new Product {ProductID=5,ProductName="Product E",Price=300000,Count=3,Description="Description E"}
      };
    }

    public IEnumerable Get()
    {
      return productList;
    }

    public Product Get(int id)
    {
      return productList.Where(p => p.ProductID == id).FirstOrDefault();
    }

    public void Post([FromBody]Product product)
    {
      var lastProduct = productList.OrderByDescending(p => p.ProductID).FirstOrDefault();
      int newProductID = lastProduct.ProductID + 1;
      product.ProductID = newProductID;

      productList.Add(product);
    }

    public void Put([FromBody]Product product)
    {
      var currentProduct = productList.Where(p => p.ProductID == product.ProductID).FirstOrDefault();
      if (currentProduct != null)
      {
        foreach (var item in productList)
        {
          if (item.ProductID.Equals(currentProduct.ProductID))
          {
            item.ProductName = product.ProductName;
            item.Price = product.Price;
            item.Count = product.Count;
            item.Description = product.Description;
          }
        }
      }
    }

    public void Delete(int id)
    {
      Product product = productList.Where(p => p.ProductID == id).FirstOrDefault();

      productList.Remove(product);
    }
  }
Call MVC Controller through JQuery and Ajax, call Web API through HttpClient in MVC Controller
The (CRUD) method in Web API is created, next we Let’s look at the data operations of each method separately.
1. Get the Product list
Open the MVC 5 Controller file ProductController we created. Use HttpClient to call the list method in our Web API.
First we need to introduce System.Net.Http
using System.Net.Http;
Next we define a public static variable for our Web API address.
public static readonly Uri _baseAddress = new Uri("http://localhost:21853/");

    //
    // GET: /Product/
    public ActionResult Index()
    {
      return View();
    }

    public JsonResult GetProductList()
    {
      List productList = null;
      Uri address = new Uri(_baseAddress, "/api/products");

      using (var httpClient = new HttpClient())
      {
        var response = httpClient.GetAsync(address).Result;

        if (response.IsSuccessStatusCode)
          productList = response.Content.ReadAsAsync>().Result;
      }

      return Json(productList, JsonRequestBehavior.AllowGet);
    }
Here we need to get the Product list data by clicking the button and calling Ajax, so here we use JsonResult to return the data.
Next, let’s create View.
Create a View named "Index" under the folder Views->Product. Open the Index View and modify the page code as follows:
@{
  Layout = null;
}


  Index


    Get Product List
Next, what we have to do is to load the Product List when the Get Product List button is clicked. The code is implemented as follows:
    $('#btnGetProductList').click(function () {
      $.ajax({
        url: '/Product/GetProductList',
        type: 'GET',
        dataType: 'json'
      }).success(function (result) {
        DisplayProductList(result);
      }).error(function (data) {
        alert(data);
      });
    });

    // Display product list
    function DisplayProductList(result) {
var productTable = $("Okay, run code.
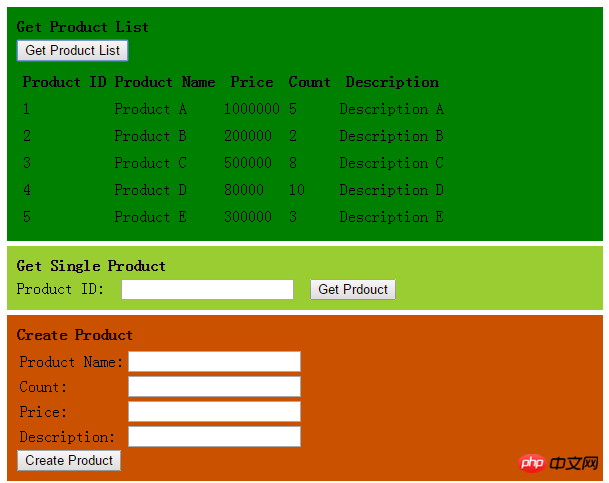
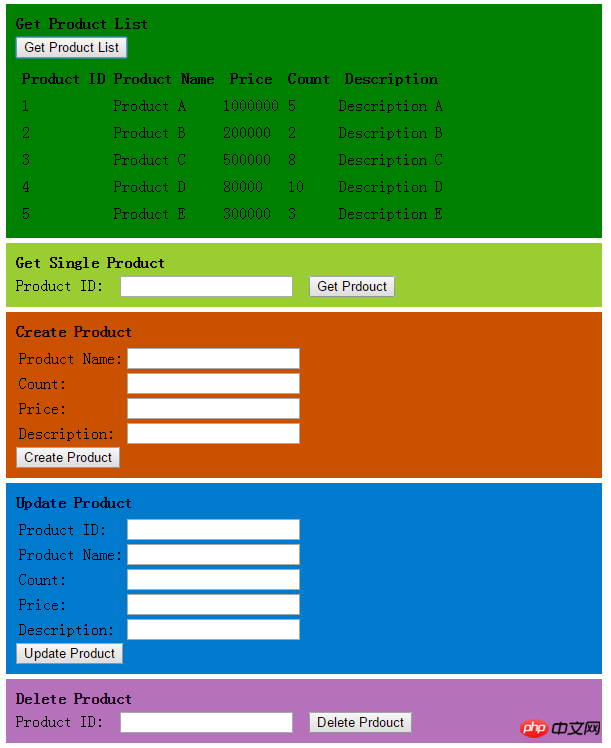
Before clicking the Get Product List button, the following is as follows:

After clicking the Get Product List button, the following is as follows:
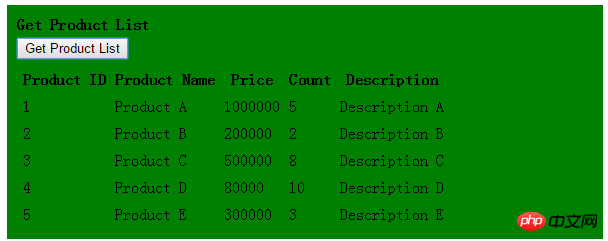
Product data list is loaded successfully.
2. Obtain a single Product data
What we do here is to enter the Product ID in the search box, and then click the Get Product button to find this Product information.
First, we first complete the method of using HttpClient in the ProductController to call the Web API to obtain a single Product data.
    public JsonResult GetSingleProduct(int id)
    {
      Uri address = new Uri(_baseAddress, "/api/products/" + id);
      Product product = null;

      using (var httpClient = new HttpClient())
      {
        var response = httpClient.GetAsync(address).Result;

        if (response.IsSuccessStatusCode)
          product = response.Content.ReadAsAsync().Result;
      }

      return Json(product, JsonRequestBehavior.AllowGet);
    }
Next, go to the Index View page and add a textbox for searching Product ID and a Get Product button.
    Get Single Product
    Product ID:
Add Ajax method to the button Get Product button
    $('#btnGetProduct').click(function () {
      if ($('#txtSearchProductID').val().trim() != "") {
        $.ajax({
          url: '/Product/GetSingleProduct?id=' + $('#txtSearchProductID').val(),
          type: 'GET',
          dataType: 'json'
        }).success(function (result) {
          if (result != null) {
            $('#product').html("Product ID: " + result.ProductID + "
" + "Product Name: " + result.ProductName + "
" + "Count: " + result.Count + "
" + "Price: " + result.Price + "
" + "Description: " + result.Description);
          } else {
            $('#product').html('');
          }
        }).error(function (data) {
          alert(data);
        });
      }
    });
Run the program and load the Product list.
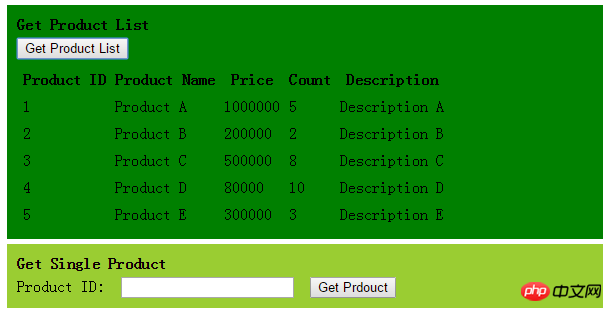
Before clicking the Get Product button:
Here we look for data with Product ID 1
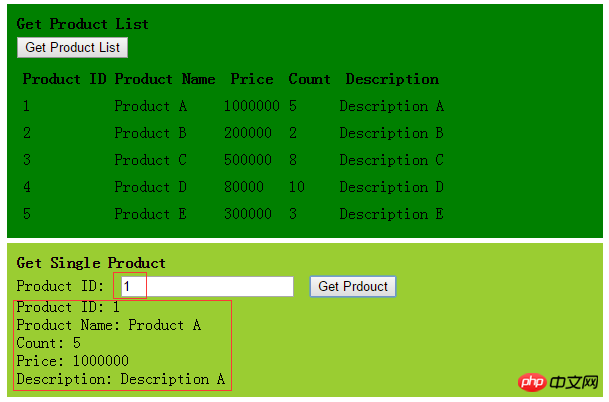
We see that the data with Product ID 1 is successfully obtained.
3. Add a new Product
Here we create 4 textboxes to enter Product Name, Count, Price, Description information and a Create Product button.
首先,我们先完成在ProductController中使用HttpClient调用Web API中新增一条Product数据的方法。
    public JsonResult CreateProduct(Product product)
    {
      bool createSuccess = true;
      Uri address = new Uri(_baseAddress, "/api/products");

      using(var httpClient=new HttpClient())
      {
        var response = httpClient.PostAsJsonAsync(address, product).Result;

        if (!response.IsSuccessStatusCode)
          createSuccess = false;
      }

      return Json(createSuccess, JsonRequestBehavior.AllowGet);
    }
接着,来到Index View页面中添加4个textbox用来输入Product Name,Count,Price,Description的信息以及一个Create Product按钮。
Create Product
| Product Name: | |
| Count: | |
| Price: | |
| Description: |
为按钮Create Produc按钮t添加Ajax方法
    $('#btnCreateProduct').click(function () {
      if ($('#txtCreateProductName').val().trim() != "" && $('#txtCreateCount').val().trim() != "" &&
        $('#txtCreatePrice').val().trim() != "" && $('#txtCreateDescription').val().trim() != "") {
        var product = {
          ProductID: 0, ProductName: $('#txtCreateProductName').val(),
          Count: $('#txtCreateCount').val(), Price: $('#txtCreatePrice').val(),
          Description: $('#txtCreateDescription').val()
        };

        $.ajax({
          url: '/Product/CreateProduct',
          type: 'GET',
          data: product,
          dataType: 'json'
        }).success(function (result) {
          if (result != null && result) {
            $('#createMessage').html('Product create success.');
            $("#btnGetProductList").trigger('click');
          }
        }).error(function (data) {
          alert(data);
        })
      }
    });
运行程序,加载Product列表。
点击Create Product按钮之前:
输入新增数据,点击Create Product按钮之后:
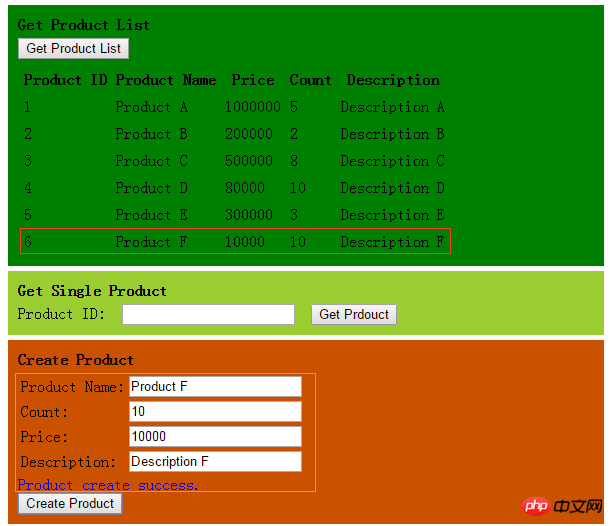
我们看到新增数据成功并显示到了Product列表中。
4.修改Product信息
这里我们创建5个textbox,用来输入Product ID,Product Name,Count,Price,Description的信息以及一个Update Product按钮。
首先,我们先完成在ProductController中使用HttpClient调用Web API中修改一条Product数据的方法。
    public JsonResult UpdateProduct(Product product)
    {
      bool updateSuccess = true;
      Uri address = new Uri(_baseAddress, "/api/products");

      using (var httpClient = new HttpClient())
      {
        var response = httpClient.PutAsync(address, product, new JsonMediaTypeFormatter()).Result;

        if (!response.IsSuccessStatusCode)
          updateSuccess = false;
      }

      return Json(updateSuccess, JsonRequestBehavior.AllowGet);
    }
接着,来到Index View页面中添加5个textbox用来输入Product ID,Product Name,Count,Price,Description的信息以及一个Update Product按钮。
Update Product
| Product ID: | |
| Product Name: | |
| Count: | |
| Price: | |
| Description: |
为按钮Update Product按钮添加Ajax方法
   $('#btnUpdateProduct').click(function () {
      if ($('#txtUpdateProductID').val().trim() != "" && $('#txtUpdateProductName').val().trim() != "" &&
        $('#txtUpdateCount').val().trim() != "" && $('#txtUpdatePrice').val().trim() != null && $('#txtUpdateDescription').val().trim() != "") {
        var product = {
          ProductID: $('#txtUpdateProductID').val(), ProductName: $('#txtUpdateProductName').val(),
          Count: $('#txtUpdateCount').val(), Price: $('#txtUpdatePrice').val(),
          Description: $('#txtUpdateDescription').val()
        };

        $.ajax({
          url: '/Product/UpdateProduct',
          type: 'GET',
          data: product,
          dataType: 'json'
        }).success(function (result) {
          if (result != null && result) {
            $('#updateMessage').html('Product update success.');
            $('#btnGetProductList').trigger('click');
          }
        }).error(function (data) {
          alert(data);
        })
      }
    });
运行代码,加载Product列表。
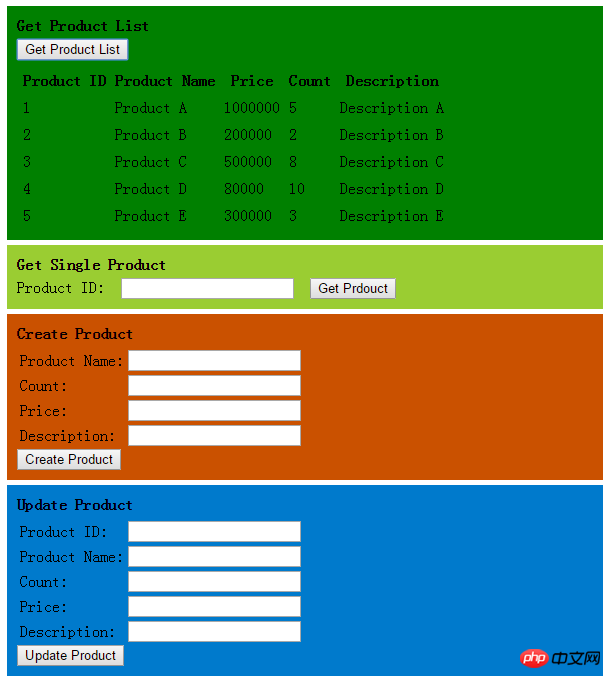
点击Update Create按钮之前:
这里我们修改第一条数据,输入修改信息,点击Update Product按钮之后:
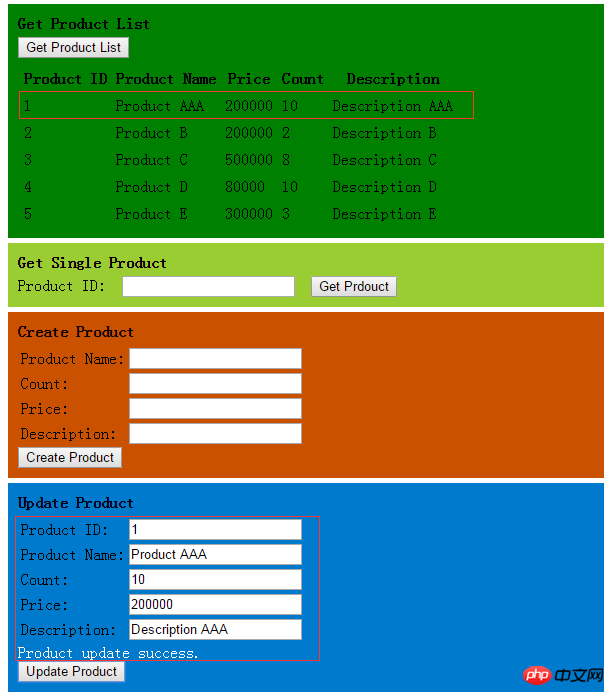
我们看到Product ID为1的信息成功修改并显示到了Product列表中。
5.删除Product
这里我们创建1个textbox,用来输入Product ID的信息以及一个Delete Product按钮。
首先,我们先完成在ProductController中使用HttpClient调用Web API中删除一条Product数据的方法。
    public JsonResult DeleteProduct(int id)
    {
      bool deleteSuccess = true;
      Uri address = new Uri(_baseAddress, "/api/products/" + id);

      using (var httpClient = new HttpClient())
      {
        var response = httpClient.DeleteAsync(address).Result;

        if (!response.IsSuccessStatusCode)
          deleteSuccess = false;
      }

      return Json(deleteSuccess, JsonRequestBehavior.AllowGet);
    }
接着,来到Index View页面中添加1个textbox用来输入Product ID的信息以及一个Delete Product按钮。
    Delete Product
    Product ID:
为按钮Delete Product按钮添加Ajax方法
   $('#btnDeleteProduct').click(function () {
      if ($('#txtDeleteProductID').val().trim() != "") {
        $.ajax({
          url: '/Product/DeleteProduct?id=' + $('#txtDeleteProductID').val(),
          type: 'GET',
          dataType: 'json'
        }).success(function (result) {
          if (result != null && result) {
            $('#deleteMessage').html('Product delete success.');
            $('#btnGetProductList').trigger('click');
          }
        }).error(function (data) {
          alert(data);
        })
      }
    });
运行代码,加载Product列表。
点击Delete Product按钮之前。
这里我们输入Product ID为1的数据,点击Delete Product按钮之后:
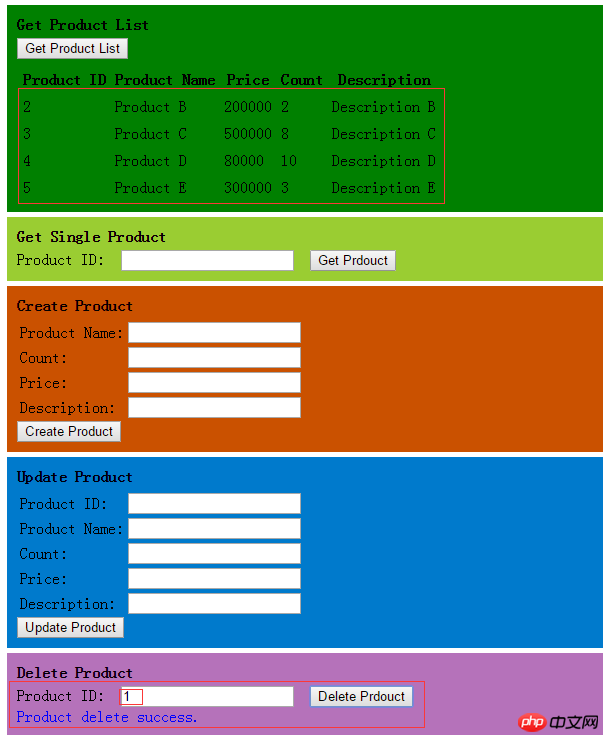
我们看到Product ID为1的数据成功删除,并且Product列表中也没有了这条数据。
The above is the detailed content of Detailed graphic explanation of HttpClient calling ASP.NET Web API. For more information, please follow other related articles on the PHP Chinese website!