오늘 기사에서는 어떤 이야기를 나눠볼까요? 이봐 이봐. 이전 글을 이어가며, 모든 사람이 단계별 개선 프로세스를 가질 수 있도록 간단하고 이해하기 쉬운 방식으로 결함을 재구성하고 단계별로 분석하겠습니다. 더 이상 고민하지 않고 요점을 살펴보겠습니다. 먼저 이전
을 검토해 보겠습니다.
Js 부분의 코드는 다음과 같습니다.
함수 ItemSelector(elem,opts){
This.elem = elem ;
This.opts = 선택 ;
} ;
var ISProto = ItemSelector.prototype ;
ISProto.getElem = 함수(){
this.elem을 반환하세요 ;
} ;
ISProto.getOpts = 함수(){
이것을 반환하세요.opts ;
} ;
/* 데이터 조작*/
ISProto._setCurrent = 함수(현재){
This.getOpts()["현재"] = 현재 ;
} ;
ISProto.getCurrentValue = 함수(현재){
return this.getOpts()["현재"] ;
} ;
/* 데이터 조작*/
ISProto.init = 함수(){
var that = this ;
This.getOpts()["current"] = null ; // 데이터 커서
This._setItemValue(this.getOpts()["currentText"]) ;
var itemsElem = that.getElem().find(".content .items") ;
This.getElem().find(".title div").on("click",function(){
itemsElem.toggle() ;
}) ;
This.getElem().find(".title 범위").on("클릭",function(){
itemsElem.toggle() ;
}) ;
$.each(this.getOpts()["items"],function(i,item){
Item["id"] = (new Date().getTime()).toString() ;
That._render(항목) ;
}) ;
} ;
ISProto._setItemValue = 함수(값){
This.getElem().find(".title div").text(value)
} ;
ISProto._render = 함수(항목){
var that = this ;
var itemElem = $("
")
.text(항목["텍스트"])
.attr("id",item["id"]) ;
If("0" == 항목["비활성화됨"]){
itemElem.on("클릭",function(){
var onChange = that.getOpts()["change"] ;
That.getElem().find(".content .items").hide() ;
That._setItemValue(item["text"]) ;
That._setCurrent(항목) ;
onChange && onChange(항목) ;
})
.mouseover(function(){
$(this).addClass("item-hover") ;
})
.mouseout(function(){
$(this).removeClass("item-hover") ;
}) ;
}
그 외{
itemElem.css("color","#ccc").on("click",function(){
That.getElem().find(".content .items").hide() ;
That._setItemValue(item["text"]) ;
}) ;
}
itemElem.appendTo(this.getElem().find(".content .items")) ;
} ;
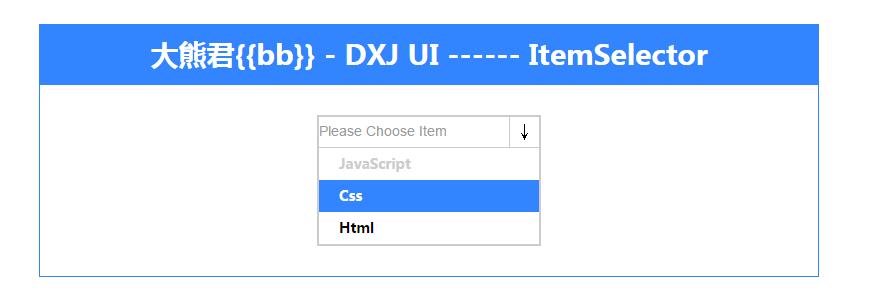
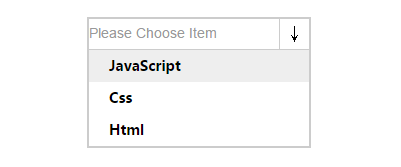
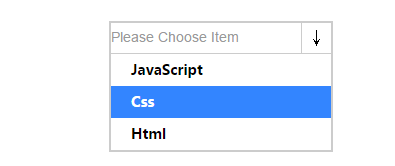
효과는 아래와 같습니다.
느슨한 절차적 구성 형태보다 훨씬 나은 "Js"의 문법적 특징을 통해 객체지향적으로 효율적으로 구성되었음을 코드에서 쉽게 알 수 있지만, 여전히 많은 부분이 있습니다. 단점.
위의 사항을 바탕으로 효과적인 재구성을 수행하려면 먼저 이 구성요소의 요구 사항을 정리해야 합니다.
이 코드는 매우 명확하고 수정이 필요하지 않지만, 여러 옵션을 지원하도록 구성 항목 "모드"를 추가하는 등 위 구성을 기반으로 기능을 확장할 수 있습니다. 예: "체크박스 선택 모드".
다음 단계는 다음과 같이 초기화 로직을 완료하는 것입니다.
var that = this ;
This.getOpts()["current"] = null ; // 데이터 커서
This._setItemValue(this.getOpts()["currentText"]) ;
var itemsElem = that.getElem().find(".content .items") ;
This.getElem().find(".title div").on("click",function(){
itemsElem.toggle() ;
}) ;
This.getElem().find(".title 범위").on("클릭",function(){
itemsElem.toggle() ;
}) ;
$.each(this.getOpts()["items"],function(i,item){
Item["id"] = (new Date().getTime()).toString() ;
That._render(항목) ;
}) ;
} ;
이 코드에는 문제가 많고, 책임이 불분명하며, 초기화 로직에 기능 포인트의 상세한 구현이 포함되어 있습니다.
계속해서 렌더링 코드를 살펴보겠습니다.
ISProto._render = 함수(항목){
var that = this ;
var itemElem = $("
")
.text(항목["텍스트"])
.attr("id",item["id"]) ;
If("0" == 항목["비활성화됨"]){
itemElem.on("클릭",function(){
var onChange = that.getOpts()["change"] ;
That.getElem().find(".content .items").hide() ;
That._setItemValue(item["text"]) ;
That._setCurrent(항목) ;
onChange && onChange(항목) ;
})
.mouseover(function(){
$(this).addClass("item-hover") ;
})
.mouseout(function(){
$(this).removeClass("item-hover") ;
}) ;
}
그 외{
itemElem.css("color","#ccc").on("click",function(){
That.getElem().find(".content .items").hide() ;
That._setItemValue(item["text"]) ;
}) ;
}
itemElem.appendTo(this.getElem().find(".content .items")) ;
} ;
문제는 분명합니다. 반복적인 작업이 발견되면 재사용 목적을 달성하기 위해 합리적으로 추상화해야 합니다.
전체 어셈블리 프로세스에는 초기화, 렌더링(이벤트 바인딩)뿐만 아니라 관련 데이터 작업 방법 및 DOM 작업을 위한 보조 방법이 포함됩니다.
요약하자면, 간단한 빗질을 한 후, 기능의 운영 목적과 주요 프로세스 라인의 작업 할당을 설정하고, 모두가 책임을 져야 합니다.
그럼 우리 재건축의 목적은 아주 명확하죠! 이는 기능 포인트의 추상화와 우호적인 책임 분할을 의미합니다. 그렇다면 이를 어떻게 달성할 수 있을까요?
첫 번째 단계는 프로세스 함수 메소드를 설정하는 것입니다: (메소드 인터페이스)
ISProto.init = 함수(){
// 여기에 코드를 입력하세요!
} ;
ISProto._render = 함수(){
// 여기에 코드를 입력하세요!
} ;
두 번째 부분, 추상 메소드 인터페이스 설정:
ISProto._fnItemSelectorDelegateHandler = 함수(){
// 여기에 코드를 입력하세요!
} ;
ISProto._fnTriggerHandler = 함수(){
// 여기에 코드를 입력하세요!
} ;
ISProto._addOrRemoveClass = 함수(){
// 여기에 코드를 입력하세요!
} ;
세 번째 단계는 데이터 운영 인터페이스를 구축하는 것입니다.
ISProto._setCurrent = 함수(){
// 여기에 코드를 입력하세요!
} ;
ISProto._getCurrent = 함수(){
// 여기에 코드를 입력하세요!
} ;
아래에는 몇 가지 완전한 소스 코드도 있습니다. 여기에는 아이디어만 있습니다.
(3), 학습을 위한 완전한 코드, 이 코드는 테스트되었습니다
함수 ItemSelector(elem,opts){
This.elem = elem ;
This.opts = 선택 ;
This.current = -1; // 데이터 커서
} ;
var ISProto = ItemSelector.prototype ;
/* getter API*/
ISProto.getElem = 함수(){
this.elem을 반환하세요 ;
} ;
ISProto.getOpts = 함수(){
이것을 반환하세요.opts ;
} ;
ISProto._getCurrent = 함수(){
this.current를 반환하세요 ;
} ;
/* getter API*/
/* 데이터 조작*/
ISProto._setCurrent = 함수(현재){
This.current = 현재 ;
} ;
ISProto._setItemText = 함수(텍스트){
This.getElem().find(".title div").text(text) ;
} ;
/* 데이터 조작*/
/* 2015년 1월 31일 23:38 업데이트 */
ISProto._fnTriggerHandler = 함수(색인,텍스트,값){
If(this._isDisabled(값)){
인덱스 = -1 ;
텍스트 = this.getOpts()["currentText"] ;
}
This._setItemText(text) ;
This._setCurrent(색인) ;
This.getElem().find(".content .items").hide() ;
} ;
ISProto._addOrRemoveClass = 함수(elem,className,addIs){
만약(추가하다){
elem.addClass(className) ;
}
그렇지 않으면{
elem.removeClass(className) ;
}
} ;
ISProto._fnItemSelectorDelegateHandler = 함수(){
var that = this ;
This.getElem().on("클릭","[data-toggle]",function(){
That.getElem().find(".content .items").toggle() ;
}) ;
} ;
ISProto._isDisabled = 함수(값){
반환("1" == 값) ? true : false ;
} ;
/* 2015년 1월 31일 23:38 업데이트 */
ISProto.init = 함수(){
var that = this ;
This._fnItemSelectorDelegateHandler() ;
$.each(this.getOpts()["items"],function(i,item){
항목["index"] = i ;
That._render(항목) ;
}) ;
This._fnTriggerHandler(this._getCurrent(),this.getOpts()["currentText"],"1") ;
} ;
ISProto._render = 함수(항목){
var that = this ;
var itemElem = $("
").text(item["text"]).attr("id",item["index"]) ;
var activeClass = ("0" == item["disabled"]) ? "item-hover" : "item-disabled-hover" ;
itemElem.on("클릭",function(){
That._fnTriggerHandler(item["index"],item["text"],item["disabled"]) ;
})
.mouseover(함수(){
That._addOrRemoveClass($(this),activeClass,true) ;
})
.mouseout(함수(){
That._addOrRemoveClass($(this),activeClass,false) ;
}) ;
itemElem.appendTo(this.getElem().find(".content .items")) ;
} ;
(4), 최종 요약
(1) 객체지향적 사고를 통해 기능적 요구사항을 합리적으로 분석합니다.
(2) 플러그인 로직을 클래스 형태로 구성합니다.
(3) 위의 예를 지속적으로 재구성하는 방법은 무엇입니까? 과도하게 디자인하지 말고 편안하게 사용하는 것이 좋습니다. 절차적 디자인과 객체 지향 디자인을 결합하는 것입니다.
(4) "mode" 속성 등 관련 기능은 다음 글에서 확장할 예정인데, "1"일 때 체크박스 다중 선택 모드를 지원하지만 지금은 기본 드롭다운 모드일 뿐이다. .
제 글을 보세요, 이전 코드보다 훨씬 나아졌나요? 친구들도 자신의 프로젝트를 할 때 더 많이 생각하고 더 많이 노력해야 하며, 코드를 더 합리적으로 만들도록 노력해야 합니다.


