이 글은 angular의 콘텐츠 프로젝션을 이해하는 데 도움이 될 것이며, 단일 슬롯 콘텐츠 프로젝션, 멀티 슬롯 콘텐츠 프로젝션 및 조건부 콘텐츠 프로젝션을 소개하는 것이 모든 사람에게 도움이 되기를 바랍니다.

【관련 튜토리얼 추천: "angular tutorial"】
단일 슬롯 콘텐츠 프로젝션은 컴포넌트를 프로젝션할 수 있는 컴포넌트를 생성하는 것을 의미합니다.
zippy-basic.comComponent.ts
import { Component } from '@angular/core';

@Component({
  selector: 'app-zippy-basic',
  template: `
  <h2>单插槽内容投影</h2>
  <ng-content></ng-content>
`
})
export class ZippyBasicComponent {}ng-content 요소를 사용하면 이 구성 요소의 사용자는 이제 자신의 메시지를 구성 요소에 투영할 수 있습니다. 예: ng-content 元素,该组件的用户现在可以将自己的消息投影到该组件中。例如:
app.component.html
<!-- 将 app-zippy-basic 元素包裹的全部内容投影到 zippy-basic 组件中去 -->
<app-zippy-basic>
  <p>单插槽内容投影:投影数据</p>
</app-zippy-basic>
效果如下:
ng-content 元素是一个占位符,它不会创建真正的 DOM 元素。
ng-content的那些自定义属性将被忽略。
- 组件模板含有多个
ng-content标签。- 为了区分投影的内容可以投影到对应
ng-content标签,需要使用ng-content标签上的select属性作为识别。select属性支持标签名、属性、CSS 类和 :not 伪类的任意组合。- 不添加
select属性的ng-content标签将作为默认插槽。所有为匹配的投影内容都会投影在该ng-content的位置。
zippy-multislot.component.ts
import { Component } from '@angular/core';

@Component({
  selector: 'app-zippy-multislot',
  template: `
  <h2>多插槽内容投影</h2>
  <ng-content></ng-content>
  <ng-content select="[question]"></ng-content>
`
})
export class ZippyMultislotComponent {}app.component.html
<!-- 使用 question 属性的内容将投影到带有 `select=[question]` 属性的 ng-content 元素。 -->
<app-zippy-multislot>
  <p question style="color: hotpink;">
    带question属性的p元素
  </p>
  <p style="color: lightgreen">不带question属性的p元素-->匹配到不带select属性的ng-content</p>
  <p>不带question属性的p元素-->匹配到不带select属性的ng-content</p>
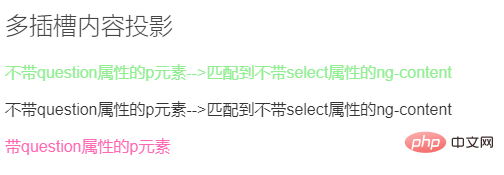
</app-zippy-multislot>效果如下:
在前面的示例中,只有第二个 ng-content 元素定义了select 属性。结果,第一个 ng-content 元素就会接收投影到组件中的任何其他内容。
推荐使用
ng-container标签,因为该标签不需要渲染真实的 DOM 元素。
<ng-container *ngTemplateOutlet="templateRefExp; context: contextExp"></ng-container>
<!-- 等同 -->
<ng-container [ngTemplateOutlet]="templateRefExp" [ngTemplateOutletContext]="contextExp"></ng-container>
| 参数 | 类型 | 说明 |
|---|---|---|
| templateRefExp | TemplateRef | null | 一个字符串,用于定义模板引用以及模板的上下文对象 |
| contextExp | Object | null | 是一个对象,该对象的键名将可以在局部模板中使用 let 声明中进行绑定。在上下文对象中使用 $implicit 为键名时,将把它作为默认值。 |
ng-template 标签的#ID会匹配templateRefExp,将ng-template标签的内容嵌入到指定的ngTemplateOutlet中。
例一:
<header>头部</header>
<main>
	<h3>内容:</h3>
	<ng-container [ngTemplateOutlet]="greet"></ng-container>
</main>
<footer>底部</footer>

<ng-template #greet>
	<div>
		<h4>hi!</h4>
		<h4>hello my dear friend!</h4>
	</div>
</ng-template>
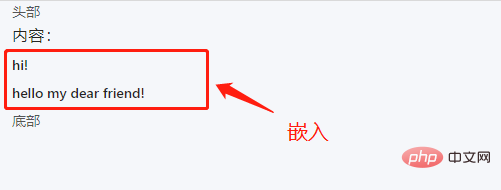
效果:

ContentChild:与内容子节点有关,操作投影进来的内容;ViewChild:与视图子节点有关,操作自身的视图内容;在上一部分,我们通过内容投影,让自定义的组件标签能够嵌入html标签或自定义组件标签,那么它如何操作投影进来的内容呢?
首先创建两个组件
/**** part-b.component.ts ****/
import { Component, OnInit,Output} from '@angular/core';

@Component({
	selector: 'app-content-part-b',
	templateUrl: './part-b.component.html',
	styleUrls: ['./part-b.component.scss']
})

export class PartBComponent implements OnInit {
	constructor() { }
	ngOnInit() { }

	public func():void{
		console.log("PartB");
	}
}/**** part-a.component.ts ****/
import { Component, OnInit, ContentChild } from '@angular/core';
// 1、引入 part-b 组件
import { PartBComponent } from '../part-b/part-b.component';
@Component({
selector: 'app-content-part-a',
templateUrl: './part-a.component.html',
styleUrls: ['./part-a.component.scss']
})
export class PartAComponent implements OnInit {
// 2、获取投影
@ContentChild(PartBComponent) PartB:PartBComponent
constructor() { }
ngOnInit() {}
ngAfterContentInit(): void {
// 3、调用 part-b 组件的 func() 方法
this.PartB.func();
}
public func() {
console.log('PartA')
}
}将part-b组件的内容投影到part-a组件中
 <!-- content.component.html -->
<div>
	<div>Content</div>
	<div>
		<app-content-part-a>
		<!-- 投影在part-a组件中的内容 -->
			<h1>PartA--start</h1>
			<app-content-part-b></app-content-part-b>
			<span>PartA--end</span>
		</app-content-part-a>
	</div>
</div>
在组件的生命周期里面,有一个钩子
ngAfterContentInit()是与投影内容初始化有关,所以我们有关投影的内容操作尽量放在它初始化完成之后进行
上一部分的ContentChild操作的时投影进来的内容,而ViewChild操作的是自身的视图内容
给上一部分的content.component.html修改如下:
 <!-- content.component.html -->
<div>
	<div>Content</div>
	<div>
	<!-- 在此处引用模板变量 #partA -->
		<app-content-part-a #partA>
			<h1>PartA--start</h1>
				<app-content-part-b></app-content-part-b>
			<span>PartA--end</span>
		</app-content-part-a>
	</div>
</div>
/**** content.component.ts ****/
import { Component, OnInit, ViewChild } from '@angular/core';

@Component({
	selector: 'app-content',
	templateUrl: './content.component.html',
	styleUrls: ['./content.component.scss']
})

export class ContentComponent implements OnInit {
	// 2、获取视图 partA
	@ViewChild('partA') partA: any;
	constructor() { }
	ngOnInit() {}
	ngAfterViewInit(): void {
		// 3、调用 part-a 组件的 func() 方法
		this.partA.func();
	}
}
ngAfterContentInit()对应的是ngAfterViewInit()(视图节点初始化是在投影内容初始化之后)
ContentChild和ViewChild还存在复数的形式,即ContentChildren和ViewChildren
import { Component, OnInit, ContentChild,ContentChildren ,QueryList } from '@angular/core';
import { PartBComponent } from '../part-b/part-b.component';

@Component({
	selector: 'app-content-part-a',
	templateUrl: './part-a.component.html',
	styleUrls: ['./part-a.component.scss']
})
export class PartAComponent implements OnInit {

	@ContentChildren(PartBComponent) PartBs: QueryList<PartBComponent>;

	constructor() { }
	ngOnInit() {}
}
ng-content 요소는 자리 표시자이며 실제 DOM 요소를 생성하지 않습니다. ng-content의 사용자 정의 속성은 무시됩니다.
ng-content 태그가 포함되어 있습니다. ng-content 태그에 프로젝션할 수 있는 프로젝션된 콘텐츠를 구별하려면 ng에서 <code>select를 사용해야 합니다. -content 태그 >식별 속성. select 속성은 태그 이름, 속성, CSS 클래스 및 :not 의사 클래스의 모든 조합을 지원합니다. select 속성을 추가하지 않은 ng-content 태그가 기본 슬롯으로 사용됩니다. 일치하는 모든 투영된 콘텐츠는 ng-content의 위치에 투영됩니다.  🎜🎜🎜이전 예에서는 두 번째 ng-content 요소에만 선택 속성이 정의되어 있습니다. 결과적으로 첫 번째 ng-content 요소는 구성 요소에 투영된 다른 콘텐츠를 수신합니다. 🎜🎜🎜🎜🎜조건부 콘텐츠 투영🎜🎜🎜🎜
 ng-container 태그는 실제 DOM 요소의 렌더링이 필요하지 않으므로 이 태그를 사용하는 것이 좋습니다. 🎜🎜rrreee| 매개변수 | 유형 | 설명 |
|---|---|---|
| templateRefExp | TemplateRef | null | 템플릿 참조와 템플릿의 컨텍스트 객체를 정의하는 데 사용되는 문자열 | contextExp | Object | null | 는 로컬 템플릿의 let 문에 키 이름을 바인딩할 수 있는 개체입니다. 컨텍스트 객체에서 $implicit를 키 이름으로 사용하는 경우 기본값으로 사용됩니다. |
ng-template 태그의 #ID는 templateRefExp와 일치하며 ng-template 태그의 내용은 지정된 ngTemplateOutlet에 포함됩니다. 🎜🎜예 1: 🎜rrreee🎜효과: 🎜🎜 🎜🎜🎜ViewChild 및 ContentChild🎜🎜
ContentChild: 콘텐츠 하위 노드와 관련, 🎜투영된 콘텐츠를 작동🎜;ViewChild: 뷰 하위 노드와 관련하여 🎜자체 뷰 콘텐츠를 운영🎜;part-b 구성 요소의 콘텐츠를 투영하세요. part-a 컴포넌트에 🎜rrreee🎜🎜컴포넌트의 라이프사이클에는 투사된 콘텐츠의 초기화와 관련된 후크 ngAfterContentInit()가 있고, 그래서 투영된 콘텐츠가 걱정됩니다. 초기화가 완료된 후 작업을 수행해 보세요🎜🎜ContentChild 작업은 투영된 콘텐츠이고, ViewChild 작동하는 것은 자체 보기 콘텐츠입니다.content.comComponent.html를 다음과 같이 수정합니다: 🎜rrreeerrreee🎜🎜ngAfterContentInit()는 <code> ngAfterViewInit()에 해당합니다(뷰 노드 초기화는 투영된 콘텐츠가 초기화된 후입니다). 🎜🎜🎜ContentChild 및 ViewChild도 복수형, 즉 ContentChildren 및 ViewChildren은 노드 컬렉션을 가져오며 다른 노드 간에 차이가 없습니다. 🎜🎜쓰기는 다음과 같습니다. 🎜rrreee🎜For 프로그래밍 관련 지식을 더 보려면 🎜프로그래밍 입문🎜을 방문하세요! ! 🎜위 내용은 Angular의 세 가지 유형의 콘텐츠 프로젝션(단일 슬롯, 다중 슬롯, 조건부)을 이해하는 기사 1개의 상세 내용입니다. 자세한 내용은 PHP 중국어 웹사이트의 기타 관련 기사를 참조하세요!