추천 무료 학습: javascript 비디오 튜토리얼
네이티브 js를 사용하여 캐러셀 그래프 구현
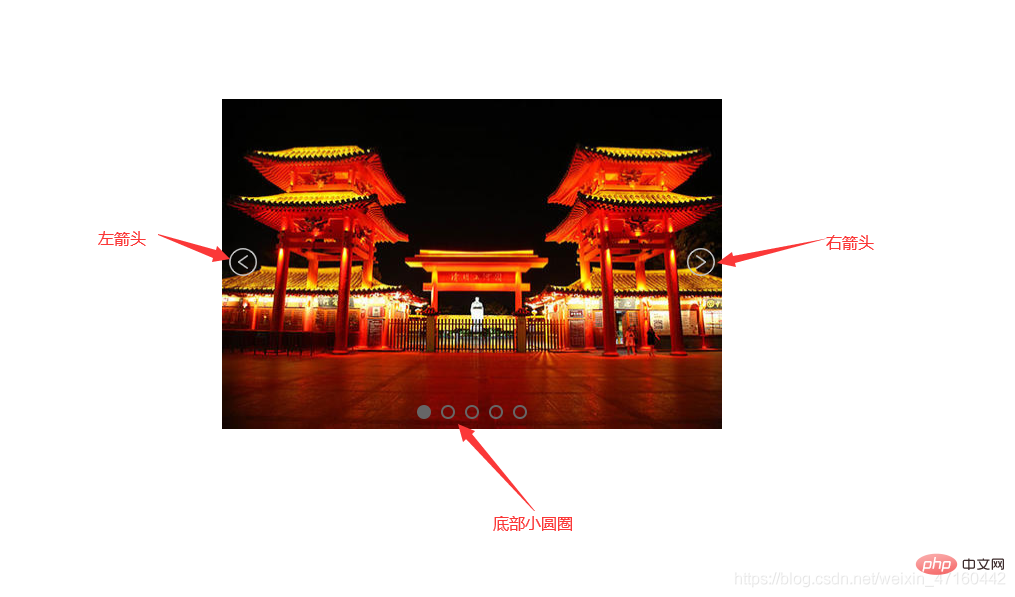
오늘은 네이티브 JS를 사용하여 캐러셀 그래프를 구현한 사례를 더 자세히 공유하겠습니다. 과정이 설명되어 있으며 친구들이 찾아보고 비판하는 것을 환영합니다. 정적 렌더링은 다음과 같습니다: 
핵심 아이디어
몇몇 그림을 연속으로 타일링한 다음 오프셋을 계산하고 타이머를 사용하여 예약된 캐러셀을 구현합니다.
단계:
1. 먼저 기본 HTML 구조를 구축합니다
<!-- 结构部分 --><!-- 结构说明:外层一个container盒子,用于放图片盒子(imgBox)、左箭头、右箭头、底部小圆圈,
        图片盒子中放的是轮播的图片 -->
    <p class="container">
      <!-- 注意:此处强调一下,图片盒子imgBox的left属性必须写成行内样式,否则js中拿不到left的值 -->
        <p class="imgBox" style="left: -500px;">
            <img src="./images/lunbo1.jpg" alt="轮播图1">
            <img src="./images/lunbo2.jpg" alt="轮播图2">
            <img src="./images/lunbo3.jpg" alt="轮播图3">
            <img src="./images/lunbo4.jpg" alt="轮播图4">
            <img src="./images/lunbo5.jpg" alt="轮播图5">
        </p>

        <a href="javascript:;" class="leftArrow"  style="display: none;">
            <img src="./images/leftArrow.png" alt="左箭头">
        </a>
        <a href="javascript:;" class="rightArrow"  style="display: none;">
            <img src="./images/rightArrow.png" alt="右箭头">
        </a>

        <ul class="circleFather">
            <li class="select"></li>
            <li></li>
            <li></li>
            <li></li>
            <li></li>
        </ul>
</p>2. 스타일 부분에서
절대 위치 지정을 사용하여 왼쪽 및 오른쪽 화살표를 배치합니다. 적절한 위치. 외부 컨테이너 상자의 너비는 그림의 너비와 동일하며, 그림 상자의 너비는 모든 그림의 너비의 합입니다. 모든 그림은 가로 정렬을 위해 부동 상태로 유지됩니다.
☆☆☆참고: 여기서는 이미지 상자 imgBox의 left 속성을 인라인 스타일로 작성해야 한다는 점을 강조합니다. 그렇지 않으면 js
 <style>
        /* 内联样式表 */

        * {
            margin: 0;
            padding: 0;
        }

        li {
            list-style: none;
        }
        /* 外层容器样式 */

        .container {
            height: 330px;
            width: 500px;  //外层容器盒子的宽度等于一张图片的宽度
            margin: 100px auto;
            position: relative;
            overflow: hidden;  //超出隐藏
        }
        /* 左右箭头样式 */

        .container .leftArrow,
        .container .rightArrow {
            position: absolute;
            top: 50%;
            transform: translate(0, -50%);
            z-index: 1;
        }

        .container .leftArrow {
            left: 5px;
        }

        .container .rightArrow {
            right: 5px;
        }
        /* 图片盒子样式 */

        .imgBox {
            position: absolute;
            transition: all 0.5s;
            height: 333px;
            width: 3500px;  //图片盒子的宽度为所有图片宽度之和
        }

        .imgBox img {
            height: 330px;
            width: 500px;
            float: left;  //所有图片左浮动,实现水平排列
        }
        /* 底部小圆圈样式 */

        .circleFather {
            position: absolute;
            bottom: 10px;
            left: 50%;
            transform: translate(-50%, 0);
        }

        .circleFather li {
            float: left;
            height: 10px;
            width: 10px;
            margin: 0 5px;
            border: 2px solid #e7641c;
            border-radius: 50%;
        }

        .select {
            background-color: #e7641c;
        }
</style>3에서 left 값을 얻을 수 없습니다.
3.1 첫 번째 구현 왼쪽 및 오른쪽 화살표를 클릭하여 왼쪽 및 오른쪽으로 슬라이드
var container = document.querySelector('.container') //获取外层容器盒子
        var imgBox = document.querySelector('.imgBox') //获取图片盒子
        var leftArrow = document.querySelector('.leftArrow') //获取左箭头
        var rightArrow = document.querySelector('.rightArrow') //获取右箭头


        //给左箭头绑定点击事件
        leftArrow.onclick = function() {
            goLast()
        }

        //右箭头点击事件
        rightArrow.onclick = function() {
            goNext()
        }

        // 显示上一张图片
        // 1.点一次左箭头,就让left值-500,点一次右箭头,就让left值+500
        // 2.但是有两种特殊情况,(1)当前展示图片1时,点击左箭头则需展示图片5,(2)当前展示图片5时,点击右箭头则需展示图片1
        function goLast() {
            let newBoxLeft            if (imgBox.style.left === '0px') {
                newBoxLeft = -2000
            } else {
                // imgBox.style.left是一个字符串,所以要转化为数字才能进行计算,而设定left时就要加上px成为一个字符串
                newBoxLeft = parseInt(imgBox.style.left) + 500;
            }
            imgBox.style.left = newBoxLeft + "px"
        }

        // 显示下一张图片
        function goNext() {
            let newBoxLeft            if (imgBox.style.left === '-2000px') {
                newBoxLeft = 0
            } else {
                newBoxLeft = parseInt(imgBox.style.left) - 500;
            }
            imgBox.style.left = newBoxLeft + "px"
        }
// 使用setInterval()定时器实现自动切换功能
        var timer        function autoChange() {
            timer = setInterval(goNext, 1500)
        }
autoChange() // 监听鼠标移入事件和移出事件,实现鼠标悬停在图片上时,停止自动切换,停留在当前图片,
// 鼠标移出时继续自动切换
container.addEventListener('mouseenter', function() {
clearInterval(timer)
})
container.addEventListener('mouseleave', autoChange)여기에 작은 에피소드 추가:
처음에는 mouseout 이벤트를 모니터링했지만 테스트 중에 마우스가 컨테이너 상자 밖으로 이동할 때 mouseout 이벤트가 여러 번 트리거되어 autoChange 함수에 대한 여러 호출, 여러 타이머 및 혼란스러운 그림 전환이 발생한다는 것을 발견했습니다. . mouseout 이벤트와 mouseleave 이벤트의 차이점을 확인했습니다.간단히 말하면 :
 goLast() 함수와 goNext() 함수에서 선택한 작은 원의 인덱스를 계산/계산할 수 있습니다.
 var index = 0 // 定义index变量,表示第几个小圆圈被选中

 function goLast() {
            let newBoxLeft            if (imgBox.style.left === '0px') {
                newBoxLeft = -2000
            } else {
                // imgBox.style.left是一个字符串,所以要转化为数字才能进行计算,而设定left时就要加上px成为一个字符串
                newBoxLeft = parseInt(imgBox.style.left) + 500;
            }
            imgBox.style.left = newBoxLeft + "px"
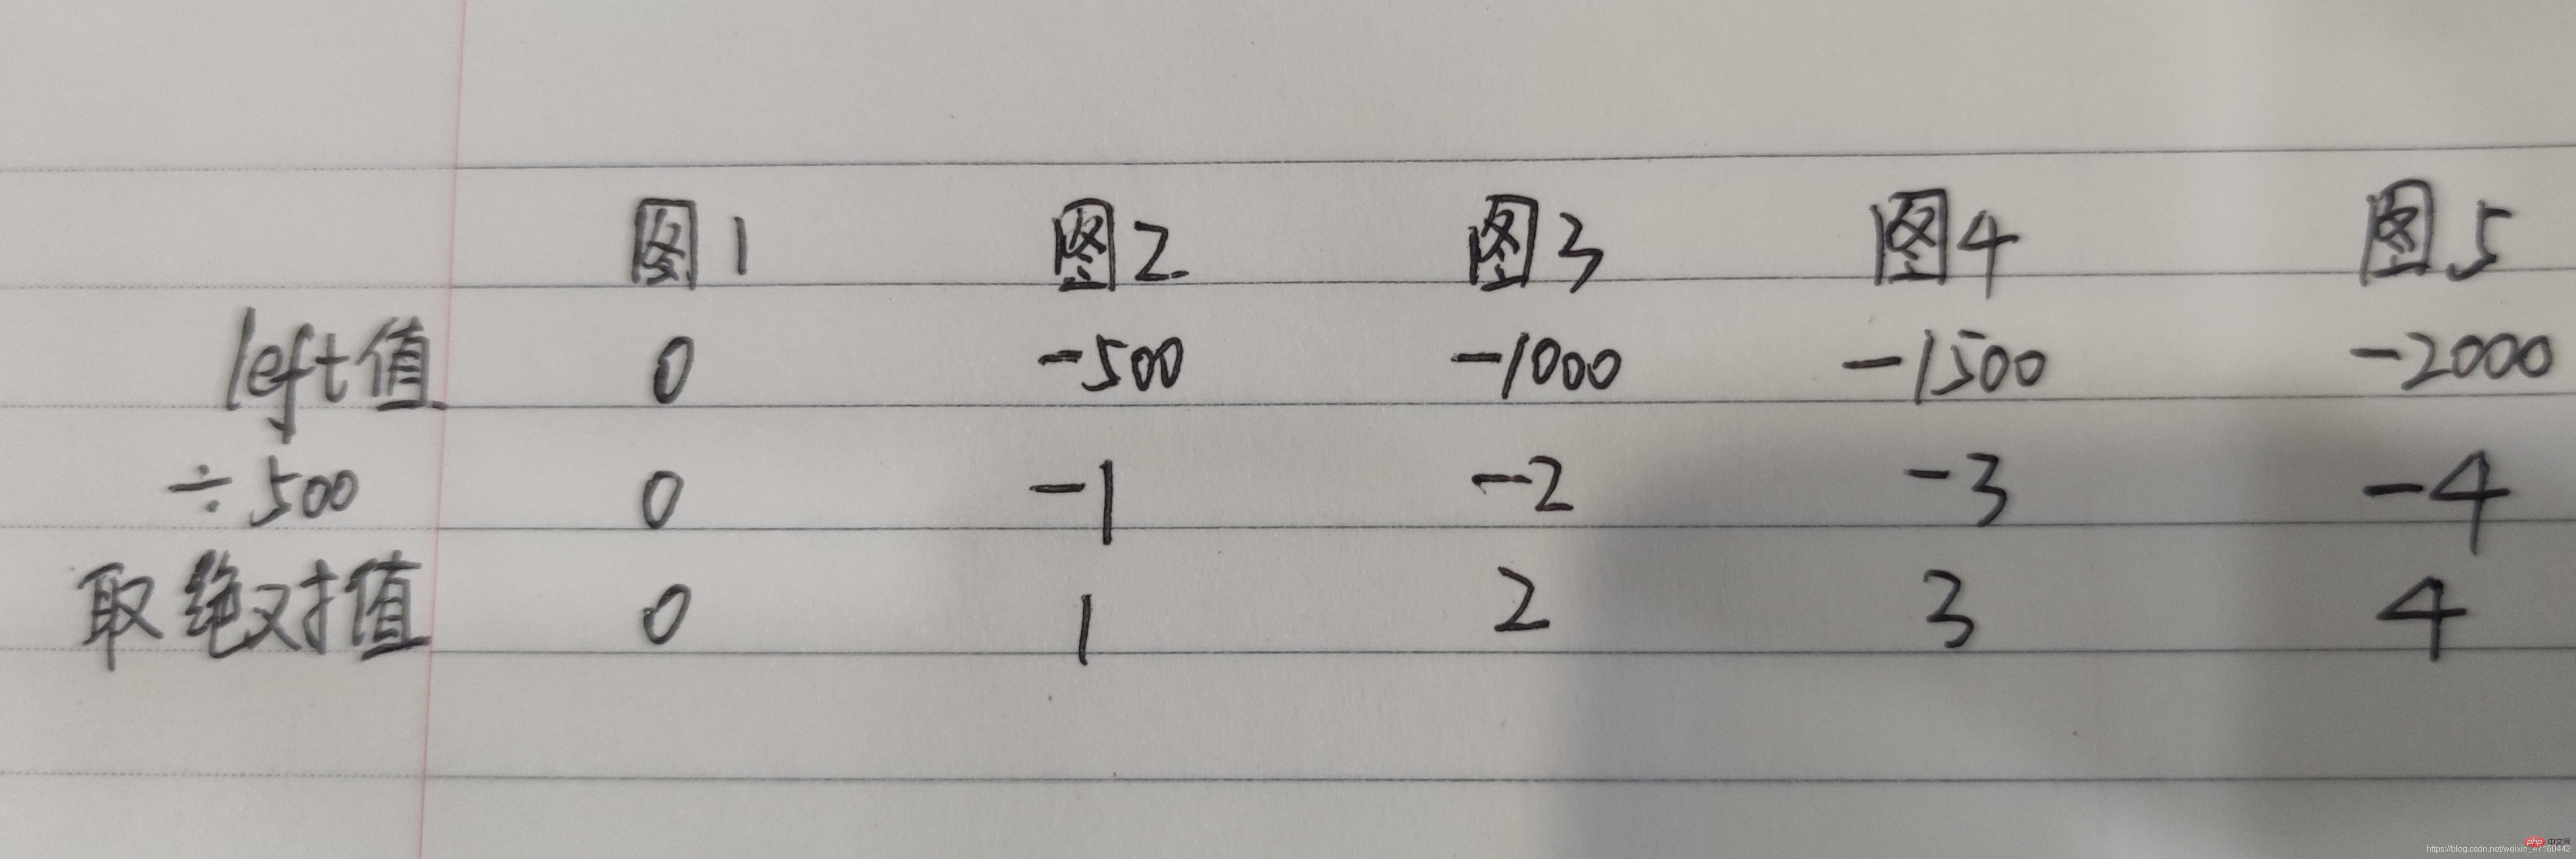
            index = Math.abs(newBoxLeft / 500)  //计算出被选中小圆圈的索引
        }

 function goNext() {
            let newBoxLeft            if (imgBox.style.left === '-2000px') {
                newBoxLeft = 0
            } else {
                newBoxLeft = parseInt(imgBox.style.left) - 500;
            }
            imgBox.style.left = newBoxLeft + "px"
            index = Math.abs(newBoxLeft / 500)  ///计算出被选中小圆圈的索引
        }
// 实现点击底部某个小圆圈时切换成对应的图片
(function clickCircle() {
let circleArr = document.getElementsByTagName('li')
for (let j = 0; j < circleArr.length; j++) {
circleArr[j].addEventListener('click', () => {
index = j selectCircle()
imgBox.style.left = -(index * 500) + "px"
})
}
})() //函数自调用写法,格式:(函数)() 지금까지 회전목마 그림의 기능은 구현되었으나 강박장애로 자동전환시 표시되는 왼쪽, 오른쪽 화살표가 잘 안보여서 약간의 조정을 하게 되었습니다. .
//给左右箭头默认隐藏<a href="javascript:;" class="leftArrow"   style="max-width:90%">
    <img src="./images/leftArrow.png" alt="左箭头"></a><a href="javascript:;" class="rightArrow"   style="max-width:90%">
<img src="./images/rightArrow.png" alt="右箭头"></a>// 监听鼠标移入事件和移出事件,实现鼠标悬停在图片上时,停止自动切换,停留在当前图片,鼠标移出时继续自动切换
container.addEventListener('mouseenter', function() {
clearInterval(timer)
leftArrow.style.display = "inline"
rightArrow.style.display = "inline"
})
container.addEventListener('mouseleave', function() {
autoChange()
leftArrow.style.display = "none"
rightArrow.style.display = "none"
})
그렇습니다. 정리하기 쉽지 않네요. 마음에 드셨다면 좋아요와 저장 부탁드려요!
Gedong Zhang
개인 블로그에 오신 것을 환영합니다. 전체 코드는 다음과 같습니다.관련 무료 학습 권장 사항: javascript(동영상)
위 내용은 캐러셀 차트를 구현하기 위해 기본 JS를 구현합니다.의 상세 내용입니다. 자세한 내용은 PHP 중국어 웹사이트의 기타 관련 기사를 참조하세요!