

참고: Bootstrap 관련 파일 경로, Bootstrap 종속성 jQuery, jQuery를 로드해야 합니다
index.html 먼저:
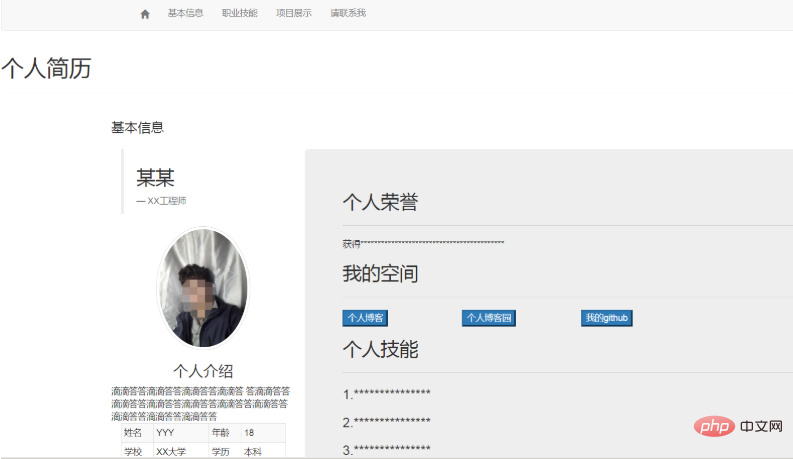
个人简历 个人简历
基本信息
某某

个人介绍
滴滴答答滴滴答答滴滴答答滴滴答 答滴滴答答滴滴答答滴滴答答滴滴答答滴滴答答滴滴答答滴滴答答滴滴答答滴滴答答
姓名 YYY 年龄 18 学校 XX大学 学历 本科 专业 软件工程 学制 全日制 职业技能
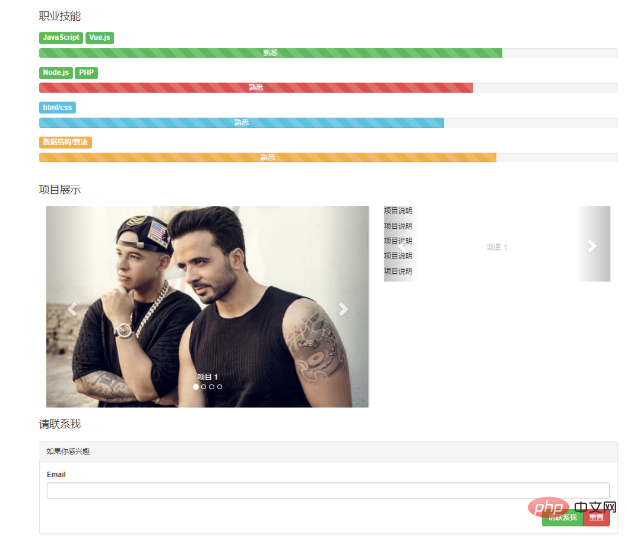
JavaScript Vue.js
Node.js PHP
html/css
数据结构/算法
项目展示
请联系我
如果你感兴趣
관련 권장 사항: "bootstrap 입문 튜토리얼# # 》
css
/* * Globals */ body { font-family: Georgia, "Times New Roman", Times, serif; color: #555; } h1, .h1, h2, .h2, h3, .h3, h4, .h4, h5, .h5, h6, .h6 { margin-top: 0; font-family: "Helvetica Neue", Helvetica, Arial, sans-serif; font-weight: normal; color: #333; } /* * Override Bootstrap's default container. */ @media (min-width: 1200px) { .container { width: 970px; } } /* * Masthead for nav */ .blog-masthead { background-color: #428bca; -webkit-box-shadow: inset 0 -2px 5px rgba(0, 0, 0, .1); box-shadow: inset 0 -2px 5px rgba(0, 0, 0, .1); } /* Nav links */ .blog-nav-item { position: relative; display: inline-block; padding: 10px; font-weight: 500; color: #cdddeb; } .blog-nav-item:hover, .blog-nav-item:focus { color: #fff; text-decoration: none; } /* Active state gets a caret at the bottom */ .blog-nav .active { color: #fff; } .blog-nav .active:after { position: absolute; bottom: 0; left: 50%; width: 0; height: 0; margin-left: -5px; vertical-align: middle; content: " "; border-right: 5px solid transparent; border-bottom: 5px solid; border-left: 5px solid transparent; } /* * Blog name and description */ .blog-header { padding-top: 20px; padding-bottom: 20px; } .blog-title { margin-top: 30px; margin-bottom: 0; font-size: 60px; font-weight: normal; } .blog-description { font-size: 20px; color: #999; } /* * Main column and sidebar layout */ .blog-main { font-size: 18px; line-height: 1.5; } /* Sidebar modules for boxing content */ .sidebar-module { padding: 15px; margin: 0 -15px 15px; } .sidebar-module-inset { padding: 15px; background-color: #f5f5f5; border-radius: 4px; } .sidebar-module-inset p:last-child, .sidebar-module-inset ul:last-child, .sidebar-module-inset ol:last-child { margin-bottom: 0; } /* Pagination */ .pager { margin-bottom: 60px; text-align: left; } .pager>li>a { width: 140px; padding: 10px 20px; text-align: center; border-radius: 30px; } /* * Blog posts */ .blog-post { margin-bottom: 60px; } .blog-post-title { margin-bottom: 5px; font-size: 40px; } .blog-post-meta { margin-bottom: 20px; color: #999; } /* * Footer */ .blog-footer { padding: 40px 0; color: #999; text-align: center; background-color: #f9f9f9; border-top: 1px solid #e5e5e5; } .blog-footer p:last-child { margin-bottom: 0; }
header, footer, nav, div, section, aside, article, p { border: 1px dotted #f0f0f0; } .divContent { min-height: 350px; }
위 내용은 부트스트랩을 사용하여 이력서를 만드는 방법의 상세 내용입니다. 자세한 내용은 PHP 중국어 웹사이트의 기타 관련 기사를 참조하세요!