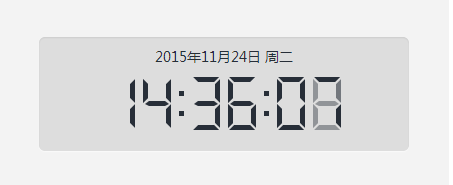
더 이상 고민하지 말고 먼저 렌더링을 보여드리겠습니다. 관심이 있으시면 계속해서 읽어주세요

HTML
이전 기사와 동일한 HTML 구조: jQuery 및 CSS3를 사용하여 디지털 시계 만들기(CSS3 기사), 단, 날짜와 요일을 표시하는 추가 >date가 있다는 점만 제외 .
<div id="clock" class="light">
 <div class="display">
  <div class="date"></div>
  <div class="digits"></div>
 </div>
</div>
jQuery
CSS 코드에 대해서는 이전 글을 참고하세요. 이번 글은 장황하지 않고 jQuery 코드만 살펴보겠습니다.
먼저 매개변수를 정의하고, 번호를 호출하는 데 사용되는 클래스 이름 배열을 정의하고, 중국어 주의 이름을 정의하고, 시, 분, 초의 위치를 정의합니다.
$(function(){
 var clock = $('#clock');
 //定义数字数组0-9
 var digit_to_name = ['zero','one', 'two', 'three', 'four', 'five', 'six', 'seven', 'eight', 'nine'];
 //定义星期
 var weekday = ['周日','周一','周二','周三','周四','周五','周六'];
 var digits = {};
 //定义时分秒位置
 var positions = [
  'h1', 'h2', ':', 'm1', 'm2', ':', 's1', 's2'
 ];
}); 그런 다음 디지털 시계의 시, 분, 초를 만들어 보세요. 이전 글에서는 디지털 시계의 html 구조를 html에 직접 배치하였고, 이제는 jQuery를 사용하여 시계 표시를 처리하고,append() 메소드를 통해 디지털 시계를 구축합니다.
var digit_holder = clock.find('.digits');
 $.each(positions, function(){
  if(this == ':'){
   digit_holder.append('<div class="dots">');
  }
  else{
   var pos = $('<div>');
   for(var i=1; i<8; i++){
    pos.append('<span class="d' + i + '">');
   }
   digits[this] = pos;
   digit_holder.append(pos);
  }
}); 마지막으로 시계를 작동시켜야 합니다. update_time() 함수는 1초마다 호출됩니다. update_time()에서는 먼저 moment.js를 사용하여 시간 형식을 지정합니다. moment.js에 대한 소개는 이 사이트의 기사를 참조하세요. 날짜와 시간을 관리합니다. 그런 다음 현재 시, 분, 초에 따라 각각 시, 분, 초 숫자의 클래스 속성을 설정합니다. 즉, 현재 시, 분, 초 숫자가 표시됩니다. 그런 다음 계속해서 moment.js를 사용하여 날짜와 요일의 형식을 지정하고 마지막으로 움직이는 디지털 시계를 완성하세요.
$(function(){
 ...
 (function update_time(){
  //调用moment.js来格式化时间
  var now = moment().format("HHmmss");
  digits.h1.attr('class', digit_to_name[now[0]]);
  digits.h2.attr('class', digit_to_name[now[1]]);
  digits.m1.attr('class', digit_to_name[now[2]]);
  digits.m2.attr('class', digit_to_name[now[3]]);
  digits.s1.attr('class', digit_to_name[now[4]]);
  digits.s2.attr('class', digit_to_name[now[5]]);
  var date = moment().format("YYYY年MM月DD日");
  var week = weekday[moment().format('d')];
  $(".date").html(date + ' ' + week);
  // 每秒钟运行一次
  setTimeout(update_time, 1000);
 })();
});