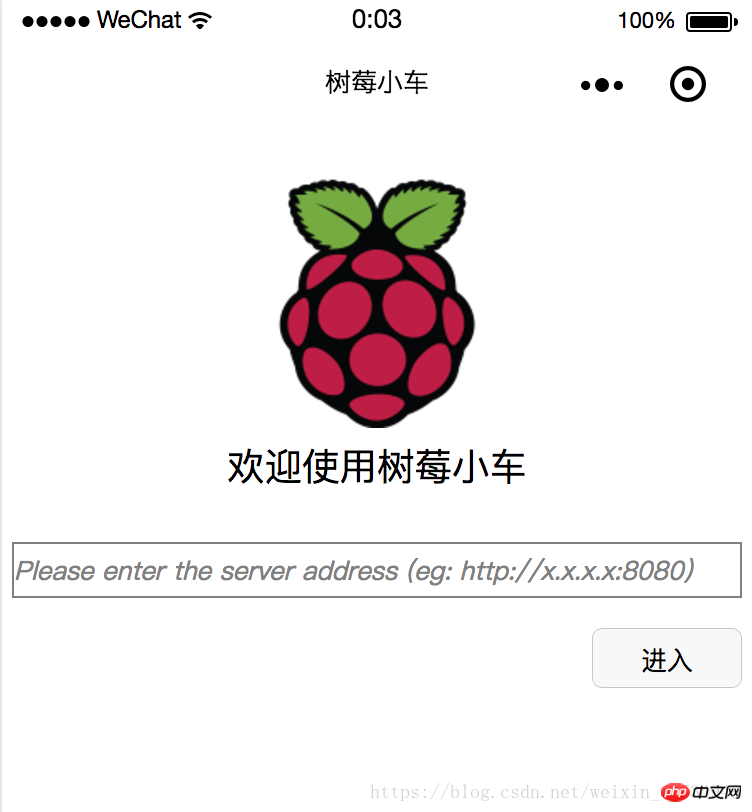
디렉토리
1. 기본 아이디어
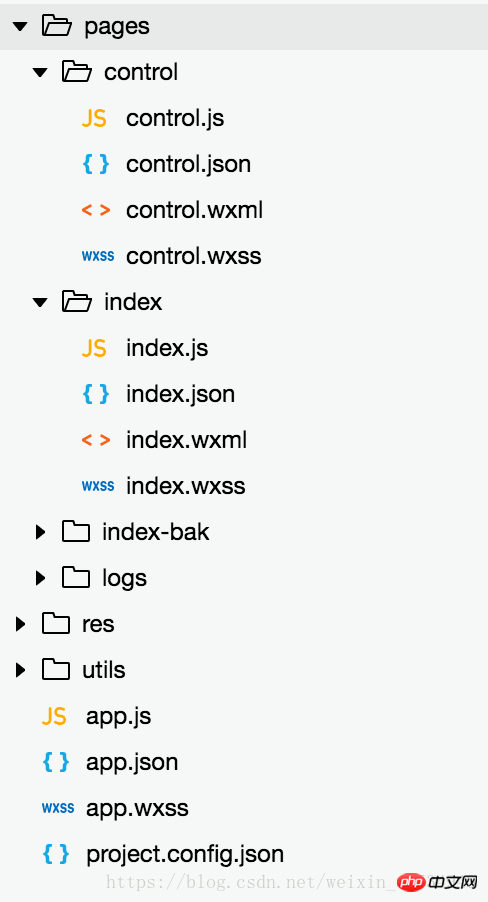
2. 코드 구조는 다음과 같습니다.
3. 인덱스 디렉토리
4. 프로젝트 전역 제어
주로 수행했습니다. . 다음은 주요 코드 조각에 대한 간략한 기록입니다. 우리는 또한 많은 함정을 겪었습니다. 예를 들어 WeChat 애플릿은 전체 전체 화면을 지원하지 않으며 WeChat 애플릿은 가로로 표시할 수 없습니다. 따라서 개발 과정에서 몇 가지 특별한 수단도 사용되었습니다. 이건 아주 기본적인 데모일 뿐이라 그 안에는 카메라 모니터링 IP나 페이지 요소 위치 지정 등 많은 부분에 하드코딩된 값을 사용했다고 할 수 있습니다. 특히 인터페이스는 아이폰6에서만 실험을 했기 때문에 다른 폰으로 바꾸면 인터페이스가 바뀌게 되더라구요.
1. 기본 아이디어
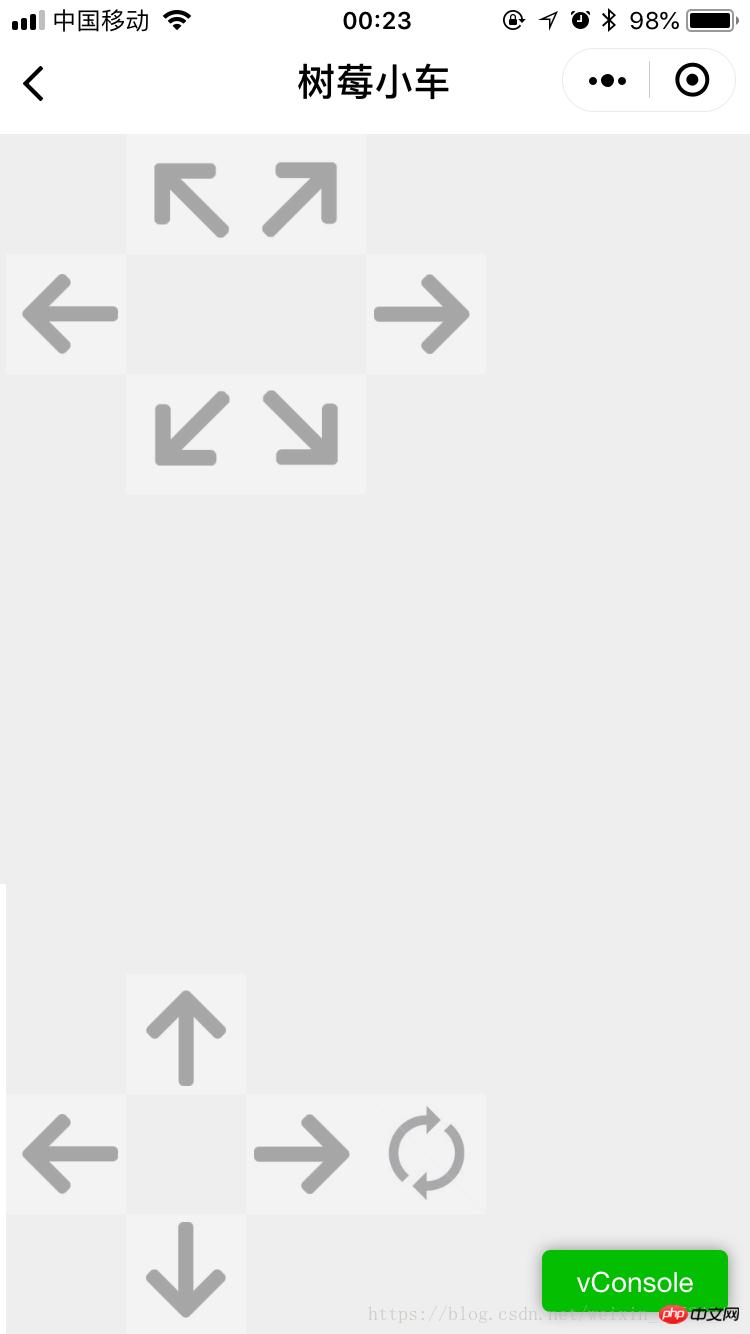
 들어간 후의 페이지는 다음과 같습니다 (가운데 공백에 카메라 모니터링이 뜨는데 아직 시작하지 않았습니다) , 그래서 볼 수 없음):
 2. 코드 구조는 다음과 같습니다.
 3. 인덱스 디렉터리
//index.js
//获取应用实例
const app = getApp()

Page({
  data: {
    logo: "/res/rasp-logo.png",
    welcome: "欢迎使用树莓小车",
    enterBtn: "进入",
    PromoteMsg: "Please enter the server address (eg: http://x.x.x.x:8080)",
    reqURL: ""
  },
  // 从输入框中获取用户输入的服务器地址信息
  getURL: function (e) {
    this.setData({
      reqURL: e.detail.value
    })
  },
  enterClicked: function (e) {
    /*
     * 当按下进入按钮,需要做以下事情:
     * 1. 首先判断用户是否已经在输入框中输入完整的服务器地址
     * 2. 发起一个到服务器的GET请求,并分析服务器的响应结果
     * 3. 跳转到小车控制界面
    */
    console.log(this.data.reqURL)

    if (this.data.reqURL == '') {
      wx.showModal({
        title: '提示',
        content: '请先输入正确的服务器地址!',
      })
      return
    }

    // 发起到服务器的GET请求
    wx.request({
      url: this.data.reqURL,
      success: function (res) {
        // 在这里获取POST请求地址,以及视频流地址,然后赋值给全局变量,供control页面调用
        console.log(res.data.match(/url = \"(\S*)\"/)[1])
        console.log(res.data.match(/src=\"(\S*)\"/)[1])
        app.globalData.postURL = res.data.match(/url = \"(\S*)\"/)[1]
        app.globalData.cameraURL = res.data.match(/src=\"(\S*)\"/)[1]

        // 跳转到control页面
        wx.navigateTo({
          url: '/pages/control/control',
        })
      },
      fail: function(res) {
        wx.showModal({
          title: '提示',
          content: '请检查输入的服务器地址!',
        })
      }
    })
  }
})<!--index.wxml-->
<view>
<view class="welcome">
<view class="logo">
<image style="width: 250rpx; height: 250rpx" src="{{logo}}"></image>
</view>
<view>
<text class="words">{{welcome}}</text>
</view>
</view>
<input class="requestURL" type="text" placeholder="{{PromoteMsg}}" focus='1' cursor='10' confirm-type="done" bindinput='getURL'></input>
<button class='enter' bindtap='enterClicked'>{{enterBtn}}</button>
</view>/**index.wxss**/
.welcome{
display: flex;
margin-top: 50rpx;
flex-direction: column;
align-items: center;
justify-content: space-between;
}
.requestURL{
margin: 50rpx 10rpx 30rpx 10rpx;
border: 1px solid gray;
font-style: italic;
font-size: small
}
.enter{
margin-right: 10rpx;
width: 150rpx;
height: 60rpx;
font-size: small
}// pages/control/control.js
const app = getApp()
Page({
/**
* 页面的初始数据
*/
data: {
// Car control images
"forwardBtn": "/res/forward.png",
"leftBtn": "/res/left.png",
"rightBtn": "/res/right.png",
"backLeftBtn": "/res/back-left.png",
"backRightBtn": "/res/back-right.png",
"backBtn": "/res/backward.png",
// Camera control images
"upBtn": "/res/forward.png",
"camLeftBtn": "/res/camLeft.png",
"camRightBtn": "/res/camRight.png",
"downBtn": "/res/backward.png",
"resetBtn": "/res/reset.png"
},
carMove: function(event) {
wx.request({
url: this.data.postURL,
data: event.currentTarget.dataset.direction,
method: "POST",
success: function(res){
},
fail: function(res){
}
})
},
carStop: function(event) {
wx.request({
url: this.data.postURL,
data: "S",
method: "POST",
success: function (res) {
},
fail: function (res) {
}
})
},
camMove: function(event) {
wx.request({
url: this.data.postURL,
data: event.currentTarget.dataset.direction,
method: "POST",
success: function (res) {
},
fail: function (res) {
}
})
},
/**
* 生命周期函数--监听页面加载
*/
onLoad: function (options) {
//this.data.cameraURL = app.globalData.cameraURL
this.setData({
cameraURL: app.globalData.cameraURL,
postURL: app.globalData.postURL
})
console.log(this.data.cameraURL)
console.log("post url in control page: " + app.globalData.postURL)
},
/**
* 生命周期函数--监听页面初次渲染完成
*/
onReady: function () {
},
/**
* 生命周期函数--监听页面显示
*/
onShow: function () {
//console.log(wx.getSystemInfoSync().windowWidth)
//console.log(wx.getSystemInfoSync().windowHeight)
},
/**
* 生命周期函数--监听页面隐藏
*/
onHide: function () {
},
/**
* 生命周期函数--监听页面卸载
*/
onUnload: function () {
},
/**
* 页面相关事件处理函数--监听用户下拉动作
*/
onPullDownRefresh: function () {
},
/**
* 页面上拉触底事件的处理函数
*/
onReachBottom: function () {
},
/**
* 用户点击右上角分享
*/
onShareAppMessage: function () {
}
}){
"navigationBarBackgroundColor": "#ffffff",
"navigationBarTextStyle": "black",
"navigationBarTitleText": "树莓小车",
"backgroundColor": "#eeeeee",
"backgroundTextStyle": "light",
"enablePullDownRefresh": false,
"navigationStyle": "custom",
"disableScroll": true
}<!--pages/control/control.wxml-->
<view class='control'>
<!-- This image shows the camera view -->
<image class='cameraView' src='http://192.168.1.104:8080/?action=stream' style="z-index:1"></image>
<!-- The following six images control the car move -->
<image class='button' id='forward' src='{{forwardBtn}}' style="position:absolute;z-index:2" bindtouchstart='carMove' data-direction='F' bindtouchend='carStop'></image>
<image class='button' id='left' src='{{leftBtn}}' style="position:absolute;z-index:2" bindtouchstart='carMove' data-direction='L' bindtouchend='carStop'></image>
<image class='button' id='right' src='{{rightBtn}}' style="position:absolute;z-index:2" bindtouchstart='carMove' data-direction='R' bindtouchend='carStop'></image>
<image class='button' id='backLeft' src='{{backLeftBtn}}' style="position:absolute;z-index:2" bindtouchstart='carMove' data-direction='BL' bindtouchend='carStop'></image>
<image class='button' id='backRight' src='{{backRightBtn}}' style="position:absolute;z-index:2" bindtouchstart='carMove' data-direction='BR' bindtouchend='carStop'></image>
<image class='button' id='back' src='{{backBtn}}' style="position:absolute;z-index:2" bindtouchstart='carMove' data-direction='B' bindtouchend='carStop'></image>
<!-- The following images control the camera move -->
<image class='button' id='up' src='{{upBtn}}' style="position:absolute;z-index:2" bindtouchstart='camMove' data-direction='VU'></image>
<image class='button' id='camLeft' src='{{camLeftBtn}}' style="position:absolute;z-index:2" bindtouchstart='camMove' data-direction='HL'></image>
<image class='button' id='camRight' src='{{camRightBtn}}' style="position:absolute;z-index:2" bindtouchstart='camMove' data-direction='HR'></image>
<image class='button' id='down' src='{{downBtn}}' style="position:absolute;z-index:2" bindtouchstart='camMove' data-direction='VD'></image>
<image class='button' id='reset' src='{{resetBtn}}' style="position:absolute;z-index:2" bindtouchstart='camMove' data-direction='RESET'></image>
</view>/* pages/control/control.wxss */
.control {
width: 100%;
height: 100%;
transform: rotate(90deg);
background-color: #eee;
justify-content: center;
}
.cameraView {
margin-left: 0px;
width: 603px;
height: 375px;
background-color: #eee;
justify-content: center;
}
.button {
height: 60px;
width: 60px;
opacity: 0.3;
}
#forward {
left: 60px;
top: 135px;
}
#left {
left: 0px;
top: 195px;
}
#right {
left: 120px;
top: 195px;
}
#backLeft {
left: 0px;
top: 255px;
}
#backRight {
left: 120px;
top: 255px;
}
#back {
left: 60px;
top: 315px;
}
#up {
left: 480px;
top: 195px;
}
#camLeft {
left: 420px;
top: 255px;
}
#camRight {
left: 540px;
top: 255px;
}
#down {
left: 480px;
top: 315px;
}
#reset{
left: 480px;
top: 135px
}//app.js
App({
onLaunch: function () {
// 展示本地存储能力
var logs = wx.getStorageSync('logs') || []
logs.unshift(Date.now())
wx.setStorageSync('logs', logs)
// 登录
wx.login({
success: res => {
// 发送 res.code 到后台换取 openId, sessionKey, unionId
}
})
// 获取用户信息
wx.getSetting({
success: res => {
if (res.authSetting['scope.userInfo']) {
// 已经授权,可以直接调用 getUserInfo 获取头像昵称,不会弹框
wx.getUserInfo({
success: res => {
// 可以将 res 发送给后台解码出 unionId
this.globalData.userInfo = res.userInfo
// 由于 getUserInfo 是网络请求,可能会在 Page.onLoad 之后才返回
// 所以此处加入 callback 以防止这种情况
if (this.userInfoReadyCallback) {
this.userInfoReadyCallback(res)
}
}
})
}
}
})
},
globalData: {
userInfo: null,
postURL: null,
cameraURL: null
}
}){
"pages": [
"pages/index/index",
"pages/control/control"
],
"window": {
"backgroundTextStyle": "light",
"navigationBarBackgroundColor": "#fff",
"navigationBarTitleText": "树莓小车",
"navigationBarTextStyle": "black",
"showStatusBar": false
}
}/**app.wxss**/
.container {
height: 100%;
display: flex;
flex-direction: column;
align-items: center;
justify-content: space-between;
padding: 200rpx 0;
box-sizing: border-box;
}{
"description": "项目配置文件。",
"packOptions": {
"ignore": []
},
"setting": {
"urlCheck": false,
"es6": true,
"postcss": true,
"minified": true,
"newFeature": true
},
"compileType": "miniprogram",
"libVersion": "2.0.4",
"appid": "wx18414b9f85bfc895",
"projectname": "wechat-control",
"isGameTourist": false,
"condition": {
"search": {
"current": -1,
"list": []
},
"conversation": {
"current": -1,
"list": []
},
"game": {
"currentL": -1,
"list": []
},
"miniprogram": {
"current": -1,
"list": []
}
}
}위 내용은 WeChat 애플릿--Raspberry Pi 자동차 제어를 위한 코드 흐름의 상세 내용입니다. 자세한 내용은 PHP 중국어 웹사이트의 기타 관련 기사를 참조하세요!