이 글에서는 주로 jquery 드래그 앤 드롭 정렬의 간단한 구현 방법을 소개하며, 페이지 요소를 동적으로 조작하기 위해 마우스 이벤트에 응답하는 jQuery의 관련 기술이 포함되어 있습니다.
이 글의 예에서는 간단한 구현을 설명합니다. jquery 드래그 앤 드롭 정렬 방법. 참고하실 수 있도록 모두와 공유해 드리며, 자세한 내용은 다음과 같습니다.
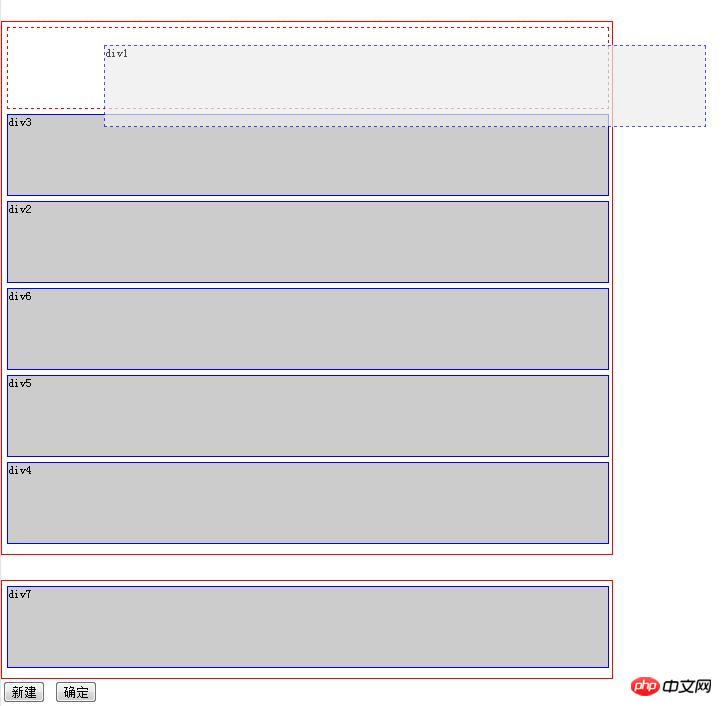
실행 중인 효과의 스크린샷은 다음과 같습니다.

원래는 새로운 동작이 없었는데 코드를 분석해 보니 쉽습니다. Enhanced~~
코드는 다음과 같습니다:
<!DOCTYPE HTML>
<html>
<head>
<meta http-equiv="Content-Type" content="text/html; charset=utf-8" />
<title>测试的拖拽功能</title>
<style type="text/css">
body, p { margin: 0; paading: 0; font-size: 12px; }
body { width:100%; margin: 0 auto; }
ul, li { margin: 0; padding: 0; list-style: none; }
.clear { clear: both; width: 1px; height: 0px; line-height: 0px; font-size: 1px; }
.drag_module_box { width: 600px; height: auto; margin: 25px 0 0 0; padding: 5px; border: 1px solid #f00; }
.drag_module_box1 { width: 600px; height: auto; margin: 25px 0 0 0; padding: 5px; border: 1px solid #f00; }
.drag_module_main { position: static; width: 600px; height: 80px; margin-bottom: 5px; border: 1px solid blue; background: #ccc; }
.drag_module_maindash { position: absolute; width: 600px; height: 80px; margin-bottom: 5px; border: 1px dashed blue; background: #ececec; opacity: 0.7; }
.drag_module_hide { width: 600px; height: 80px; margin-bottom: 5px; }
.drag_module_dash { position: sta;tic; width: 600px; height: 80px; margin-bottom: 5px; border: 1px dashed #f00; };
</style>
<script type="text/javascript" src="jquery-1.7.2.min.js"></script>
<script type="text/javascript">
$(document).ready( function () {
var range = { x: 0, y: 0 };//鼠标元素偏移量
var lastPos = { x: 0, y: 0, x1: 0, y1: 0 }; //拖拽对象的四个坐标
var tarPos = { x: 0, y: 0, x1: 0, y1: 0 }; //目标元素对象的坐标初始化
var thep = null, move = false;//拖拽对象 拖拽状态
var thepId =0, thepHeight = 0, thepHalf = 0; tarFirstY = 0; //拖拽对象的索引、高度、的初始化。
var tarp = null, tarFirst, tempp; //要插入的目标元素的对象, 临时的虚线对象
function loopbox(){ //循环初始化
$(".drag_module_box").find(".drag_module_main").each(function(){
console.log( 'find' );
$(this).mousedown(function (event){
//拖拽对象
thep = $(this);
//鼠标元素相对偏移量
range.x = event.pageX - thep.offset().left;
range.y = event.pageY - thep.offset().top;
thepId = thep.index();
thepHeight = thep.height();
thepHalf = thepHeight/2;
move = true;
thep.attr("class","drag_module_maindash");
// 创建新元素 插入拖拽元素之前的位置(虚线框)
$("<p class='drag_module_dash'></p>").insertBefore(thep);
});
});
}
loopbox();
$(".drag_module_box").mousemove(function(event) {
console.log( 'mousemove' );
if (!move) return false;
lastPos.x = event.pageX - range.x;
lastPos.y = event.pageY - range.y;
lastPos.y1 = lastPos.y + thepHeight;
// 拖拽元素随鼠标移动
thep.css({left: lastPos.x + 'px',top: lastPos.y + 'px'});
// 拖拽元素随鼠标移动 查找插入目标元素
var $main = $('.drag_module_main'); // 局部变量:按照重新排列过的顺序 再次获取 各个元素的坐标,
tempp = $(".drag_module_dash"); //获得临时 虚线框的对象
$main.each(function () {
tarp = $(this);
tarPos.x = tarp.offset().left;
tarPos.y = tarp.offset().top;
tarPos.y1 = tarPos.y + tarp.height()/2;
tarFirst = $main.eq(0); // 获得第一个元素
tarFirstY = tarFirst.offset().top + thepHalf ; // 第一个元素对象的中心纵坐标
//拖拽对象 移动到第一个位置
if (lastPos.y <= tarFirstY) {
tempp.insertBefore(tarFirst);
}
//判断要插入目标元素的 坐标后, 直接插入
if (lastPos.y >= tarPos.y - thepHalf && lastPos.y1 >= tarPos.y1 ) {
tempp.insertAfter(tarp);
}
});
}).mouseup(function(event) {
console.log( 'mouseup' );
if(thep==null) return false;
thep.insertBefore(tempp); // 拖拽元素插入到 虚线p的位置上
thep.attr("class", "drag_module_main"); //恢复对象的初始样式
$('.drag_module_dash').remove(); // 删除新建的虚线p
move=false;
});
$("#drag_module_insert").click(function(){
$("#drag_module_box1").html($("#drag_module_box1").html()+$("#drag_module_box2").html());
loopbox();
});
$("#drag_module_seque").click(function(){
$(".drag_module_box").find(".drag_module_main").each(function(){
console.log($(this).attr('id'));
});
});
});
</script>
</head>
<body>
<p class="drag_module_box" id="drag_module_box1">
<p class="drag_module_main" id="main1">p1</p>
<p class="drag_module_main" id="main2">p2</p>
<p class="drag_module_main" id="main3">p3</p>
<p class="drag_module_main" id="main4">p4</p>
<p class="drag_module_main" id="main5">p5</p>
<p class="drag_module_main" id="main6">p6</p>
</p>
<p class="drag_module_box1" id="drag_module_box2">
<p class="drag_module_main" id="main_first">p7</p>
</p>
<input type="button" value="新建" id="drag_module_insert"/>
<input type="button" value="确定" id="drag_module_seque"/>
</body>
</html>이 기사에서 사례를 읽으실 것이라고 믿습니다. 더 흥미로운 정보를 보려면 PHP 중국어 웹사이트의 다른 관련 기사를 주목하세요!
추천 도서:
JS 상위 창과 하위 창을 가져오는 iframe 사례에 대한 자세한 설명
jQuery 상위 창과 하위 창을 가져오는 iframe 사례에 대한 자세한 설명
방법 jQuery는 iframe 창의 너비와 높이를 계산합니다
위 내용은 jquery 작업 다기능 양식의 상세 내용입니다. 자세한 내용은 PHP 중국어 웹사이트의 기타 관련 기사를 참조하세요!