Non-zero 포장 원칙은 채울 때 캔버스를 채워야 하는지 판단하는 기준입니다.
충전재를 판단하는 부분과 그래픽 바깥쪽에 선을 그립니다. 이 그려진 선이 보조선입니다. 그려진 선이 보조선의 왼쪽에서 오른쪽으로 교차하는지 여부를 판단합니다. 이때 이 교차 방식은 보조선의 오른쪽에서 왼쪽으로 교차하는 경우 +1로 기록됩니다. 마지막으로 기록된 숫자를 모두 합산하여 합산 결과가 0이면 이 영역을 채워서는 안 된다는 뜻이며, 그렇지 않으면 위의 원칙을 따른다. 이렇게 이해하면 됩니다. 큰 직사각형의 경우 작은 직사각형을 그립니다. 큰 직사각형의 그리기 방향이 작은 직사각형의 방향과 같으면 색을 채운 후 크고 작은 직사각형이 그려집니다. 큰 직사각형의 그리기 방향과 작은 직사각형의 그리기 방향이 반대인 경우, 색상을 채운 후 작은 직사각형에는 큰 직사각형과 작은 직사각형 사이의 영역이 색상으로 채워지지 않습니다.
큰 직사각형 그리기 방향과 작은 직사각형 그리기 방향이 같을 때의 코드
1 <!DOCTYPE html> 2 <html lang="en"> 3 4 <head> 5 <meta charset="UTF-8"> 6 <title>非零环绕原则</title> 7 </head> 8 9 <body>10 <canvas id="canvas" style="margin:0 auto;border:1px #666 solid" width="800" height="600">11 </canvas>12 <script>13 var canvas = document.getElementById('canvas');14 var ctx = canvas.getContext('2d');15 ctx.moveTo(100, 100);16 ctx.lineTo(100, 400);17 ctx.lineTo(400, 400);18 ctx.lineTo(400, 100);19 ctx.lineTo(100, 100);20 21 ctx.moveTo(200, 200);22 ctx.lineTo(300, 300);23 ctx.lineTo(300, 300);24 ctx.lineTo(300, 200);25 ctx.lineTo(200, 200);26 ctx.fill();27 </script>28 </body>29 30 </html> 코드 보기
코드 보기
큰 직사각형 그리기 방향 직사각형은 작은 직사각형의 그리는 방향과 같습니다 동시 렌더링
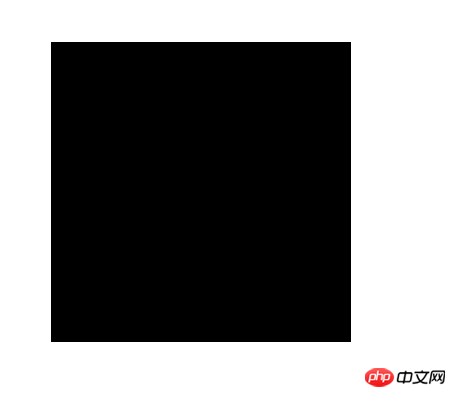 큰 직사각형의 그리는 방향이 작은 직사각형의 그리는 방향과 반대일 때의 코드
1 <!DOCTYPE html> 2 <html lang="en"> 3 4 <head> 5 <meta charset="UTF-8"> 6 <title>非零环绕原则</title> 7 </head> 8 9 <body>10 <canvas id="canvas" style="margin:0 auto;border:1px #666 solid" width="800" height="600">11 </canvas>12 <script>13 var canvas = document.getElementById('canvas');14 var ctx = canvas.getContext('2d');15 ctx.moveTo(100, 100);16 ctx.lineTo(100, 400);17 ctx.lineTo(400, 400);18 ctx.lineTo(400, 100);19 ctx.lineTo(100, 100);20 21 ctx.moveTo(200, 200);22 ctx.lineTo(300, 200);23 ctx.lineTo(300, 300);24 ctx.lineTo(200, 300);25 ctx.lineTo(200, 200);26 ctx.fill();27 </script>28 </body>29 30 </html> 코드 보기
코드 보기
큰 직사각형 그리는 방향이 작은 직사각형의 그리는 방향과 반대일 때의 효과도
2.
closePath() 및 lineTo()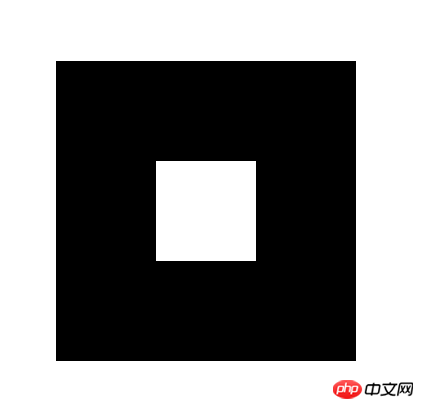
closePath와 lineTo Closing 사이에는 차이가 있습니다. closePath
는 자연스럽게 닫히고, 는 닫힌 연결에서만 다릅니다 렌더링

1 <!DOCTYPE html> 2 <html lang="en"> 3 4 <head> 5 <meta charset="UTF-8"> 6 <title>Document</title> 7 <style> 8 canvas { 9 display: block;10 margin: 100px auto;11 border: 1px solid #000;12 }13 </style>14 </head>15 16 <body>17 <canvas id="myCanvas" width="600px" height="400px"></canvas>18 <script>19 var myCanvas = document.getElementById("myCanvas");20 var ctx = myCanvas.getContext('2d');21 ctx.lineWidth = 20;22 ctx.moveTo(100, 100);23 ctx.lineTo(100, 100 + 100);24 ctx.lineTo(100 + 100, 100 + 100);25 ctx.lineTo(100, 100);26 27 ctx.moveTo(300, 100);28 ctx.lineTo(300, 100 + 100);29 ctx.lineTo(300 + 100, 100 + 100);30 ctx.closePath();31 ctx.stroke();32 </script>33 </body>34 </html> 코드 보기
코드 보기 
스트로크 방식을 사용하면 호의 시작 위치에 연결됩니다. arc.fill 메소드를 사용하면 경로가 자동으로 닫히고 채워집니다.
1 <!DOCTYPE html> 2 <html lang="en"> 3 <head> 4 <meta charset="UTF-8"> 5 <title>Document</title> 6 <style> 7 canvas{ 8 display: block; 9 margin: 0 auto;10 border: 1px solid #666;11 }12 </style>13 </head>14 <body>15 <canvas id="myCanvas" width="800" height="300"></canvas>16 <script>17 var myCanvas = document.getElementById("myCanvas");18 var ctx = myCanvas.getContext('2d');19 ctx.moveTo(50,100);20 ctx.lineTo(100,100);21 ctx.arc(150,150,50,0,Math.PI);22 ctx.stroke();23 24 ctx.moveTo(200,100);25 ctx.lineTo(300,100);26 ctx.arc(300,150,50,0,Math.PI*1.2);27 ctx.stroke();28 29 ctx.beginPath();30 ctx.moveTo(400,100);31 ctx.lineTo(500,100);32 ctx.arc(500,150,50,0,Math.PI*1.2);33 ctx.fill();34 35 ctx.beginPath();36 ctx.moveTo(600,50);37 ctx.lineTo(700,100);38 ctx.arc(700,150,50,0,Math.PI*1.2);39 ctx.fill();40 </script>41 </body>42 </html> 코드 보기
코드 보기
效果图
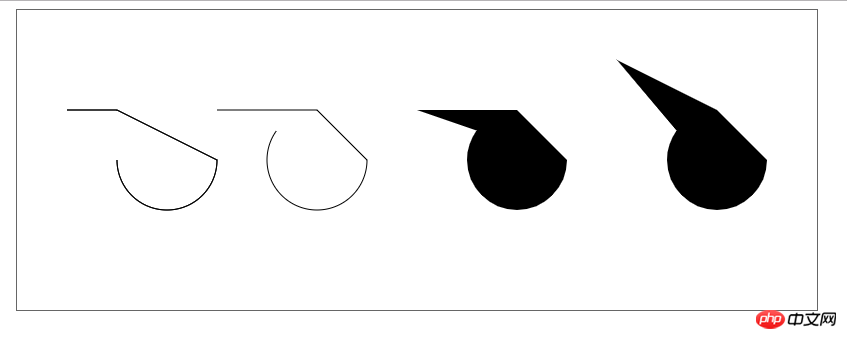


1 <!DOCTYPE html> 2 <html lang="en"> 3 <head> 4 <meta charset="UTF-8"> 5 <title>Document</title> 6 <style> 7 canvas{ 8 display: block; 9 margin: 0 auto;10 border: 1px solid #666;11 }12 </style>13 </head>14 <body>15 <canvas id="myCanvas" width="800" height="300"></canvas>16 <script>17 var myCanvas = document.getElementById("myCanvas");18 var ctx = myCanvas.getContext('2d');19 ctx.moveTo(50,100);20 ctx.lineTo(100,100);21 //使用beginPath(),多添加的两句代码22 ctx.stroke();23 ctx.beginPath();24 ctx.arc(150,150,50,0,Math.PI);25 ctx.stroke();26 </script>27 </body>28 </html>效果图
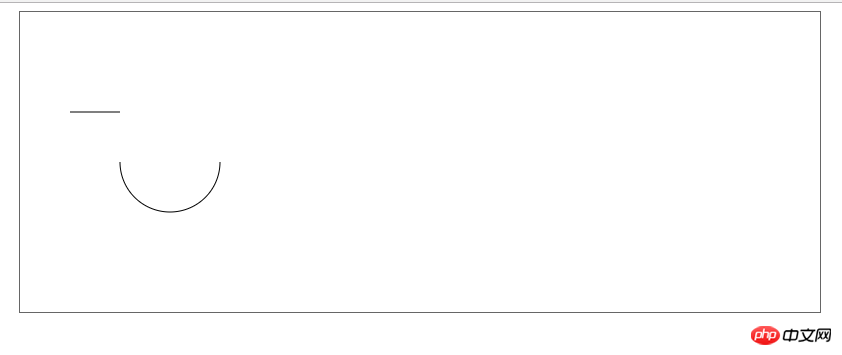


1 <!DOCTYPE html> 2 <html lang="en"> 3 <head> 4 <meta charset="UTF-8"> 5 <title>Document</title> 6 <style> 7 canvas{ 8 display: block; 9 margin: 0 auto;10 border: 1px solid #666;11 }12 </style>13 </head>14 <body>15 <canvas id="myCanvas" width="800" height="300"></canvas>16 <script>17 var myCanvas = document.getElementById("myCanvas");18 var ctx = myCanvas.getContext('2d');19 ctx.moveTo(50,100);20 ctx.lineTo(100,100);21 //添加moveTO()这一句代码即可22 ctx.moveTo(200,150);23 ctx.arc(150,150,50,0,Math.PI);24 ctx.stroke();25 </script>26 </body>27 </html>


1 <!DOCTYPE html> 2 <html lang="en"> 3 4 <head> 5 <meta charset="UTF-8"> 6 <title>Document</title> 7 <style> 8 canvas { 9 display: block;10 margin: 0 auto;11 border: 1px solid #666;12 }13 </style>14 </head>15 16 <body>17 <canvas id="myCanvas" width="400" height="400"></canvas>18 <script>19 var myCanvas = document.getElementById("myCanvas");20 var ctx = myCanvas.getContext('2d');21 22 function toRad(d) {23 return d * Math.PI / 180;24 }25 var x = 200,26 y = 200,27 angle = 0,28 percent = 0;29 var timeId = setInterval(function() {30 ctx.clearRect(0,0,myCanvas.width,myCanvas.height);31 ctx.beginPath();32 ctx.arc(x, y, 120, 0, toRad(angle));33 ctx.strokeStyle = '#00f';34 ctx.lineWidth = 40;35 ctx.stroke();36 37 ctx.fillStyle = '#f00';38 ctx.font = '700 30px Arial';39 ctx.textAlign = 'center';40 ctx.textBaseline = 'middle';41 percent = Math.floor(angle /360*100);42 ctx.fillText(percent + '%', x, y);43 if (percent >= 100) {44 clearInterval(timeId)45 }46 else{47 angle++;48 }49 }, 20);50 </script>51 </body>52 53 </html>效果图
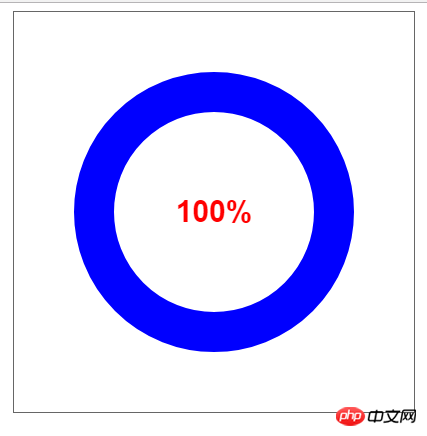
绘图方法
canvas画布提供了一个用来作图的平面空间,该空间的每个点都有自己的坐标,x表示横坐标,y表示竖坐标。原点(0, 0)位于图像左上角,x轴的正向是原点向右,y轴的正向是原点向下。
(1)绘制路径
beginPath方法表示开始绘制路径,moveTo(x, y)方法设置线段的起点,lineTo(x, y)方法设置线段的终点,stroke方法用来给透明的线段着色。
ctx.beginPath(); // 开始路径绘制
ctx.moveTo(20, 20); // 设置路径起点,坐标为(20,20)
ctx.lineTo(200, 20); // 绘制一条到(200,20)的直线
ctx.lineWidth = 1.0; // 设置线宽
ctx.strokeStyle = '#CC0000'; // 设置线的颜色
ctx.stroke(); // 进行线的着色,这时整条线才变得可见
moveto和lineto方法可以多次使用。最后,还可以使用closePath方法,自动绘制一条当前点到起点的直线,形成一个封闭图形,省却使用一次lineto方法。
(2)绘制矩形
fillRect(x, y, width, height)方法用来绘制矩形,它的四个参数分别为矩形左上角顶点的x坐标、y坐标,以及矩形的宽和高。fillStyle属性用来设置矩形的填充色。
ctx.fillStyle = 'yellow';
ctx.fillRect(50, 50, 200, 100);
strokeRect方法与fillRect类似,用来绘制空心矩形。
ctx.strokeRect(10,10,200,100);
clearRect方法用来清除某个矩形区域的内容。
ctx.clearRect(100,50,50,50);
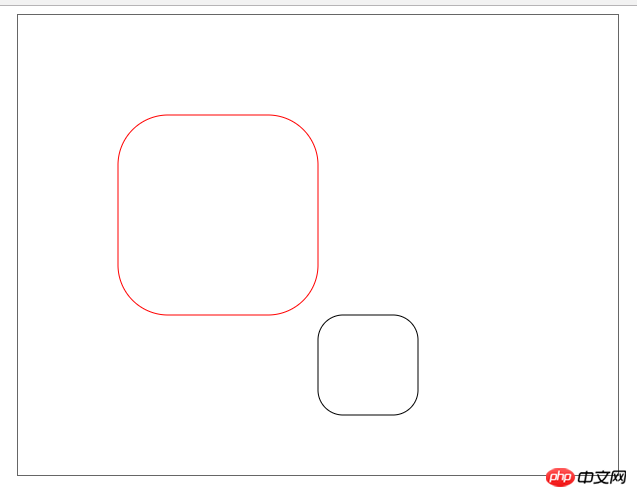
arcTo绘制圆角,需要线端点,矩形顶点以及另一线段的端点三个参考点


1 <!DOCTYPE html> 2 <html lang="en"> 3 4 <head> 5 <meta charset="UTF-8"> 6 <title>Document</title> 7 <style> 8 canvas { 9 display: block;10 margin: 0 auto;11 border: 1px solid #666;12 }13 </style>14 </head>15 16 <body>17 <canvas id="myCanvas" width="600" height="460"></canvas>18 <script>19 var myCanvas = document.getElementById("myCanvas");20 var ctx = myCanvas.getContext('2d');21 22 function toRad(d) {23 return d * Math.PI / 180;24 }25 26 function circleRect(x, y, width, height, r, color) {27 //保存之前的绘图状态28 ctx.save();29 ctx.beginPath();30 //绘制四条边31 ctx.moveTo(x + r, y);32 ctx.lineTo(x + width - r, y);33 34 ctx.moveTo(x + r, y + height);35 ctx.lineTo(x + width - r, y + height);36 37 ctx.moveTo(x, y + r);38 ctx.lineTo(x, y + height - r);39 40 ctx.moveTo(x + width, y + r);41 ctx.lineTo(x + width, y + height - r);42 43 ctx.moveTo(x + r, y);44 ctx.arcTo(x, y, x, y + r, r);45 46 ctx.moveTo(x + width - r, y);47 ctx.arcTo(x + width, y, x + width, y + r, r);48 49 ctx.moveTo(x, y + height - r);50 ctx.arcTo(x, y + height, x + r, y + height, r);51 52 ctx.moveTo(x + width - r, y + height);53 ctx.arcTo(x + width, y + height, x + width, y + height - r, r);54 //传入颜色,则使用传入的颜色;否则使用默认黑色55 ctx.strokeStyle = color || '#000';56 ctx.stroke();57 //恢复之前的绘图状态58 ctx.restore();59 }60 61 circleRect(100, 100, 200, 200, 50, 'red');62 circleRect(300, 300, 100, 100, 25);63 </script>64 </body>65 66 </html>
效果图
위 내용은 HTML5의 캔버스 문제 요약의 상세 내용입니다. 자세한 내용은 PHP 중국어 웹사이트의 기타 관련 기사를 참조하세요!