

这篇文章主要介绍了ionic 自定义弹框效果,非常不错,具有参考借鉴价值,需要的朋友可以参考下
在工作过程中往往需要自定义的弹框。因此,将内容整理如下,以方便学习。若有不当之处,敬请斧正!
思路
利用ionic自带的弹框$ionicPopup。
隐藏头部和尾部,只保留body部分
在利用templateUrl或者template,引入需要的模板
代码
$ionicPopup.show({ cssClass:'team-popup', template: "" + "
{{tempItem.name}}
" + "" + "
input1:
" + "" + "" + "" + "
input2:
" + "" + "" + "" + "", scope: $scope });
/**弹出窗popup 无titlecss*/ .team-popup .popup-head{ display: none; } .team-popup .popup{ padding: 0; -moz-border-radius: 5px; -webkit-border-radius: 5px; border-radius:5px; } .team-popup .popup-body{ padding: 0; /*overflow-y:scroll;*/ } /*自定义表单*/ .popup-form{ font-size:15px } .form-title{ margin: 10px; text-align:center } .form-content{ width: 90%; height: 36px; background-color: white; padding-left: 10px; margin:10px auto; position: relative; border-radius: 5px; } .form-content input{ line-height: 36px; padding-left:10px } .input-name{ float: left; line-height: 36px; } .input-area{ width: 50%; float: left; height: 36px; } .form-button{ width: 90%; height: 36px; margin:10px auto; position: relative; } .form-button button{ width: 50%; border-radius: 5px; min-height: 10px; height: 100%; line-height: 100%; }
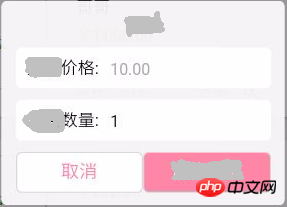
效果
以上所述是小编给大家介绍的ionic 自定义弹框效果,希望对大家有所帮助,如果大家有任何疑问请给我留言,小编会及时回复大家的。在此也非常感谢大家对脚本之家网站的支持!
위 내용은 ionic 自定义弹框效果의 상세 내용입니다. 자세한 내용은 PHP 중국어 웹사이트의 기타 관련 기사를 참조하세요!


![[웹 프런트엔드] Node.js 빠른 시작](https://img.php.cn/upload/course/000/000/067/662b5d34ba7c0227.png)


