

최근 html5의 다양한 API에 대해 알아보는 시간을 가졌고, Sina Weibo의 아바타 설정에서 스크린샷을 얻기 위해 캔버스를 사용한다는 것을 알게 되었습니다. 또한 얼마 전에 html5의 File API에 대해 배우고 File API를 사용했다는 것을 알게 되었습니다. FileReader로 파일 업로드 구현 《JavaScript File API 파일 업로드 미리보기》, html5가 더 재미있는 것 같은데, 이 기능을 작성해보고 캔버스를 배워보고 싶습니다.
아래는 제가 직접 작성한 데모입니다. 코드가 상대적으로 작아서 많은 세부 사항을 처리하는 방법을 모르겠습니다. 부적절한 내용이 있으면 말씀해주세요 감사합니다 ^_^ ^_^
기능 구현 단계:
PS: 제가 이 글을 쓰기 전에 먼저 데모를 작성했기 때문에 섹션에 게시된 코드는 섹션별로 코드를 직접 복사한 것입니다.
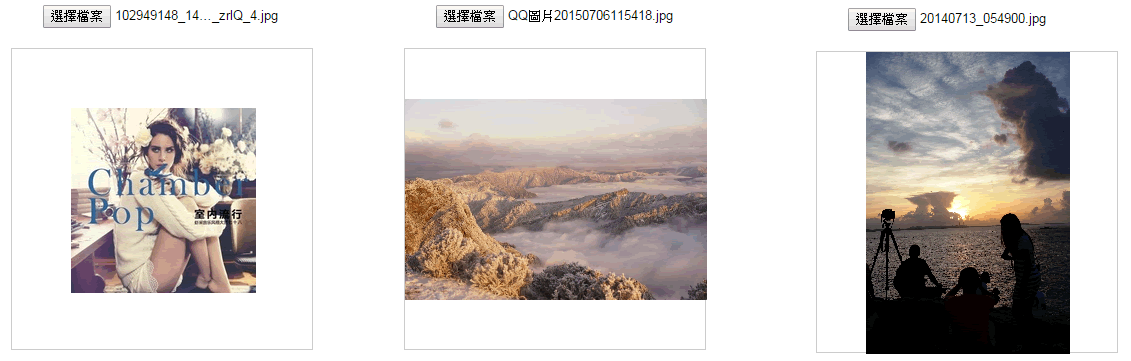
1단계: 파일 가져오기, 파일 읽기 및 URL 생성
여기서는 HTML5의 파일 API를 사용하여 로컬 파일 업로드를 처리합니다. 이렇게 하면 이미지를 서버에 업로드할 필요가 없어지고 서버는 미리보기를 위해 이미지 주소를 반환합니다. 자세한 내용은 File API의 FileReader 사용을 참조하세요. 파일 업로드 구현
document.getElementById('post_file').onchange = function() {
  var fileList = this.files[0];
  var oFReader = new FileReader();
  oFReader.readAsDataURL(fileList);
  oFReader.onload = function (oFREvent) { //当读取操作成功完成时调用.
    postFile.paintImage(oFREvent.target.result);//把预览图片url传给函数
  };
}
2단계: 캔버스를 이용해 용기 크기에 맞춰 그림 그리기
이전 단계에서는 File API를 사용하여 FileReader가 업로드할 이미지의 주소를 얻었습니다. 다음으로 캔버스를 사용하여 이미지를 그려야 합니다. 여기에 img를 직접 삽입하고 캔버스로 다시 그려보면 어떨까요? 설마. img를 사용하여 페이지에 직접 삽입하면 적응적으로 중앙에 배치되지 않습니다. 캔버스를 사용하여 이미지를 그리는 경우 이미지를 적응적으로 중앙에 배치하고 균등하게 크기를 조정할 수 있을 뿐만 아니라 쉽게 만들 수 있습니다. 이미지의 좌표와 크기를 후속 마스크 레이어에 전달합니다. 이렇게 하면 이미지의 좌표와 이미지의 크기를 기반으로 마스크 레이어를 그릴 수 있습니다.
여기서 캔버스의 drawImage 메소드에 약간 주의를 기울여야 합니다.
paintImage: function(url) {
var t = this;
var createCanvas = t.getImage.getContext("2d");
var img = new Image();
img.src = url;
img.onload = function(){
//等比例缩放图片(如果图片宽高都比容器小,则绘制的图片宽高 = 原图片的宽高。)
//如果图片的宽度或者高度比容器大,则宽度或者高度 = 容器的宽度或者高度,另一高度或者宽度则等比例缩放
//t.imgWidth:绘制后图片的宽度;t.imgHeight:绘制后图片的高度;t.px:绘制后图片的X轴;t.py:绘制后图片的Y轴
if ( img.width < t.regional.offsetWidth && img.height < t.regional.offsetHeight) {
t.imgWidth = img.width;
t.imgHeight = img.height;
} else {
var pWidth = img.width / (img.height / t.regional.offsetHeight);
var pHeight = img.height / (img.width / t.regional.offsetWidth);
t.imgWidth = img.width > img.height ? t.regional.offsetWidth : pWidth;
t.imgHeight = img.height > img.width ? t.regional.offsetHeight : pHeight;
}
//图片的坐标
t.px = (t.regional.offsetWidth - t.imgWidth) / 2 + 'px';
t.py = (t.regional.offsetHeight - t.imgHeight) / 2 + 'px';
t.getImage.height = t.imgHeight;
t.getImage.width = t.imgWidth;
t.getImage.style.left = t.px;
t.getImage.style.top = t.py;
createCanvas.drawImage(img,0,0,t.imgWidth,t.imgHeight);//没用直接插入背景图片而用canvas绘制图片,是为了调整所需框内图片的大小
t.imgUrl = t.getImage.toDataURL();//储存canvas绘制的图片地址
t.cutImage();
t.drag();
};
},
결과는 다음과 같습니다.
3단계: 캔버스를 사용하여 마스크 레이어 그리기
이전 단계에서는 잘라야 할 배경 이미지를 그렸습니다. 이제 배경 이미지의 좌표와 크기에 따라 배경을 덮을 마스크 레이어를 그리고 캔버스의clearRect 메서드를 사용해야 합니다. 자르기 영역을 지워서 자르지 않은 영역과 대조합니다.
(여기서 마스크 레이어는 디스플레이 효과에만 사용되며 이미지를 잘라내는 작업은 하지 않습니다. 이 단계를 직접 제거할 수 있는지 궁금합니다. 아시는 분 알려주세요.)
//绘制遮罩层:
t.editBox.height = t.imgHeight;
t.editBox.width = t.imgWidth;
t.editBox.style.display = 'block';
t.editBox.style.left = t.px;
t.editBox.style.top = t.py;

var cover = t.editBox.getContext("2d");
cover.fillStyle = "rgba(0, 0, 0, 0.5)";
cover.fillRect (0,0, t.imgWidth, t.imgHeight);
cover.clearRect(t.sx, t.sy, t.sHeight, t.sWidth);
4단계: 캔버스를 사용하여 자른 그림 그리기
세 번째 단계에서는 마스크 레이어가 그려지지만 마스크 레이어에는 크롭 기능이 없습니다. 크롭된 영역과 크롭되지 않은 영역의 비교를 표시하는 데만 사용되므로 이미지 크롭 기능이 시작됩니다. 여기. 또한 캔버스의 drawImage 메소드를 사용하십시오.
//绘制剪切图片:
t.editPic.height = t.sHeight;
t.editPic.width = t.sWidth;
var ctx = t.editPic.getContext('2d');
var images = new Image();
images.src = t.imgUrl;
images.onload = function(){
  ctx.drawImage(images,t.sx, t.sy, t.sHeight, t.sWidth, 0, 0, t.sHeight, t.sWidth); //裁剪图片
  document.getElementById('show_edit').getElementsByTagName('img')[0].src = t.editPic.toDataURL(); //把裁剪后的图片使用img标签显示出来
}
5단계: 자르기 상자를 드래그하여 이미지를 다시 자릅니다
스크린샷 업로드 아바타 기능을 사용할 때 만족스러운 사진을 자를 수 있기를 바라기 때문에 완벽한 사진을 자르기 위해서는 자르기 프레임을 지속적으로 변경해야 합니다. 사진 자르기의 기본 기능은 이전 단계에서 완료되었으므로 이제 해야 할 일은 마우스의 움직임을 따라 실시간으로 사진을 자르는 것입니다.
drag: function() {
  var t = this;
  var draging = false;
  var startX = 0;
  var startY = 0;

  document.getElementById('cover_box').onmousemove = function(e) {
    //获取鼠标到背景图片的距离
    var pageX = e.pageX - ( t.regional.offsetLeft + this.offsetLeft );
    var pageY = e.pageY - ( t.regional.offsetTop + this.offsetTop );
    //判断鼠标是否在裁剪区域里面:
    if ( pageX > t.sx && pageX < t.sx + t.sWidth && pageY > t.sy && pageY < t.sy + t.sHeight ) {
      this.style.cursor = 'move';

      this.onmousedown = function(){
        draging = true;
        //记录上一次截图的坐标
        t.ex = t.sx;
        t.ey = t.sy;
        //记录鼠标按下时候的坐标
        startX = e.pageX - ( t.regional.offsetLeft + this.offsetLeft );
        startY = e.pageY - ( t.regional.offsetTop + this.offsetTop );
      }
      window.onmouseup = function() {
        draging = false;
      }

      if (draging) {
        //移动时裁剪区域的坐标 = 上次记录的定位 + (当前鼠标的位置 - 按下鼠标的位置),裁剪区域不能超出遮罩层的区域;
        if ( t.ex + (pageX - startX) < 0 ) {
          t.sx = 0;
        } else if ( t.ex + (pageX - startX) + t.sWidth > t.imgWidth) {
          t.sx = t.imgWidth - t.sWidth;
        } else {
          t.sx = t.ex + (pageX - startX);
        };

        if (t.ey + (pageY - startY) < 0) {
          t.sy = 0;
        } else if ( t.ey + (pageY - startY) + t.sHeight > t.imgHeight ) {
          t.sy = t.imgHeight - t.sHeight;
        } else {
          t.sy = t.ey + (pageY - startY);
        }

        t.cutImage();
      }
    } else{
      this.style.cursor = 'auto';
    }
  };
}
大功告成,图片如下:

有童鞋指出,每移动一下鼠标就裁剪一张图片不是很耗性能吗,为什么不用background-position来做预览效果 保存的时候才用canvas裁出来?一听觉得这建议很有道理,所以就在第四步把代码稍微改动了一下。鼠标移动的时候的预览效果是改变图片的background-position,点击保存按钮的时候才裁剪图片,把裁剪下来的图片生成新的url就可以传给服务器啦~~
以下代码是改正过来的,大家有什么其它好的建议欢迎指出来喔 ^_^ ^_^
demo完整代码如下:
注意:因为用的是seajs写的,所以稍微留意下文件的加载情况啦
css:
body{text-align:center;}
#label{border:1px solid #ccc;background-color:#fff;text-align:center;height:300px; width:300px;margin:20px auto;position:relative;}
#get_image{position:absolute;}
#edit_pic{position:absolute;display:none;background:#000;}
#cover_box{position: absolute;z-index: 9999;display:none;top:0px;left:0px;}
#show_edit{margin: 0 auto;display:inline-block;}
#show_pic{height:100px;width:100px;border:2px solid #000;overflow:hidden;margin:0 auto;display:inline-block; }
html:
<input type="file" name="file" id="post_file">
<button id="save_button">保存</button>
<div id="label">
  <canvas id="get_image"></canvas>
  <p>
    <canvas id="cover_box"></canvas>
    <canvas id="edit_pic"></canvas>
  </p>
</div>
<p>
  <span id="show_edit"></span>
  <span id="show_pic"><img src=""></span>
</p>


<script type="text/javascript" src="../../lib/seajs/sea.js"></script>
<script type="text/javascript">
seajs.use(['_example/fileAPI/index_v2.js'], function(clipFile) {
  clipFile.init({
    clipPos: {    //裁剪框的默认尺寸与定位
      x: 15,
      y: 15,
      height: 100,
      width: 100,
    },
  });
});

</script>
js:
define(function(require, exports, module) {
'use strict';
var postFile = {
init: function(options) {
var t = this;
t.regional = document.getElementById('label');
t.getImage = document.getElementById('get_image');
t.clipPic = document.getElementById('edit_pic');
t.coverBox = document.getElementById('cover_box');
t.achieve = document.getElementById('show_edit');
t.clipPos = options.clipPos;
//初始化图片基本参数
t.bgPagePos = {
x: 0,
y: 0,
height: 0,
width: 0
};
//传进图片
document.getElementById('post_file').addEventListener("change", t.handleFiles, false);
//点击保存按钮后再裁剪图片
document.getElementById('save_button').onclick = function() {
//绘制剪切后的图片:
t.clipPic.height = t.clipPos.height;
t.clipPic.width = t.clipPos.width;
var ctx = t.clipPic.getContext('2d');
var images = new Image();
images.src = t.imgUrl;
images.onload = function(){
//drawImage(images,相对于裁剪图片的X, 相对于裁剪图片的Y, 裁剪的高度, 裁剪的宽度, 显示在画布的X, 显示在画布的Y, 显示在画布多高, 显示在画布多宽);
ctx.drawImage(images,t.clipPos.x, t.clipPos.y, t.clipPos.height, t.clipPos.width, 0, 0, t.clipPos.height, t.clipPos.width); //裁剪图片
document.getElementById('show_pic').getElementsByTagName('img')[0].src = t.clipPic.toDataURL();
}
};
t.drag();
},
handleFiles: function() {
var fileList = this.files[0];
var oFReader = new FileReader();
//读取文件内容
oFReader.readAsDataURL(fileList);
//当读取操作成功完成时调用.
oFReader.onload = function (oFREvent) {
//把预览图片URL传给函数
postFile.paintImage(oFREvent.target.result);
};
},
paintImage: function(url) {
var t = this;
var createCanvas = t.getImage.getContext("2d");
var img = new Image();
img.src = url;
//把传进来的图片进行等比例缩放
img.onload = function(){
//等比例缩放图片(如果图片宽高都比容器小,则绘制的图片宽高 = 原图片的宽高。)
//如果图片的宽度或者高度比容器大,则宽度或者高度 = 容器的宽度或者高度,另一高度或者宽度则等比例缩放
//t.bgPagePos.width:绘制后图片的宽度;
//t.bgPagePos.height:绘制后图片的高度;
//t.bgPagePos.x:绘制后图片的X轴;
//t.bgPagePos.y:绘制后图片的Y轴
if ( img.width < t.regional.offsetWidth && img.height < t.regional.offsetHeight) {
t.bgPagePos.width = img.width;
t.bgPagePos.height = img.height;
} else {
var pWidth = img.width / (img.height / t.regional.offsetHeight);
var pHeight = img.height / (img.width / t.regional.offsetWidth);
t.bgPagePos.width = img.width > img.height ? t.regional.offsetWidth : pWidth;
t.bgPagePos.height = img.height > img.width ? t.regional.offsetHeight : pHeight;
}
//图片的坐标
t.bgPagePos.x = (t.regional.offsetWidth - t.bgPagePos.width) / 2 + 'px';
t.bgPagePos.y = (t.regional.offsetHeight - t.bgPagePos.height) / 2 + 'px';
t.getImage.height = t.bgPagePos.height;
t.getImage.width = t.bgPagePos.width;
t.getImage.style.left = t.bgPagePos.x;
t.getImage.style.top = t.bgPagePos.y;
createCanvas.drawImage(img,0,0,t.bgPagePos.width,t.bgPagePos.height);//没用直接插入背景图片而用canvas绘制图片,是为了调整所需框内图片的大小
t.imgUrl = t.getImage.toDataURL();//储存canvas绘制的图片地址
t.clipImg();
};
},
clipImg: function() {
var t = this;
//绘制遮罩层:
t.coverBox.height = t.bgPagePos.height;
t.coverBox.width = t.bgPagePos.width;
t.coverBox.style.display = 'block';
t.coverBox.style.left = t.bgPagePos.x;
t.coverBox.style.top = t.bgPagePos.y;
var cover = t.coverBox.getContext("2d");
cover.fillStyle = "rgba(0, 0, 0, 0.5)";
cover.fillRect (0,0, t.bgPagePos.width, t.bgPagePos.height);
cover.clearRect(t.clipPos.x, t.clipPos.y, t.clipPos.height, t.clipPos.width);
t.achieve.style.background = 'url(' + t.imgUrl + ')' + -t.clipPos.x + 'px ' + -t.clipPos.y + 'px no-repeat';
t.achieve.style.height = t.clipPos.height + 'px';
t.achieve.style.width = t.clipPos.width + 'px';
},
drag: function() {
var t = this;
var draging = false;
var _startPos = null;
t.coverBox.onmousemove = function(e) {
e = e || window.event;
if ( e.pageX == null && e.clientX != null ) {
var doc = document.documentElement, body = document.body;
e.pageX = e.clientX + (doc && doc.scrollLeft || body && body.scrollLeft || 0) - (doc && doc.clientLeft || body && body.clientLeft || 0);
e.pageY = e.clientY + (doc && doc.scrollTop || body && body.scrollTop);
}
//获取鼠标到背景图片的距离
var _mousePos = {
left: e.pageX - ( t.regional.offsetLeft + this.offsetLeft ),
top: e.pageY - ( t.regional.offsetTop + this.offsetTop )
}
//判断鼠标是否在裁剪区域里面:
if ( _mousePos.left > t.clipPos.x && _mousePos.left < t.clipPos.x + t.clipPos.width && _mousePos.top > t.clipPos.y && _mousePos.top < t.clipPos.y + t.clipPos.height ) {
this.style.cursor = 'move';
this.onmousedown = function(){
draging = true;
//记录上一次截图的坐标
t.ex = t.clipPos.x;
t.ey = t.clipPos.y;
//记录鼠标按下时候的坐标
_startPos = {
left: e.pageX - ( t.regional.offsetLeft + this.offsetLeft ),
top: e.pageY - ( t.regional.offsetTop + this.offsetTop )
}
}
if (draging) {
//移动时裁剪区域的坐标 = 上次记录的定位 + (当前鼠标的位置 - 按下鼠标的位置),裁剪区域不能超出遮罩层的区域;
if ( t.ex + ( _mousePos.left - _startPos.left ) < 0 ) {
t.clipPos.x = 0;
} else if ( t.ex + ( _mousePos.left - _startPos.left ) + t.clipPos.width > t.bgPagePos.width ) {
t.clipPos.x = t.bgPagePos.width - t.clipPos.width;
} else {
t.clipPos.x = t.ex + ( _mousePos.left - _startPos.left );
};
if (t.ey + ( _mousePos.top - _startPos.top ) < 0) {
t.clipPos.y = 0;
} else if ( t.ey + ( _mousePos.top - _startPos.top ) + t.clipPos.height > t.bgPagePos.height ) {
t.clipPos.y = t.bgPagePos.height - t.clipPos.height;
} else {
t.clipPos.y = t.ey + ( _mousePos.top - _startPos.top );
}
t.clipImg();
}
document.body.onmouseup = function() {
draging = false;
document.onmousemove = null;
document.onmouseup = null;
}
} else{
this.style.cursor = 'auto';
}
};
}
}
return postFile;
});
以上就是本文的全部内容,希望对大家的学习有所帮助。


![[웹 프런트엔드] Node.js 빠른 시작](https://img.php.cn/upload/course/000/000/067/662b5d34ba7c0227.png)


